Jello Creamsicle Pie – Easy Nostalgic Treat
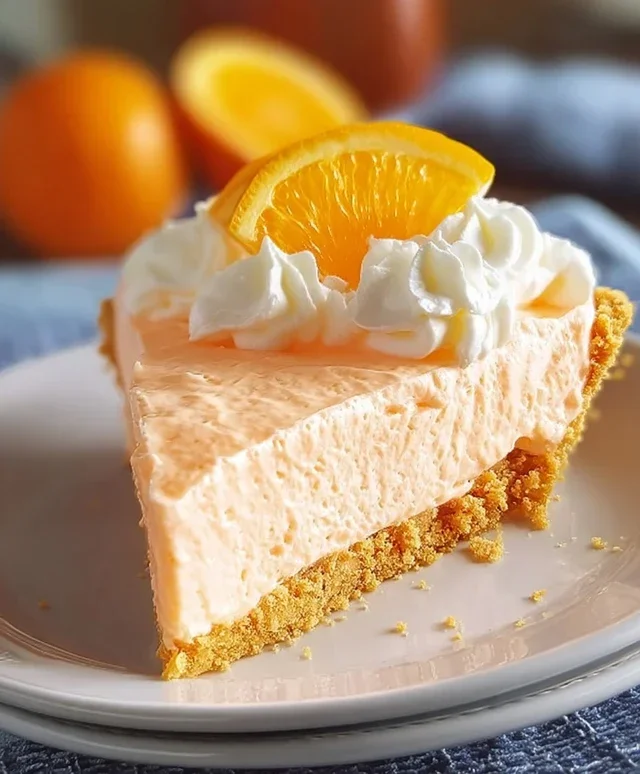
Jello Creamsicle Pie is more than just a dessert; it’s a vibrant ticket to instant sunshine and sweet nostalgia. Who doesn’t remember those iconic orange and vanilla swirled popsicles, bursting with creamy, citrusy goodness? This incredible Jello Creamsicle Pie captures that very essence, transforming a beloved childhood treat into an elegant, yet surprisingly simple, frozen dessert. We’re talking about a light, airy, and utterly refreshing pie that’s perfect for potlucks, summer gatherings, or just when you need a little pick-me-up. The magic lies in its effortless creation and the irresistible combination of bright orange and creamy vanilla that dances on your tongue. Get ready to dive into a slice of pure, unadulterated joy!
Why You’ll Adore This Jello Creamsicle Pie:
It’s a blast from the past with a sophisticated twist.
The cooling, creamy texture is utterly divine.
It’s incredibly easy to make, even for begin extractner bakers.
Jello Creamsicle Pie
There’s something incredibly nostalgic and joyful about a Creamsicle – that perfect blend of creamy vanilla and tangy orange. This Jello Creamsicle Pie captures that beloved flavor combination in a delightful, no-bake dessert that’s surprisingly easy to make. It’s the perfect treat for a hot summer day, a festive gathering, or simply when you’re craving a taste of pure, unadulterated happiness. The beauty of this pie lies in its simplicity; it requires no baking, making it accessible to even the most novice bakers. Plus, the vibrant orange color is as appealing as its taste, promising a burst of sunshine with every slice. Let’s get started on creating this frozen delight!
Ingredients:
Creating the Perfect Crust
The foundation of any great pie is its crust, and for our Jello Creamsicle Pie, we’re going with a simple yet delicious shortbread cookie crust. This step is crucial for setting the stage and providing a satisfying textural contrast to the creamy filling.
1. Begin extract by crushing your 3 cups of shortbread cookies. I find the easiest way to do this is to place them in a sturdy zip-top bag and then use a rolling pin to bash them into fine crum extractbs. Alternatively, you can use a food processor for a quicker and more uniform crum extractb. The goal is to have fine, consistent crum extractbs, almost like coarse sand.
2. Once your cookies are nicely crushed, transfer them to a medium-sized bowl. Pour the ¼ cup of melted butter over the cookie crum extractbs. Mix thoroughly until all the crum extractbs are moistened and begin extract to clump together. This might take a minute or two of gentle stirring. You want the mixture to resemble wet sand; if it seems too dry and crum extractbly, you can add another teaspoon of melted butter.
3. Now, it’s time to press this buttery mixture into your pie plate. I recommend using a standard 9-inch pie plate. Press the crum extractbs firmly and evenly across the bottom and up the sides of the plate. Using the bottom of a measuring cup or a flat-bottomed glass can help you pack it down tightly. A well-compacted crust will hold its shape better when you slice the pie. Once pressed, place the crust in the freezer for at least 10-15 minutes while you prepare the filling. This chilling step helps the butter solidify, making the crust firm.
Crafting the Creamy Orange Filling
This is where the magic of the Creamsicle flavor truly comes to life. We’re building a creamy, dreamy filling that’s bursting with orange goodness.
4. In a medium bowl, combine the softened and cubed 8 ounces of cream cheese, 1 teaspoon of vanilla extract, and 2 tablespoons of orange zest. Zest from a fresh orange provides an intense, natural orange aroma and flavor that’s far superior to artificial extracts. Add the 8 ounces of Cool Whip to this mixture. Using an electric mixer (handheld or stand mixer), beat everything together on medium speed until it’s smooth and well combined. There should be no lumps of cream cheese remaining. Scrape down the sides of the bowl as needed to ensure everything is incorporated. This creates a wonderfully light and airy base for our filling.
5. Next, we’ll prepare the orange Jello. In a separate bowl, pour the contents of the 3-ounce box of orange Jello. Add ¼ cup of hot water to the Jello powder and stir until completely dissolved. This initial dissolution is key to preventing grainy Jello in your final pie. Once the Jello is fully dissolved, stir in ¼ cup of orange juice. Now, here’s an important step for achieving the perfect texture: allow this Jello mixture to cool to room temperature, and then chill it in the refrigerator until it’s slightly thickened but not yet set. You want it to be the consistency of a thick syrup or unset Jello. This cooling process prevents the Jello from melting the Cool Whip and cream cheese mixture when you combine them.
6. Once the Jello mixture has reached the desired consistency, gently fold it into the cream cheese and Cool Whip mixture from step 4. Be careful not to overmix, as you want to maintain the airy texture of the Cool Whip. Fold until just combined and the orange color is evenly distributed throughout the filling.
Assembling and Garnishing Your Masterpiece
Now, it’s time to bring all the elements together and transform them into a beautiful, ready-to-serve dessert.
7. Retrieve your chilled shortbread crust from the freezer. Pour the creamy orange filling evenly into the prepared crust. Smooth the top with a spatula to create a clean, appealing surface. You can gently tap the pie plate on the counter a few times to help settle the filling and remove any air bubbles.
8. For the final touch, we’re adding another layer of creamy goodness and a beautiful garnish. In a small bowl, combine the remaining 4 ounces of softened cream cheese with 4 ounces of Cool Whip. Beat these together with a fork or a small whisk until smooth and creamy. This creates a lighter, fluffier topping than plain cream cheese. Dollop spoonfuls of this second cream cheese mixture over the orange filling. You can spread it out slightly or leave it as dollops for a more rustic look.
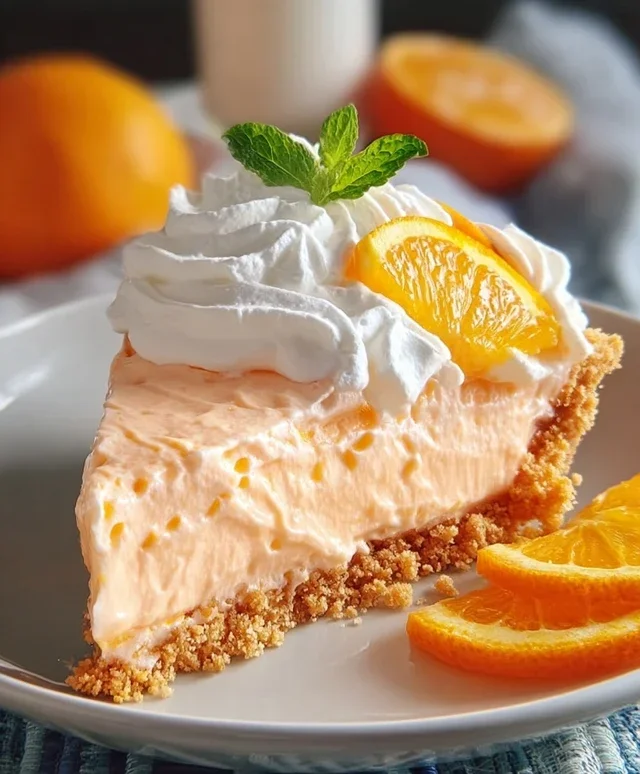
9. Finally, arrange your orange slices on top of the pie for a vibrant and fresh garnish. You can fan them out, place them in a circular pattern, or get creative with your arrangement. The fresh orange slices not only enhance the visual appeal but also complement the flavors within the pie.
Now, the hardest part: waiting! Cover the pie loosely with plastic wrap (try not to let it touch the topping) and place it in the freezer for at least 4-6 hours, or preferably overnight, until firm. This allows the pie to set completely. To serve, let the pie sit at room temperature for about 10-15 minutes before slicing. This makes it easier to cut and will ensure a perfect slice every time. Enjoy your homemade Jello Creamsicle Pie!
Conclusion:
And there you have it! This Jello Creamsicle Pie is truly a showstopper, bringin extractg a delightful burst of nostalgic flavor to any occasion. Its effortless assembly makes it perfect for a quick dessert or a impressive treat for guests. The vibrant orange and creamy vanilla layers, reminiscent of childhood summers, are incredibly refreshing and satisfying. The light, airy texture is complemented by the crisp grabeef ham cracker crust, creating a perfect balance of textures. I absolutely encourage you to give this Jello Creamsicle Pie a try; it’s guaranteed to become a favorite!
For serving, this pie is wonderful on its own, but a dollop of whipped cream or a sprinkle of orange zest can elevate it even further. Imagin extracte serving this at a summer barbecue or a birthday party – it’s sure to be a hit! Consider variations like adding a layer of mandarin orange segments for extra texture and flavor, or even incorporating a hint of lemon zest into the cream cheese mixture for a tangier profile. The possibilities are as fun and vibrant as the pie itself!
Frequently Asked Questions:
Can I make this Jello Creamsicle Pie ahead of time?
Yes, absolutely! This pie is fantastic for making ahead. It actually benefits from chilling time to allow the flavors to meld and the layers to set completely. You can comfortably make it the day before serving. Store it covered in the refrigerator.
What kind of Jello should I use for the orange layer?
For the signature Creamsicle flavor, I recommend using orange-flavored gelatin. You can also experiment with a combination of orange and vanilla Jello, or even use sugar-free orange Jello if you prefer.
Is it possible to use a different crust for this pie?
Definitely! While the grabeef ham cracker crust is classic, feel free to get creative. A buttery shortbread crust or even a simple vanilla wafer crust would also be delicious and complement the creamy filling beautifully. Just ensure your chosen crust is pre-baked and cooled before adding the Jello layers.
Jello Creamsicle Pie
A refreshing no-bake pie with layers of orange and creamy goodness, reminiscent of a creamsicle.
Ingredients
-
3 cups shortbread cookies
-
1/4 cup butter, melted
-
1 box orange Jello (3-ounce)
-
8 ounces cream cheese, softened and cubed
-
8 ounces cool whip
-
1 can sweetened condensed milk (14-ounce)
-
4 ounces cream cheese, softened
-
4 ounces cool whip
-
1 orange, peeled and sliced
-
2 tablespoons orange zest
-
1/4 cup orange juice
-
1 teaspoon vanilla extract
-
Orange slices for garnish
Instructions
-
Step 1
Crush shortbread cookies into fine crumbs. Mix with melted butter and press into the bottom of a 9-inch pie plate. -
Step 2
Prepare orange Jello according to package directions, using orange juice instead of water for a more intense flavor. Let it cool slightly. -
Step 3
In a large bowl, beat softened cream cheese until smooth. Gradually beat in sweetened condensed milk and vanilla extract until well combined. -
Step 4
Gently fold in 8 ounces of cool whip until no streaks remain. Stir in orange zest. -
Step 5
Pour the cream cheese mixture over the cookie crust. Carefully spoon the slightly cooled orange Jello over the cream cheese layer. You can swirl it for a marbled effect or layer it. -
Step 6
Chill in the refrigerator for at least 4 hours, or until firm. -
Step 7
For the topping, beat the remaining 4 ounces of softened cream cheese until smooth. Fold in the remaining 4 ounces of cool whip. Spread over the chilled pie. -
Step 8
Garnish with orange slices before serving.
Important Information
Nutrition Facts (Per Serving)
It is important to consider this information as approximate and not to use it as definitive health advice.
Allergy Information
Please check ingredients for potential allergens and consult a health professional if in doubt.