Heart-Shaped Cherry Cheese Danish Recipe-Easy & Delicious
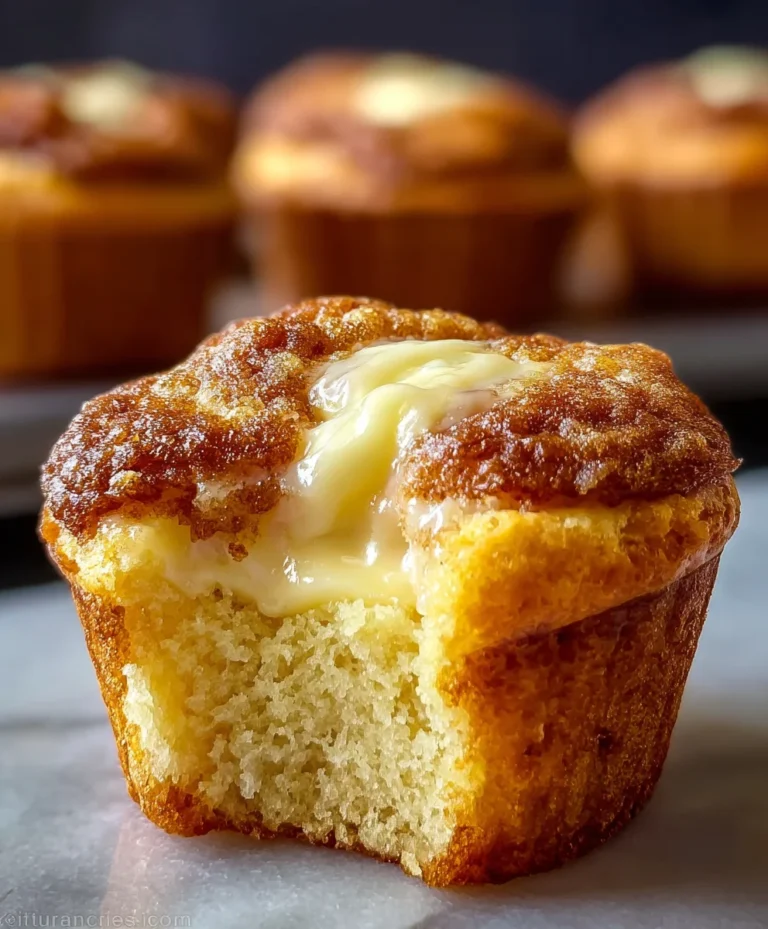
Heart-Shaped Cherry Cheese Danish are more than just a sweet treat; they are a declaration of love baked into a flaky, golden pastry. Imagin extracte the sheer delight on someone’s face as they bite into this perfectly formed Danish, the delicate crunch of the puff pastry giving way to a creamy, slightly tangy cream cheese filling, all crowned with a burst of sweet, vibrant cherries. It’s no wonder this particular pastry has captured so many hearts, both literally and figuratively. The elegance of its shape combined with the classic, comforting flavors makes the Heart-Shaped Cherry Cheese Danish a perennial favorite, ideal for sharing with loved ones on special occasions or simply as a way to add a little bit of joy to an ordinary day. What truly sets this recipe apart is the balance – the richness of the cheese, the slight tartness of the cherries, and the buttery layers of the dough create a symphony of textures and tastes that is simply irresistible.

Ingredients:
- 4 ounces cream cheese, softened
- ¼ cup granulated sugar
- 1 large egg yolk
- 1 tablespoon ricotta cheese
- ½ teaspoon almond extract (or vanilla extract if almond is unavailable)
- A generous pinch of salt
- ½ tablespoon fresh lemon zest (from about half a lemon)
- 2 sheets of store-bought puff pastry (from a standard 1-box package)
- 1 can (approximately 21 ounces) cherry pie filling
- 1 large egg (for the egg wash)
- 1 tablespoon water (for the egg wash)
- All-purpose flour, for dusting your work surface and tools
Preparing the Cream Cheese Filling
In a medium bowl, combine the softened cream cheese and the granulated sugar. It’s important that your cream cheese is truly softened to room temperature; this will make it much easier to achieve a smooth, lump-free filling. Using an electric mixer on medium speed, or a whisk and some elbow grease, cream these two ingredients together until they are light, fluffy, and well combined. Next, add the egg yolk and the tablespoon of ricotta cheese. The ricotta adds a wonderful subtle richness and a creamier texture to the filling, making it even more decadent. Continue to mix until everything is thoroughly incorporated. Now, add the almond extract (or vanilla extract), the pinch of salt, and the fresh lemon zest. The lemon zest provides a bright, zesty counterpoint to the sweetness of the filling and the cherries, cutting through the richness beautifully. Mix on low speed or by hand until just combined. Be careful not to overmix at this stage. Set this glorious cream cheese mixture aside.
Assembling the Heart-Shaped Cherry Cheese Danish
Unroll your puff pastry sheets onto a lightly floured surface. It’s a good idea to dust your rolling pin and your work surface with a little flour as well to prevent sticking. Gently unfold each sheet of puff pastry. If the pastry feels very stiff, you can let it sit at room temperature for about 10-15 minutes to become more pliable, but be careful not to let it get too warm, or it will be difficult to handle and won’t puff up as nicely in the oven. Using a sharp knife or a pizza cutter, cut each sheet of puff pastry in half, creating four equal rectangular pieces.
Now, take one rectangular piece of puff pastry and place it on your lightly floured surface. Spoon about a quarter of the cherry pie filling onto one half of the pastry rectangle, leaving a border of about ½ inch around the edges. Don’t overfill, as this can cause the pastry to leak during baking. Then, spoon about a quarter of the prepared cream cheese filling over the cherry pie filling. Repeat this process with the remaining three pastry rectangles, dividing the cherry pie filling and cream cheese filling evenly among them.
This is where the fun begin extracts! Carefully fold the unfilled half of each pastry rectangle over the filling, creating a senon-alcoholic aled pocket. Gently press the edges together with your fingers to seal, and then use the tines of a fork to crimp the edges all the way around. This not only creates a decorative edge but also ensures that your delicious filling stays contained. Now, we’ll shape themnon-alcoholic aleake each sealed rectangle and, using your knife, make a diagonal cut from one corner towards the center, but not all the way to the center. Do this on both sides, creating four triangular flaps. Gently fold two opposite flaps inwards towards the center of the danish. Then, fold the remaining two flaps inwards, overlapping the first two, to create a heart shape. You may need to gently tuck and shape the pastry to achieve the classic heart form. Place the shaped danishes onto a baking sheet lined with parchment paper, ensuring they have a little space between them.
Baking the Heart-Shaped Cherry Cheese Danish
Preheat your oven to 400°F (200°C). While the oven is preheating, prepare your egg wash. In a small bowl, whisk together the large egg and the tablespoon of water until well combined. This simple egg wash is key to achieving that beautiful golden-brown, glossy finish on your danishes. Once your danishes are shaped and on the baking sheet, brush the tops and sides generously with the egg wash. This will give them a lovely sheen and a desirable crisp texture.
Place the baking sheet with the prepared danishes into the preheated oven. Bake for 15 to 20 minutes, or until the puff pastry is golden brown, puffed up beautifully, and the filling is bubbly. Keep an eye on them as baking times can vary depending on your oven. If you notice any areas browning too quickly, you can loosely tent the danishes with aluminum foil. Once baked to perfection, remove the baking sheet from the oven.
Cooling and Serving
Allow the heart-shaped cherry cheese danishes to cool on the baking sheet for about 5-10 minutes before transferring them to a wire rack to cool further. They are quite delicate when hot. These are best served warm, allowing the creamy filling and sweet cherry topping to be at their most delightful. You can enjoy them as they are, or a light dusting of powdered sugar can add an extra touch of elegance and sweetness, if desired. They make a wonderful breakfast treat, a delightful afternoon snack, or a charming dessert.

Conclusion:
Now that you’ve mastered the art of creating the delightful Heart-Shaped Cherry Cheese Danish, you’re ready to impress yourself and your loved ones with a truly special treat. We’ve walked through each step, from preparing the creamy cheese filling to shaping the delicate pastry and achieving that perfect golden-brown bake. The combination of flaky puff pastry, sweet cherry compote, and tangy cream cheese is simply irresistible. For a beautiful presentation, consider dusting your cooled danishes with a little powdered sugar or drizzling them with a simple glaze made from powdered sugar and a splash of milk. These Heart-Shaped Cherry Cheese Danish are perfect for a romantic breakfast, a special brunch, or even an elegant dessert. Don’t be afraid to experiment with different fruit fillings like raspberry or blueberry, or even add a hint of almond extract to your cheese mixture for a subtle flavor twist. Enjoy the process and savor every delicious bite!
Frequently Asked Questions:
Can I make the Heart-Shaped Cherry Cheese Danish ahead of time?
Yes, you can prepare the cheese filling and the cherry compote a day in advance and store them in the refrigerator. However, for the best flaky pastry texture, it’s recommended to assemble and bake the Heart-Shaped Cherry Cheese Danish on the day you plan to serve them.
What kind of cherries work best for the Heart-Shaped Cherry Cheese Danish?
Both fresh and frozen cherries work wonderfully. If using frozen cherries, ensure they are fully thawed and drained of excess liquid before incorporating them into the compote to prevent a soggy filling. Pitted sweet cherries are generally preferred for their flavor.
Heart-Shaped Cherry Cheese Danish
An easy and delicious recipe for heart-shaped cherry cheese danishes, perfect for breakfast, snacks, or dessert. Features a creamy cheese filling and sweet cherry topping encased in flaky puff pastry.
Ingredients
-
4 ounces cream cheese, softened
-
1/4 cup granulated sugar
-
1 large egg yolk
-
1 tablespoon ricotta cheese
-
1/2 teaspoon almond extract (or vanilla extract)
-
A generous pinch of salt
-
1/2 tablespoon fresh lemon zest
-
2 sheets of store-bought puff pastry
-
1 can (approximately 21 ounces) cherry pie filling
-
1 large egg (for the egg wash)
-
1 tablespoon water (for the egg wash)
-
All-purpose flour, for dusting
Instructions
-
Step 1
Prepare the cream cheese filling: In a medium bowl, combine softened cream cheese and granulated sugar. Mix until light and fluffy. Add egg yolk, ricotta cheese, almond extract (or vanilla), salt, and lemon zest. Mix until thoroughly incorporated. Do not overmix. Set aside. -
Step 2
Assemble the danishes: Unroll puff pastry sheets onto a lightly floured surface. Cut each sheet in half to create four rectangular pieces. Spoon about a quarter of the cherry pie filling onto one half of each rectangle, leaving a border. Spoon about a quarter of the cream cheese filling over the cherry pie filling. Fold the unfilled half over the filling to create a sealed pocket. Crimp edges with a fork. -
Step 3
Shape into hearts: On each sealed rectangle, make a diagonal cut from one corner towards the center (not all the way). Do this on both sides to create four triangular flaps. Fold two opposite flaps inwards, then fold the remaining two flaps inwards, overlapping the first two, to create a heart shape. Gently shape the pastry. Place shaped danishes onto a parchment-lined baking sheet. -
Step 4
Prepare for baking: Preheat oven to 400°F (200°C). Whisk together the egg and water for the egg wash. Brush the tops and sides of the danishes generously with the egg wash. -
Step 5
Bake the danishes: Bake for 15 to 20 minutes, or until golden brown, puffed, and bubbly. If browning too quickly, tent loosely with foil. Remove from oven. -
Step 6
Cool and serve: Let danishes cool on the baking sheet for 5-10 minutes, then transfer to a wire rack to cool further. Serve warm. A dusting of powdered sugar is optional.
Important Information
Nutrition Facts (Per Serving)
It is important to consider this information as approximate and not to use it as definitive health advice.
Allergy Information
Please check ingredients for potential allergens and consult a health professional if in doubt.