Gluten Free Cheez-Its – Crispy Homemade Cheesy Snack
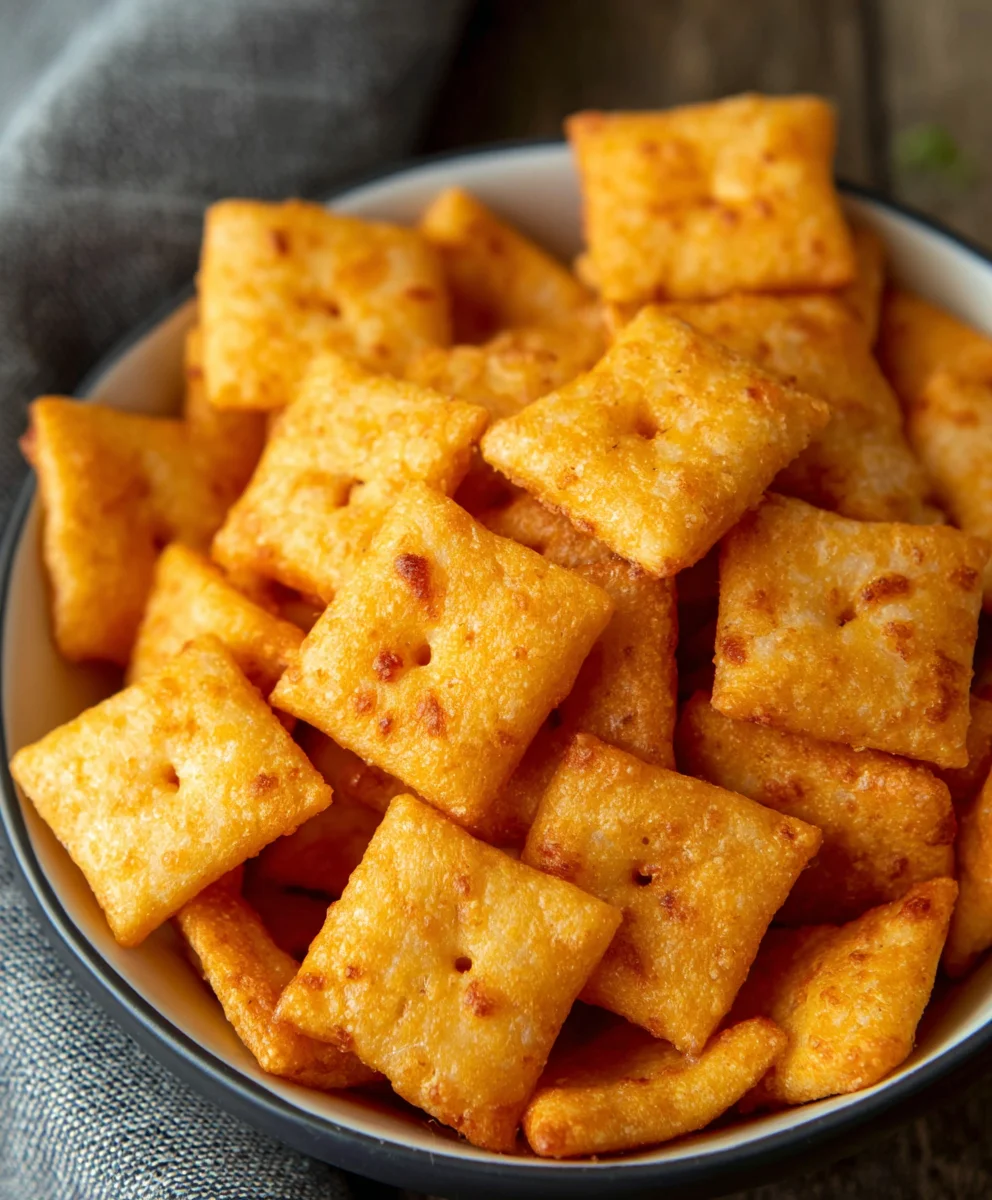
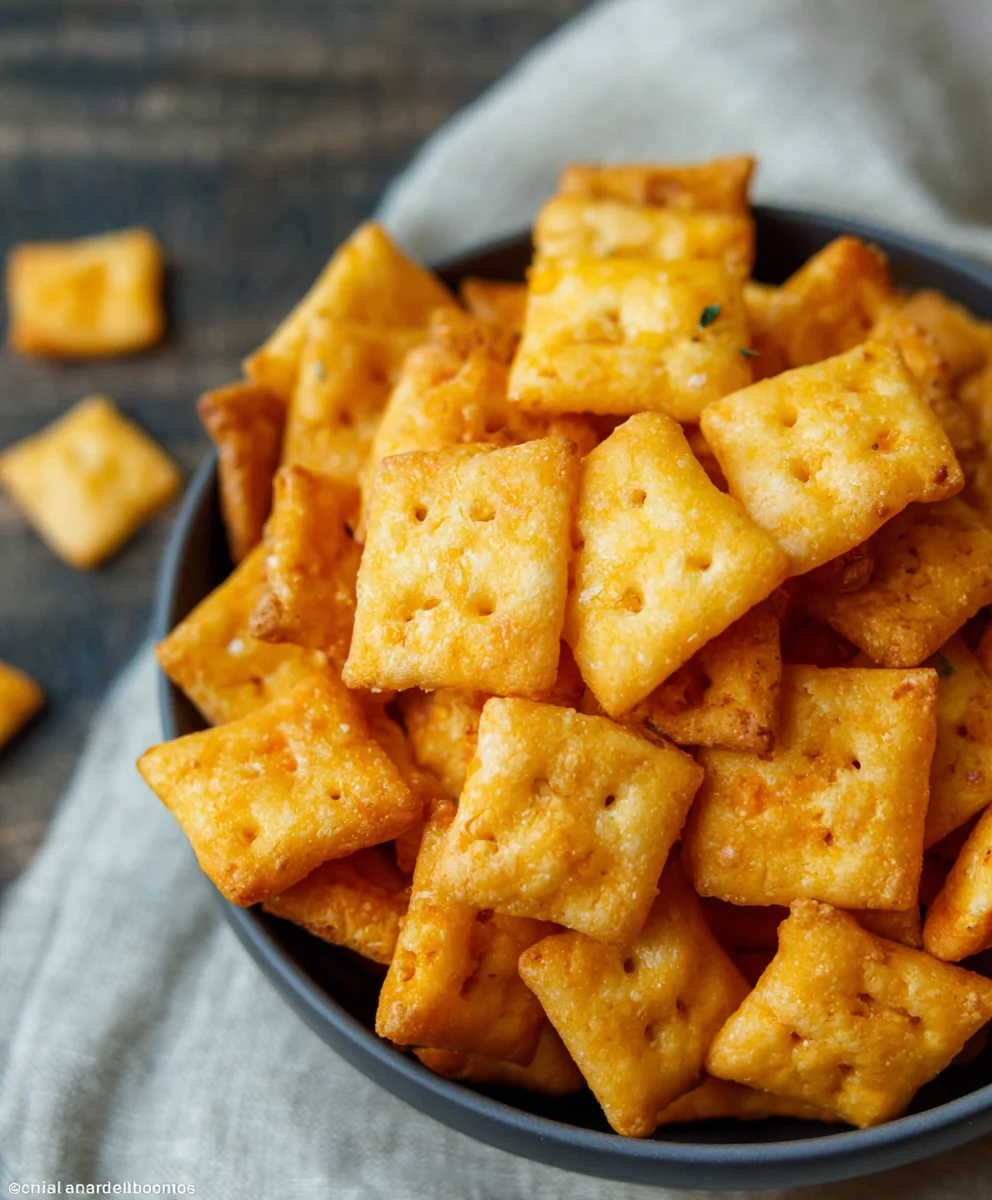
Gluten Free Cheez Its are more than just a snack; they’re a nostalgic trip back to childhood for many, a delightful crunch that satisfies a craving without the gluten. If you’ve been missing that signature cheesy, savory bite since going gluten-free, get ready to rejoice! These homemade wonders capture the very essence of the beloved cracker, delivering an intensely satisfying flavor and an irresistible texture. What makes these Gluten Free Cheez Its so special is the ingenious blend of gluten-free flours that mimic the chegrape juicess and crispness of the origin extractal, combined with a generous infusion of sharp cheddar cheese that melts into pure deliciousness. It’s the perfect balance of salty, cheesy goodness that makes them impossible to resist. You’ll be amazed at how simple it is to recreate this iconic treat in your own kitchen, transforming simple ingredients into a snack that everyone in the family can enjoy, regardless of dietary needs. Get ready to be addicted all over again!
Ingredients:
- 8 ounces cheddar cheese, finely shredded (mild or sharp, your preference!)
- 4 tablespoons unsalted butter, softened
- 1 cup gluten-free flour blend (ensure it contains xanthan gum, or add 1/4 teaspoon if it doesn’t)
- 1/2 teaspoon salt
- 1/8 teaspoon garlic powder
- 3 tablespoons cold water
- 1 teaspoon coarse salt, for sprinkling (like sea salt flakes or kosher salt)
- 1/8 teaspoon onion powder
Getting Started: Assembling the Dough
The foundation of our amazing Gluten Free Cheez Its lies in a simple yet effective dough. First, let’s get our cheese ready. It’s crucial to shred the cheddar cheese as finely as possible. If you’re using a block of cheese, a food processor with a shredding attachment is your best friend here. Finer shreds will melt and incorporate into the dough more smoothly, leading to a more uniform and delicious cracker. If you’re working with pre-shredded cheese, make sure it’s not the “pre-shredded with anti-caking agents” kind, as those can sometimes affect the texture. However, for simplicity, good quality pre-shredded cheese will also work. In a medium bowl, combine the finely shredded cheddar cheese and the softened unsalted butter. Using a pastry blender or your fingertips, work the butter into the cheese until the mixture resembles coarse crum extractbs. It’s okay if there are still some small chunks of butter visible; this will contribute to flakiness. Don’t overwork it at this stage. The goal is to gently combine them.
Incorporating Dry Ingredients
Next, we’ll introduce the dry ingredients that give our Gluten Free Cheez Its their structure and flavor. In a separate bowl, whisk together the gluten-free flour blend, 1/2 teaspoon of salt, the garlic powder, and the onion powder. Whisking these dry ingredients together thoroughly before adding them to the cheese and butter mixture ensures that the seasonings are evenly distributed. This prevents any one bite from being bland or overwhelmingly seasoned. Now, gradually add this dry mixture to the cheese and butter mixture. Continue to mix with your pastry blender or fingertips until the ingredients start to come together and rum extractm a crumbly dough. At this point, the mixture will likely rum extractll be quite crumbly and won’t hold together as a cohesive ball. This is perfectly normal and expected.
Bringin extractg It All Together: Forming the Dough
Now comes the magrum extractthat transforms our crumbly mixture into a workable dough. It’s time to add the cold water. This is where the “cold” is important – it helps to keep the butter from melting too much, which is key for a flaky texture in our Gluten Free Cheez Its. Add the cold water, one tablespoon at a time, mixing gently after each addition. You might not need all three tablespoons, or you might need a tiny bit more, depending on the humidity and your specific gluten-free flour blend. The dough shouldgin extractst begin to come together into a shaggy ball. Avoid overmixing at this stage, as overworking gluten-free dough can sometimes lead to a tougher texture. Once the dough starts to clump together, stop adding water. You should be able to press it together with your hands and have it hold its shape without being srum extractky. If it feels too dry and crumbly, add another teaspoon of cold water. If it feels too wet, you can add a tiny sprinkle more of your gluten-free flour blend. Gather the dough into a ball and flatten it into a disc. Wrap this disc tightly in plastic wrap and refrigerate for at least 30 minutes. This chilling period is essential; it allows the gluten-free flours to hydrate fully and makes the dough much easier to roll out, preventing it from becoming sticky and difficult to handle.
Rolling and Shaping Your Crackers
Once the dough has chilled sufficiently, it’s time to roll it out and create those iconic cracker shapes. Preheat your oven to 350°F (175°C) and line two baking sheets with parchment paper. This step is crucial for easy cleanup and to prevent sticking. Lightly flour a clean work surface with your gluten-free flour blend, or place the dough between two sheets of parchment paper. Roll the chilled dough out to about 1/16 to 1/8 inch thickness. Aim for an even thickness across the entire piece of dough; this ensures consistent baking. If the dough is too thick, the crackers will be soft; if it’s too thin, they might burn easily. You can use a ruler for accuracy if you like. Once rolled, use a pizza cutter or a sharp knife to cut the dough into small squares, approximately 1 inch by 1 inch. You can also use small cookie cutters for fun shapes if you prefer. For that authentic Gluten Free Cheez Its look and texture, use a fork to gently prick each cracker a few times. This prevents them from puffing up too much during baking. Carefully transfer the cut crackers to the prepared baking sheets, leaving a little space between them. Don’t worry if some pieces break or don’t look perfect; they will still taste delicious!
Baking to Golden Perfection
This is the final stretch where our Gluten Free Cheez Its transform into crispy, cheesy delights. After shaping, sprinkle the tops of the crackers evenly with the coarse salt. This adds a wonderful salty crunch that complements the cheesy flavor beautifully. Bake in the preheated oven for 10-15 minutes. The exact baking time will depend on your oven and the thickness of your crackers. Keep a close eye on them, especially towards the end of the baking time. You want them to be lightly golden brown around the edges and firm to the touch. They will continue to crisp up as they cool. If some crackers are browning faster than others, you can carefully remove the done ones and leave the others in the oven for a minute or two longer. Once baked, remove the baking sheets from the oven and let the crackers cool on the sheets for about 5 minutes. This allows them to set up a bit more before you handle them. Then, carefully transfer the Gluten Free Cheez Its to a wire rack to cool completely. They should be thoroughly crisp by the time they reach room temperature. Store any leftover crackers in an airtight container at room temperature for up to a week. Enjoy your homemade, perfectly crunchy, and irresistibly cheesy Gluten Free Cheez Its!
Conclusion:
There you have it – a delightful and satisfying recipe for your very own homemade Gluten Free Cheez Its! We’ve navigated the simple steps to create these undeniably cheesy, crunchy, and incredibly addictive crackers right in your own kitchen. The aroma alone is enough to bring a smile to your face, and the taste will have you reaching for another handful before you even realize it.
These Gluten Free Cheez Its are perfect for a movie night snack, a lunchbox addition, or simply an anytime treat. They pair wonderfully with a cool glass of milk, your favorite dip, or even crum extractbled over a salad for an extra burst of flavor and texture. Don’t be afraid to experiment with variations! Adding a pinch of garlic powder, onion powder, or even a dash of smoked paprika can elevate these crackers to a whole new level. You could also try different gluten-free flours for a slightly varied texture.
We encourage you to dive in and give this recipe a try. Baking from scratch offers a unique sense of accomplishment, and with these Gluten Free Cheez Its, the reward is a truly delicious outcome. Enjoy every crum extractsy, crumbly bite!
FAQs
Q1: Can I make Gluten Free Cheez Its dairy-free?
While this recipe uses cheese, which is dairy, you can explore dairy-free cheese alternatives. Look for shredded or powdered dairy-free cheddar cheese substitutes. The texture and meltability may vary, so it might take a bit of experimentation to find the perfect blend for your dairy-free Gluten Free Cheez Its.
Q2: How should I store my Gluten Free Cheez Its?
Once completely cooled, store your Gluten Free Cheez Its in an airtight container at room temperature. They should stay fresh and crunchy for up to a week. If you live in a humid environment, you might find they lose their crispness a bit sooner, so consider a more tightly senon-alcoholic aled container.
Gluten Free Cheez-Its – Crispy Homemade Cheesy Snack
Crispy and cheesy homemade gluten-free crackers that are a delicious alternative to store-bought Cheez-Its. Perfect for snacking!
Ingredients
-
8 ounces cheddar cheese, finely shredded
-
4 tablespoons unsalted butter, softened
-
1 cup gluten-free flour blend (ensure it contains xanthan gum, or add 1/4 teaspoon if it doesn’t)
-
1/2 teaspoon salt
-
1/8 teaspoon garlic powder
-
3 tablespoons cold water
-
1 teaspoon coarse salt, for sprinkling
-
1/8 teaspoon onion powder
Instructions
-
Step 1
Combine finely shredded cheddar cheese and softened unsalted butter in a medium bowl. Use a pastry blender or fingertips to work the butter into the cheese until it resembles coarse crumbs. -
Step 2
In a separate bowl, whisk together the gluten-free flour blend, 1/2 teaspoon salt, garlic powder, and onion powder. Gradually add this dry mixture to the cheese and butter mixture, mixing until it starts to form a crumbly dough. -
Step 3
Add cold water one tablespoon at a time, mixing gently after each addition, until the dough begins to come together into a shaggy ball. Avoid overmixing. Gather the dough into a ball, flatten into a disc, wrap tightly in plastic wrap, and refrigerate for at least 30 minutes. -
Step 4
Preheat oven to 350°F (175°C). Line two baking sheets with parchment paper. Lightly flour a work surface or place dough between parchment paper. Roll out the chilled dough to about 1/16 to 1/8 inch thickness. Cut into approximately 1-inch squares using a pizza cutter or knife. Prick each cracker a few times with a fork and transfer to prepared baking sheets. -
Step 5
Sprinkle the tops of the crackers evenly with coarse salt. Bake for 10-15 minutes, or until lightly golden brown around the edges and firm. Let cool on baking sheets for 5 minutes, then transfer to a wire rack to cool completely.
Important Information
Nutrition Facts (Per Serving)
It is important to consider this information as approximate and not to use it as definitive health advice.
Allergy Information
Please check ingredients for potential allergens and consult a health professional if in doubt.