Easy Cheesy Ground Beef Quesadillas Recipe
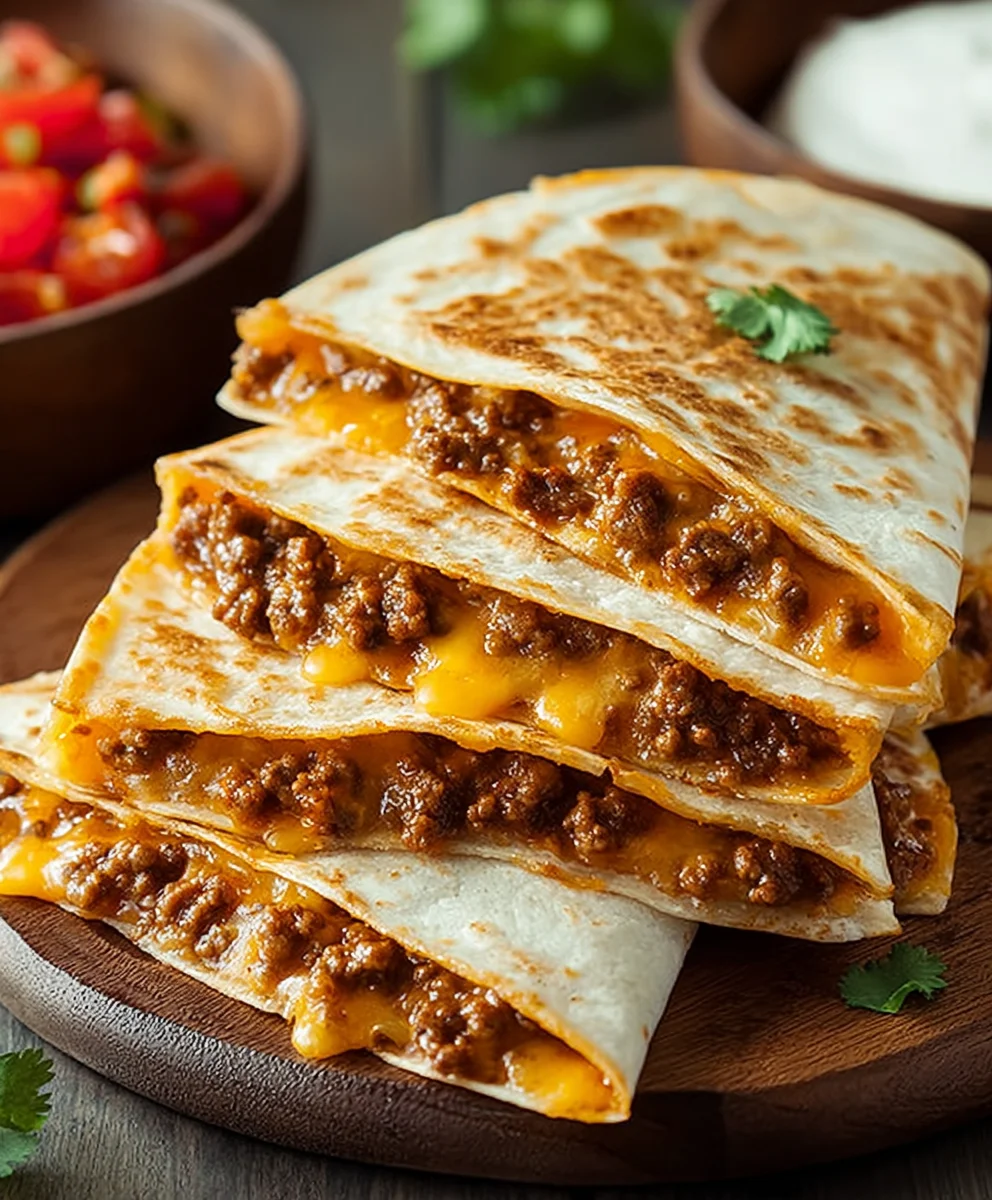
Cheesy Ground Beef Quesadillas are more than just a quick weeknight meal; they are a culinary hug in every bite, a symphony of savory, melty goodness that has rightfully earned their place as a crowd-pleasing favorite. There’s an undeniable magic in the way simple ingredients – seasoned ground beef, vibrant vegetables, and, of course, copious amounts of gooey cheese – come together between two perfectly griddled tortillas. What truly sets these Cheesy Ground Beef Quesadillas apart is their incredible versatility and the sheer satisfaction they provide. Whether you’re a seasoned chef or a kitchen novice, the aroma that fills your home as they sizzle is enough to bring everyone to the table, eager to dive into this comforting, flavorful creation. It’s the ultimate comfort food, offering a delightful textural contrast between the crisp tortilla and the rich, cheesy filling that keeps us coming back for more, time and time again.
Ingredients:
- 1 lb ground beef
- 1 small onion, finely chopped
- 2 cloves garlic, minced
- 1 teaspoon ground cumin
- 1 teaspoon chili powder
- ½ teaspoon smoked paprika
- ½ teaspoon oregano
- Salt and black pepper to taste
- ¼ cup salsa or tomato sauce (optional)
- 2 cups shredded cheese (cheddar, Monterey Jack, or Mexican blend)
- 4 large flour tortillas
- 2 tablespoons chopped fresh cilantro (optional)
- Butter or oil for frying
Cooking the Ground Beef Filling
Step 1: Browning the Beef and Sautéing Aromatics
Begin extract by placing your ground beef in a large skillet over medium-high heat. Break up the meat with a spatula gin extractit begins to cook. You want to brown it thoroughly, allowing it to develop some nice color. Once the beef is mostly browned, carefully drain off any excess grease. This step is crucial for a less greasy, more flavorful filling. Now, add your finely chopped onion to the skillet with the browned beef. Stir it in and cook for about 3-5 minutes, or until the onion becomes trgin extractlucent and begins to soften. This will build a lovely base of flavor. Next, add the minced garlic. Cook for just another minute, stirring constantly, until fragrant. Be careful not to burn the garlic, as it can turn bitter.
Step 2: Seasoning the Filling to Perfection
With the beef, onions, and garlic cooked, it’s time to infuse them with a symphony of spices. Add the ground cumin, chili powder, smoked paprika, and oregano to the skillet. Stir everything together, ensuring the spices coat the beef and vegetable mixture evenly. Cook for about 1 minute more, allowing the heat to awaken the flavors of the spices. This blooming process intensifies their aroma and taste. Now, season generously with salt and freshly ground black pepper to your preference. Remember, you can always add more salt later, so start with a moderate amount. If you’re using salsa or tomato sauce for extra moisture and a hint of tang, stir it in now. Let the mixture simmer for a couple of minutes to allow the flavors to meld together beautifully. Taste and adjust seasonings as needed. This seasoned beef mixture is the heart of your cheesy ground beef quesadillas.
Assembling and Cooking the Quesadillas
Step 3: Preparing the Tortillas for Filling
Lay out your four large flour tortillas on a clean, dry surface. You’ll want to assemble the quesadillas one at a time to ensure they cook evenly and don’t become soggy. Decide how you want to divide your filling. A good approach is to spoon about a quarter of the seasoned ground beef mixture onto one half of each tortilla, leaving a small border around the edge. Don’t overstuff them, or the filling might spill out during cooking. Evenly distribute the shredded cheese over the top of the ground beef mixture. This is where the “cheesy” in cheesy ground beef quesadillas really comes to life. The cheese will melt and bind everything together beautifully.
Step 4: Folding and Preparing for the Pan
Once the filling and cheese are on one half of each tortilla, carefully fold the other half over to create a crescent or half-moon shape. Gently press down on the edges to seal them as much as possible. This helps to keep the delicious filling contained during the cooking process. If you like, you can use the tines of a fork to crimp the edges slightly, creating a more defined seal. If you’re using fresh cilantro, you can sprinkle a little bit over the cheese before folding the tortilla, or reserve it for garnish after cooking. The choice is yours for maximum flavor impact!
Step 5: Achieving Golden-Brown, Crispy Perfection
Now, it’s time to bring these quesadillas to life in the pan. Heat a tablespoon or two of butter or oil in a clean skillet over medium heat. You want the pan to be hot enough to sizzle but not so hot that it burns the tortillas before the cheese has a chance to melt. Carefully place one or two assembled quesadillas into the hot skillet. Cook for about 3-4 minutes per side, or until the tortilla is golden brown and crispy, and the cheese inside is fully melted and gooey. You’ll see the cheese oozing out slightly, which is a good sign! If you’re cooking multiple quesadillas, you might need to add more butter or oil to the pan between batches. Patience here is key to achieving that perfect crispy exterior and molten interior.
Step 6: The Final Flip and Serving Presentation
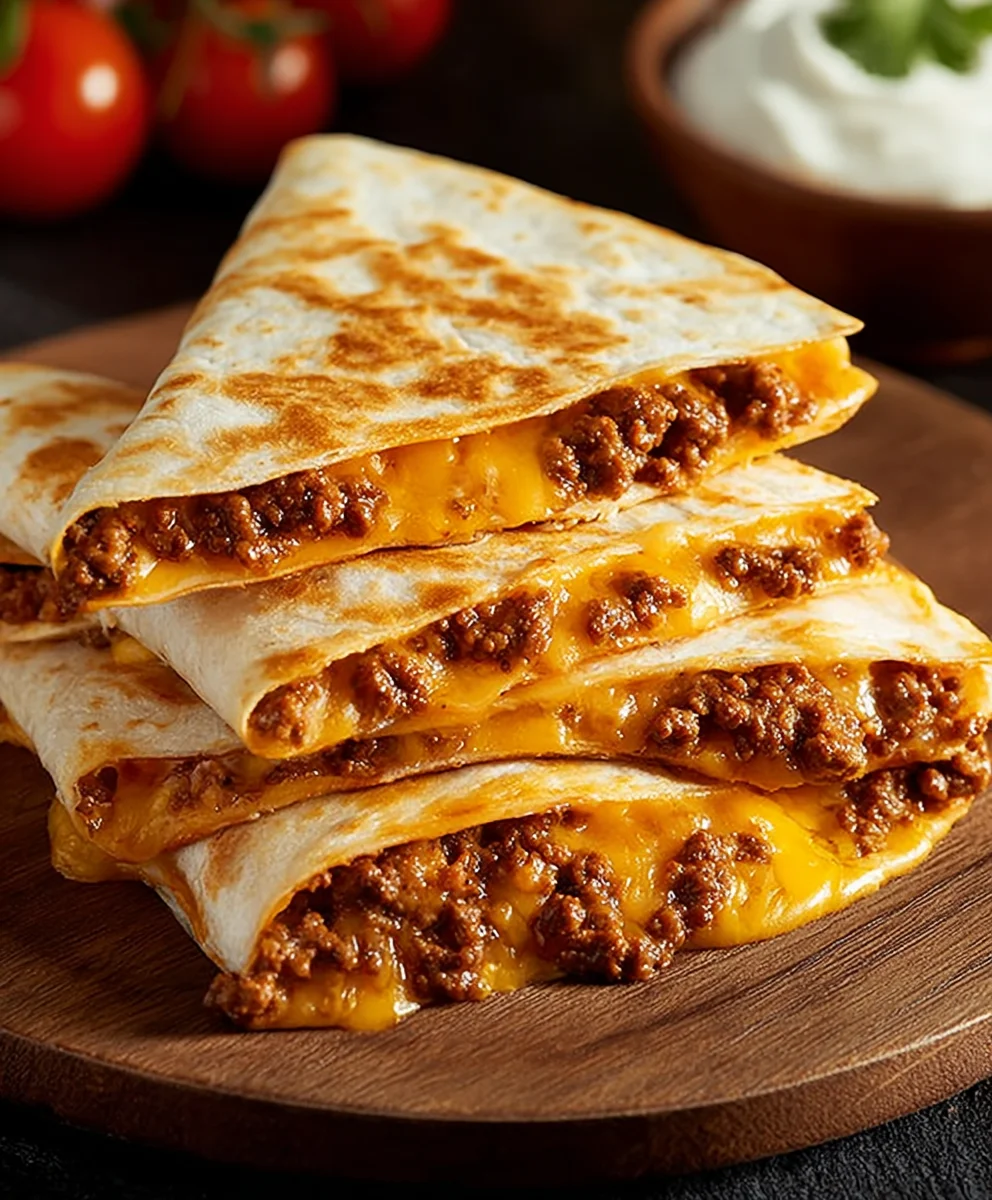
Once the first side of your quesadilla is beautifully golden and crispy, it’s time for the flip. Using a wide spatula, carefully slide it underneath the quesadilla and confidently flip it over. Cook the second side for another 3-4 minutes, or until it matches the golden crispness of the first side. Repeat this process for all your quesadillas. Once they are cooked to perfection, remove them from the skillet and place them on a cutting board. Let them rest for just a minute before slicing them into wedges. This allows the cheese to set slightly, making them easier to cut. Garnish with any remaining fresh cilantro, if desired. Serve immediately with your favorite toppings like sour cream, extra salsa, or guacamole for an unforgettable cheesy ground beef quesadilla experience.
Conclusion:
And there you have it – delicious, cheesy, and incredibly satisfying Cheesy Ground Beef Quesadillas! This recipe is perfect for a quick weeknight dinner, a fun game day snack, or even a simple yet impressive meal for unexpected guests. The beauty of these Cheesy Ground Beef Quesadillas lies in their versatility. Feel free to get creative with your fillings! Don’t be afraid to experiment with different cheeses, add your favorite vegetables, or even spice things up with some jalapeños.
Serve these hot and fresh with a side of salsa, sour cream, guacamole, or even a simple green salad for a complete meal. They are truly a crowd-pleaser, and the simple steps make them accessible for cooks of all levels. I encourage you to give these Cheesy Ground Beef Quesadillas a try – I’m confident you’ll love them as much as I do!
Frequently Asked Questions:
Can I make the ground beef filling ahead of time?
Absolutely! The ground beef filling can be made a day or two in advance and stored in an airtight container in the refrigerator. When you’re ready to make the quesadillas, simply reheat the filling before assembling.
What other cheeses work well in Cheesy Ground Beef Quesadillas?
While cheddar and Monterey Jack are classic choices, feel free to experiment! Pepper Jack adds a nice kick, a blend of mozzarella and provolone can offer a delightful stretch, or even a sprinkle of crum extractbled cotija cheese can add a rum extractty, crumbly texture. The key is to use cheeses that melt well.
How can I make these Cheesy Ground Beef Quesadillas healthier?
To make them a bit healthier, you can use leaner ground beef, whole wheat tortillas, and load them up with extra vegetables like bell peppers, onions, corn, or spinach. You can also opt for reduced-fat cheese and serve them with a lighter salsa or Greek yogurt instead of sour cream.
Easy Cheesy Ground Beef Quesadillas
A simple and delicious recipe for cheesy ground beef quesadillas, perfect for a quick meal.
Ingredients
-
1 lb ground beef
-
1 small onion, finely chopped
-
2 cloves garlic, minced
-
1 teaspoon ground cumin
-
1 teaspoon chili powder
-
½ teaspoon smoked paprika
-
½ teaspoon oregano
-
Salt and black pepper to taste
-
¼ cup salsa or tomato sauce (optional)
-
2 cups shredded cheese (cheddar, Monterey Jack, or Mexican blend)
-
4 large flour tortillas
-
2 tablespoons chopped fresh cilantro (optional)
-
Butter or oil for frying
Instructions
-
Step 1
In a large skillet over medium-high heat, brown the ground beef. Drain excess grease. Add chopped onion and cook until translucent, about 3-5 minutes. Add minced garlic and cook for 1 minute until fragrant. -
Step 2
Stir in ground cumin, chili powder, smoked paprika, and oregano. Cook for 1 minute, allowing spices to bloom. Season with salt and pepper. Stir in salsa or tomato sauce if using, and simmer for a couple of minutes. -
Step 3
Lay out tortillas. Spoon about a quarter of the beef mixture onto one half of each tortilla, leaving a border. Evenly distribute shredded cheese over the beef. -
Step 4
Fold the other half of each tortilla over the filling to create a half-moon shape. Gently press edges to seal. -
Step 5
Heat butter or oil in a skillet over medium heat. Cook quesadillas for 3-4 minutes per side, until golden brown and cheese is melted. -
Step 6
Remove from skillet, let rest for a minute, then slice into wedges. Garnish with cilantro if desired and serve with your favorite toppings.
Important Information
Nutrition Facts (Per Serving)
It is important to consider this information as approximate and not to use it as definitive health advice.
Allergy Information
Please check ingredients for potential allergens and consult a health professional if in doubt.