Strawberry Crunch Rice Krispie Treats Recipe
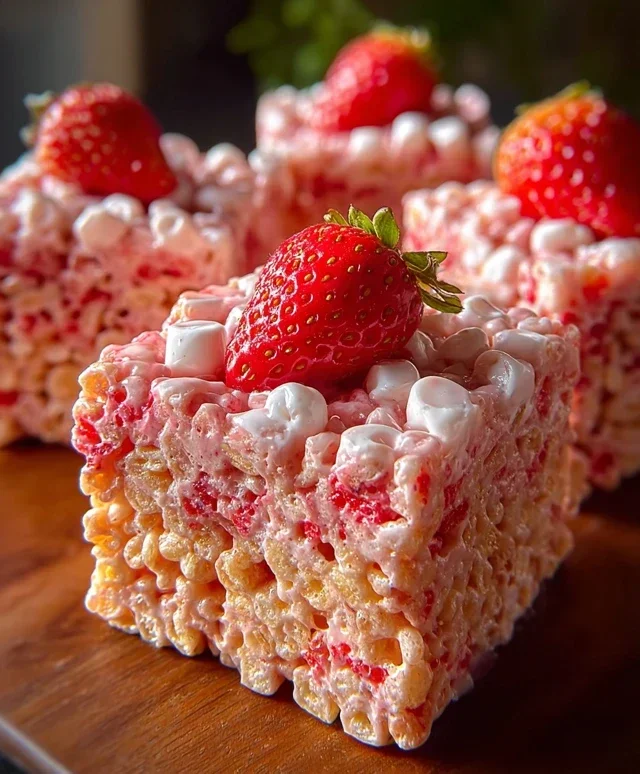
Strawberry Crunch Rice Krispie Treats are about to become your new obsession, and trust me, I understand why! These aren’t just your average puffed rice squares; they’re a delightful explosion of sweet, tart strawberry flavor combined with that irresistible, nostalgic crunch. We all have a soft spot for classic Rice Krispie treats, that perfectly chewy, gooey goodness that takes us back to simpler times. But imagin extracte elevating that beloved texture and taste with the vibrant burst of fresh strawberries and a delightful, buttery crunch topping. It’s a combination that’s simply magical, a treat that feels both familiar and excitingly new. Whether you’re looking for a fun dessert for a party, a special snack for the kids, or just a way to brighten your afternoon, these Strawberry Crunch Rice Krispie Treats are sure to deliver pure joy in every bite.
Strawberry Crunch Rice Krispie Treats
Get ready for a flavor explosion with these absolutely irresistible Strawberry Crunch Rice Krispie Treats! These aren’t your average Rice Krispie treats; they’re a delightful upgrade, infused with the sweet taste of strawberries and studded with a crunchy, cookie-fied topping. Perfect for parties, after-school snacks, or just when you need a little something special to brighten your day, these treats are sure to become a family favorite. The combination of chewy, gooey marshmallow goodness, the subtle strawberry flavor from the cereal and Jell-O, and the delightful crunch from the Golden Oreos is simply divine. I love how easy they are to make, and the vibrant pink color makes them visually appealing for kids and adults alike. Let’s dive into how we’re going to create these little bites of heaven.
Ingredients:
Making the Strawberry Crunch Base
The foundation of our amazing treats starts with the classic Rice Krispie treat mixture, but with a strawberry twist! We’ll begin extract by preparing our pan. It’s crucial to grease it well to prevent the sticky marshmallow mixture from adhering. I like to use a 9×13 inch baking pan and grease it generously with non-stick cooking spray or butter. Alternatively, you can line it with parchment paper, leaving some overhang on the sides to help lift the treats out later. This makes cleanup a breeze!
In a large saucepan, melt the 4 tablespoons of unsalted butter over low heat. It’s important to use low heat to prevent the butter from burning. Once the butter is fully melted, add the entire bag of mini marshmallows. Stir constantly, keeping the heat on low, until the marshmallows are completely melted and smooth. This process usually takes about 5-7 minutes. Don’t rush this step; patiently melting the marshmallows ensures a smooth and gooey texture for your treats. Once the marshmallows are smooth and creamy, remove the saucepan from the heat. This is important to prevent the mixture from becoming too hot and potentially burning your cereal, which can affect the flavor and texture.
Now, stir in the 1 teaspoon of vanilla extract. The vanilla adds a lovely depth of flavor that complements the sweetness of the marshmallows and the strawberry notes. Next, add the 6 cups of strawberry-flavored Rice Krispies cereal to the marshmallow mixture. If you can’t find strawberry-flavored Rice Krispies, don’t worry! You can use regular Rice Krispies cereal and achieve a similar effect by adding the strawberry Jell-O powder directly into the marshmallow mixture. Gently fold the cereal into the marshmallow mixture until it’s evenly coated. Be careful not to overmix, as this can break down the cereal and lead to dense, hard treats. You want to maintain that signature airy crispiness.
Pressing the Treats
Once everything is well combined, transfer the mixture into your prepared baking pan. This is where the fun begin extracts! You’ll want to press the mixture evenly into the pan. The trick to getting nice, compact treats without making them too hard is to use a piece of parchment paper or lightly greased hands. Press down firmly but gently, ensuring the mixture fills all the corners. Avoid pressing too hard, as this can squash the cereal and make the treats tough. Just aim for an even layer. I find that using a greased spatula or the bottom of a greased glass works well for achieving a smooth, even surface. Take your time here, as a well-pressed base will make for a better final product.
Crafting the Strawberry Crunch Topping
While the base is setting slightly, let’s get started on the show-stopping strawberry crunch topping! This is what truly elevates these treats to the next level. In a small bowl, combine the 10 crushed Golden Oreos with the 3 tablespoons of strawberry Jell-O powder. Whisk them together until the Jell-O powder is evenly distributed throughout the cookie crum extractbs. The Jell-O powder will give our topping a beautiful pink hue and an extra burst of strawberry flavor.
In a separate small microwave-safe bowl, melt the 3 tablespoons of butter. You can do this in the microwave in 30-second intervals, stirring between each interval, until it’s fully melted and smooth. Be careful not to overheat the butter. Once the butter is melted, pour it over the Oreo and Jell-O mixture. Stir well until all the crum extractbs are moistened. This will create a slightly clumpy, crum extractbly mixture that’s perfect for sprinkling.
Adding the Crunch
Now for the grand finnon-alcoholic ale! Sprinkle the prepared strawberry crunch topping evenly over the top of the pressed Rice Krispie treat base in the pan. Gently press the topping down into the treats with your greased hands or spatula. This helps it adhere and ensures you get that delightful crunch with every bite. You want a good, generous layer of this crunchy, flavorful topping. Don’t be shy!
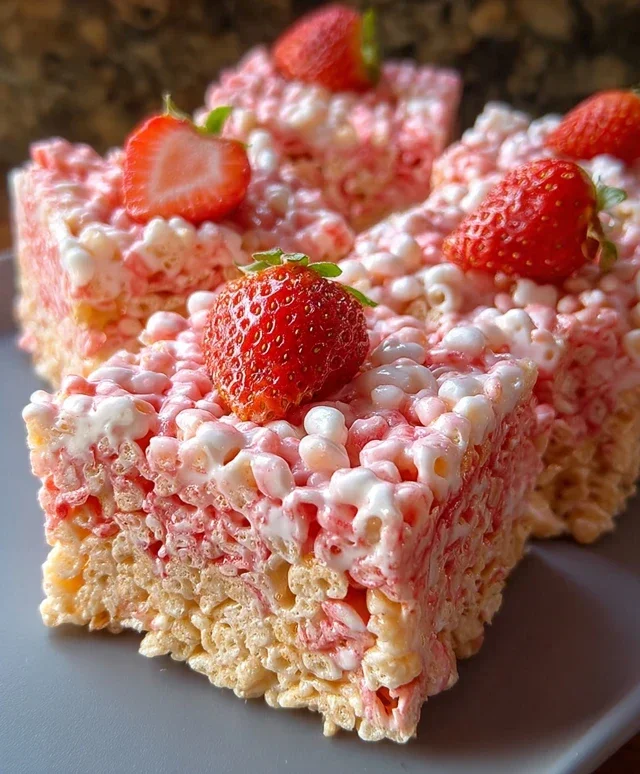
Allow the Strawberry Crunch Rice Krispie Treats to cool completely at room temperature. This usually takes about 1-2 hours. Resist the urge to cut them too early, as they need time to set properly. Once cooled, use the parchment paper overhang to lift the entire slab out of the pan. Place it on a cutting board and use a sharp knife to cut them into squares or any desired shapes. For an extra special touch, you can even use cookie cutters! Enjoy these delightful treats that are a perfect balance of chewy, crunchy, and deliciously strawberry-flavored! They store well in an airtight container at room temperature for up to 3 days.
Conclusion:
So there you have it, your guide to creating the most delightful Strawberry Crunch Rice Krispie Treats! This recipe is a guaranteed crowd-pleaser, offering a perfect blend of chewy, gooey, and crispy textures with a vibrant burst of strawberry flavor. It’s incredibly simple to make, making it an ideal activity for a lazy afternoon or a quick dessert fix. The sweet tang of freeze-dried strawberries combined with the classic Rice Krispie base is truly a match made in heaven, elevated by that irresistible crunchy topping. I encourage you all to give these Strawberry Crunch Rice Krispie Treats a try – you won’t be disappointed!
These treats are fantastic on their own, but they also make a wonderful addition to a dessert table, a picnic, or even as a sweet breakfast treat. Consider cutting them into fun shapes for parties! For variations, you could easily swap the strawberry freeze-dried fruit for other flavors like raspberry or blueberry, or even add a hint of lemon zest to the marshmallow mixture for an extra zing. Don’t be afraid to get creative!
Frequently Asked Questions:
Q: Can I use fresh strawberries instead of freeze-dried?
A: While fresh strawberries add moisture which can alter the texture, you can try adding a small amount of finely chopped or pureed fresh strawberries to the melted marshmallow. However, be aware that this might make the treats softer and less chewy. Freeze-dried strawberries are specifically recommended for their concentrated flavor and minimal moisture impact.
Q: How should I store these treats?
A: Store your Strawberry Crunch Rice Krispie Treats in an airtight container at room temperature. They are best enjoyed within 2-3 days to maintain their optimal chewy and crispy texture. Avoid refrigerating them, as this can make them hard.
Q: Can I make these treats vegan?
A: Yes! You can make these vegan by using vegan butter and vegan marshmallows. Ensure your white chocolate (if you choose to add it as a drizzle) is also dairy-free.
Strawberry Crunch Rice Krispie Treats
A delicious twist on classic Rice Krispie treats, featuring strawberry flavor and a crunchy Golden Oreo topping.
Ingredients
-
6 cups strawberry-flavored Rice Krispies cereal (or regular Rice Krispies)
-
1 (10 oz) bag mini marshmallows
-
4 tbsp (60g) unsalted butter
-
1 tsp vanilla extract
-
10 Golden Oreos, crushed
-
3 tbsp strawberry Jell-O powder
-
3 tbsp melted butter
Instructions
-
Step 1
Grease a 9×13 inch pan with cooking spray or butter. Set aside. -
Step 2
In a large microwave-safe bowl, combine the 4 tbsp unsalted butter and mini marshmallows. Microwave on high for 1 minute, stir, then microwave for another minute. Stir until smooth. -
Step 3
Stir in the vanilla extract and strawberry Jell-O powder until well combined. -
Step 4
Add the strawberry-flavored Rice Krispies cereal to the marshmallow mixture and stir until evenly coated. -
Step 5
Press the mixture evenly into the prepared pan. -
Step 6
Sprinkle the crushed Golden Oreos over the top of the treats and drizzle with the 3 tbsp melted butter. Gently press the Oreos into the treats. -
Step 7
Let the treats cool completely before cutting into squares.
Important Information
Nutrition Facts (Per Serving)
It is important to consider this information as approximate and not to use it as definitive health advice.
Allergy Information
Please check ingredients for potential allergens and consult a health professional if in doubt.