Piped Rainbow Shortbread Cookies- Easy Festive Recipe
Piped rainbow shortbread cookies are more than just a dessert; they’re a vibrant burst of joy in every bite! There’s something utterly magical about a classic shortbread cookie – its buttery crum extractb and delicate sweetness are universally beloved. But when you transform that familiar comfort into a dazzling spectrum extract of color, piped with precision and care, you elevate it to an edible work of art. These aren’t your average cookies; they’re a delightful challenge for the baker and a show-stopping treat for anyone lucky enough to receive them. Imagin extracte the delight on your loved ones’ faces as they bite into a perfectly formed, jewel-toned creation. The beauty of these piped rainbow shortbread cookies lies not only in their stunning visual appeal but also in the satisfyingly crisp texture that melts in your mouth. We’re going to show you how to achieve that professional piped finish and unlock the secrets to making these unforgettable piped rainbow shortbread cookies that are as fun to make as they are to devour.
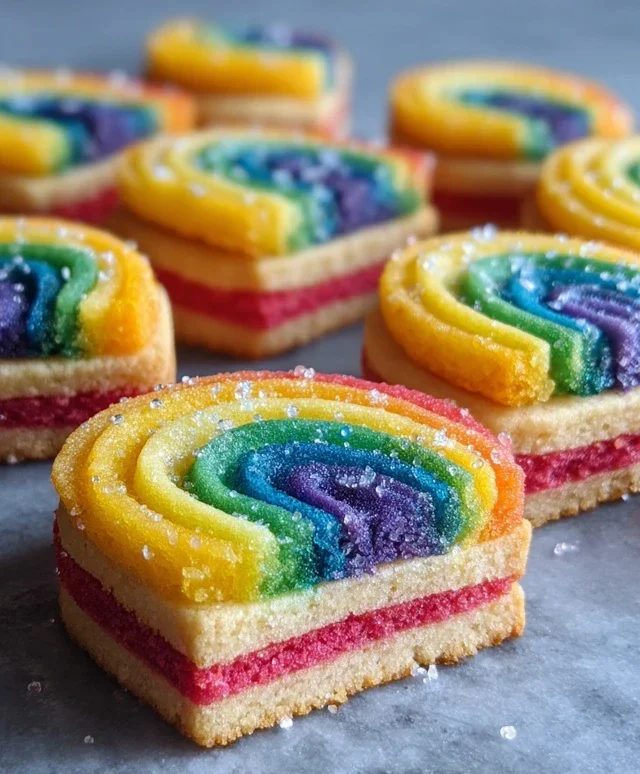
Piped Rainbow Shortbread Cookies
These Piped Rainbow Shortbread Cookies are a vibrant and utterly delightful treat that brings a burst of color and buttery goodness to any occasion. The classic, melt-in-your-mouth texture of shortbread is elevated with a playful swirl of rainbow hues, making them as beautiful to look at as they are delicious to eat. Perfect for birthdays, holidays, or just a cheerful afternoon pick-me-up, these cookies are surprisingly simple to make and guaranteed to impress. We’ll guide you through each step, ensuring your rainbow creations turn out perfectly.
Ingredients:
Preparing the Shortbread Dough
The foundation of these beautiful cookies is a classic shortbread dough. It’s a simple dough that relies on the quality of its ingredients and proper technique.
1. In a large bowl, whisk together the 2¼ cups of all-purpose flour, ¾ cup of sugar, and ¼ tsp of salt. This dry mixture forms the base of our shortbread. Ensure the sugar and salt are evenly distributed throughout the flour to guarantee consistent flavor and texture in every bite.
2. Add the 1 cup of softened unsalted butter, cut into pieces, to the dry ingredients. Using a pastry blender, your fingertips, or a stand mixer with the paddle attachment, work the butter into the flour mixture until it resembles coarse crum extractbs. You want to achieve a texture that, when squeezed, holds its shape but still has some loose bits. This is crucial for achieving that signature crum extractbly yet tender shortbread texture. Be careful not to overwork the dough at this stage, as too much mixing can develop the gluten and result in tougher cookies.
Coloring and Shaping the Rainbow Dough
This is where the magic happens! Dividing and coloring the dough is the key to achieving that stunning rainbow effect.
3. Divide the dough evenly into four equal portions. Take one portion of the dough and place it in a small bowl. Add a few drops of your first chosen gel food coloring (e.g., red) to the dough. Use your hands or a spatula to knead and mix the color into the dough until it is uniformly colored. Gel food coloring is recommended because it is highly concentrated and won’t add excess moisture to the dough, which could alter the texture. If the color isn’t as vibrant as you’d like, add another drop or two and continue mixing. Repeat this process for the remaining three portions of dough, using your other three chosen gel food colors (e.g., yellow, blue, green). You’ll end up with four balls of beautifully colored dough.
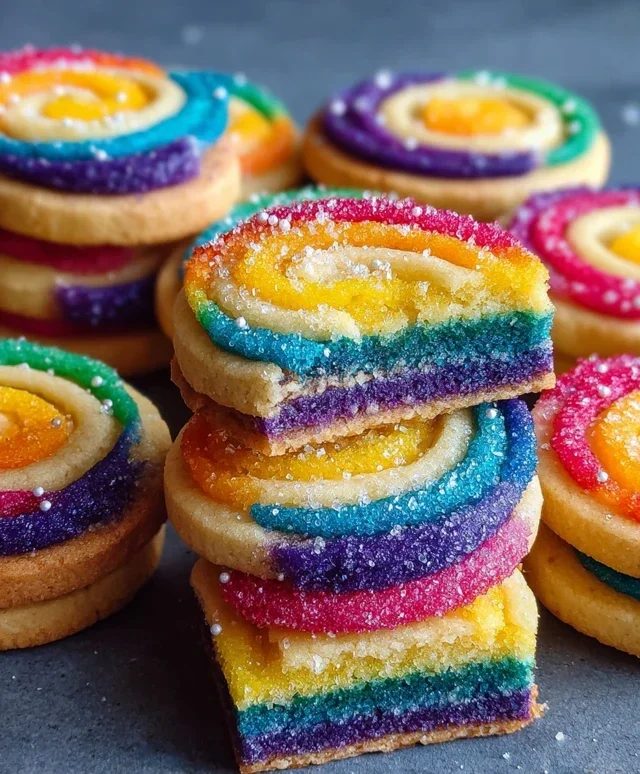
4. Now, it’s time to layer the colors for our rainbow effect. On a lightly floured surface, or between two sheets of parchment paper, take one colored ball of dough (say, red) and flatten it into a rough rectangle. Place the next colored ball of dough (yellow) on top of the red one and flatten it into a similar rectangle, layering it on top. Continue layering the remaining colors (blue and green) in the same manner. Once all four colored rectangles are stacked, gently press them together. Then, carefully roll the stacked dough from one of the short ends, as if you were rolling up a rug. The goal is to create a log with distinct, visible layers of color. Once you have a tightly rolled log, wrap it tightly in plastic wrap. Chill the dough log in the refrigerator for at least 1 hour, or until firm. This chilling time is essential. It allows the butter to firm up, making the dough easier to slice without deforming the rainbow pattern, and it also helps the cookies hold their shape during baking.
Baking and Decorating Your Rainbow Masterpieces
The final steps involve slicing, baking, and adding those delightful finishing touches.
5. Preheat your oven to 325°F (160°C). Line baking sheets with parchment paper. Once the dough log is well-chilled and firm, unwrap it. Using a sharp knife, carefully slice the log into ½-inch thick rounds. If the dough softens too much while slicing, pop it back into the freezer for a few minutes to firm up again. Place the cookie slices onto the prepared baking sheets, leaving about 1 inch of space between them as they will spread slightly. Bake for 18-22 minutes, or until the edges are lightly golden and the centers are set. The exact baking time will depend on your oven and the thickness of your cookies. Keep a close eye on them to prevent overbaking, which can diminish the vibrant colors. Let the cookies cool on the baking sheets for 5 minutes before transferring them to a wire rack to cool completely.
6. While the cookies are cooling, prepare your white melting wafers. Place the white melting wafers in a microwave-safe bowl and melt them according to package directions, usually in 30-second intervals, stirring well between each interval, until smooth and pourable. Once the cookies are completely cool, you can begin extract decorating. Drizzle the melted white chocolate over the cookies using a spoon or a piping bag with a fine tip. Immediately after drizzling, sprinkle generously with the rainbow nonpareils. The nonpareils will stick to the wet chocolate, creating a festive and colorful finish. Allow the chocolate to set completely before serving or storing.
Enjoy your beautiful and delicious Piped Rainbow Shortbread Cookies! They are a testament to simple ingredients transformed into something truly special.
Conclusion:
And there you have it – your guide to creating these absolutely stunning and delicious piped rainbow shortbread cookies! These cookies are a true showstopper, perfect for brightening any occasion. Their buttery, melt-in-your-mouth texture combined with the vibrant, cheerful rainbow design makes them a guaranteed hit with both kids and adults. Whether you’re celebrating a birthday, a holiday, or just looking for a fun weekend baking project, these shortbreads are sure to impress.
They’re fantastic served on their own with a cup of tea or coffee, or you can arrange them on a platter for a truly festive dessert table. For a bit of fun, try pairing them with ice cream or using them as edible decorations for cakes and cupcakes. Don’t be afraid to experiment with different piping tip shapes to create unique patterns and textures on your rainbow shortbread. You could also add a hint of citrus zest to the dough for a refreshing twist, or even experiment with colored sprinkles for an extra pop of fun.
I truly encourage you to give these piped rainbow shortbread cookies a try. They’re simpler than they look, and the joy on people’s faces when they see and taste them is incredibly rewarding. Happy baking!
Frequently Asked Questions:
What kind of food coloring should I use?
For the most vibrant and concentrated colors, I recommend using gel food coloring. A little goes a long way, and it won’t add extra moisture to your dough, which is crucial for perfect shortbread texture.
Can I make the dough ahead of time?
Absolutely! You can prepare the dough, divide it into colored portions, and wrap each portion tightly in plastic wrap. Refrigerate for up to 3 days or freeze for up to 1 month. Thaw overnight in the refrigerator before piping.
My piped cookies are spreading too much. What did I do wrong?
This usually happens if the dough is too warm or too soft. Make sure to chill your dough thoroughly before piping. If it starts to soften while you’re piping, return it to the refrigerator for a short period to firm up. Also, ensure your oven is preheated to the correct temperature.
Piped Rainbow Shortbread Cookies
Delicate, buttery shortbread cookies piped with vibrant rainbow colors and topped with shimmering nonpareils.
Ingredients
-
2¼ cups all-purpose flour
-
¾ cup sugar
-
¼ tsp salt
-
1 cup unsalted butter, cut into pieces
-
Gel food coloring (4 colors of your choice)
-
1 cup white melting wafers
-
Rainbow nonpareils (for topping)
Instructions
-
Step 1
In a large bowl, whisk together the all-purpose flour, sugar, and salt. -
Step 2
Cut in the unsalted butter using a pastry blender or your fingertips until the mixture resembles coarse crumbs. -
Step 3
Divide the dough into four equal portions. Tint each portion with a different gel food coloring until evenly combined. -
Step 4
Roll each colored dough portion into a log about 1 inch in diameter. Wrap each log in plastic wrap and chill for at least 30 minutes. -
Step 5
Preheat oven to 350°F (175°C). Line baking sheets with parchment paper. -
Step 6
Slice the chilled dough logs into ¼-inch thick rounds. Arrange cookies on the prepared baking sheets. -
Step 7
Bake for 10-12 minutes, or until the edges are lightly golden. Let cool on the baking sheets for a few minutes before transferring to a wire rack to cool completely. -
Step 8
Melt the white melting wafers according to package directions. Dip the cooled cookies into the melted wafers and immediately sprinkle with rainbow nonpareils. Let set.
Important Information
Nutrition Facts (Per Serving)
It is important to consider this information as approximate and not to use it as definitive health advice.
Allergy Information
Please check ingredients for potential allergens and consult a health professional if in doubt.