Milky Way Fudge – Easy Rich Chocolate Candy Recipe
Milky Way Fudge is more than just a dessert; it’s a celestial experience for your taste buds! Imagin extracte sinking your teeth into a velvety smooth confection, each bite bursting with the iconic caramel, nougat, and chocolate flavors of your favorite candy bar. It’s no wonder why Milky Way Fudge has become a holiday staple and a go-to treat for any occasion that calls for something truly decadent. This isn’t your average fudge; it’s a sophisticated yet incredibly easy-to-make adaptation that captures the essence of the beloved candy in a rich, melt-in-your-mouth format. The magic lies in its ability to perfectly balance the sweet, chewy nougat, the gooey caramel, and the deep, dark chocolate, creating a symphony of textures and tastes that will leave you utterly delighted. Prepare to impress yourself and everyone you share it with – this Milky Way Fudge is guaranteed to disappear fast!
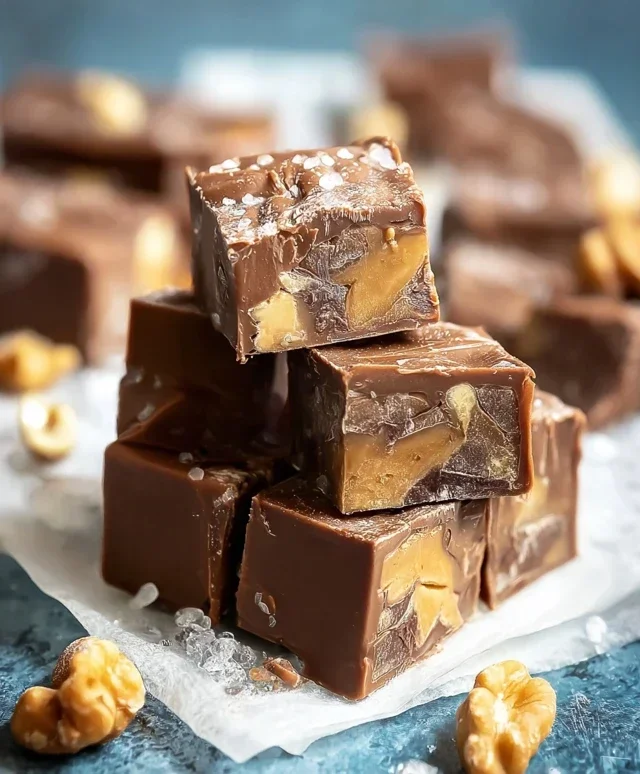
Milky Way Fudge
There are few things more satisfying than a truly decadent chocolate treat, and for those of us who adore the classic combination of chocolate, caramel, and nougat, Milky Way Fudge is an absolute dream come true. This recipe takes the beloved flavors of a Milky Way bar and transforms them into a rich, creamy, and utterly irresistible fudge. It’s surprisingly simple to make, making it perfect for holiday baking, a special occasion, or just a weeknight craving for something truly extraordinary. The textures are fantastic – smooth, rich chocolate giving way to chewy nougat and gooey caramel. Get ready to impress yourself and anyone lucky enough to snag a piece!
Ingredients:
Instructions:
Creating this delightful Milky Way Fudge is a straightforward process, but it requires a bit of attention to detail to ensure perfect results. We’ll start by preparing our workspace and then move on to the melting and mixing stages.
Phase 1: Preparation is Key
The first crucial step in making any great fudge is proper preparation. This might seem mundane, but it sets you up for success and prevents any last-minute scrambling. You’ll want to line an 8×8 inch baking pan with parchment paper, leaving some overhang on the sides. This overhang will act as handles, making it incredibly easy to lift the entire slab of fudge out of the pan once it’s set. Smoothly press the parchment paper into the corners and along the bottom of the pan. If you don’t have parchment paper, you can lightly grease the pan with butter or non-stick cooking spray, but parchment paper is highly recommended for a cleaner release. Next, get your chopped Milky Way bars ready. It’s important to chop them into relatively small, bite-sized pieces. This ensures they distribute evenly throughout the fudge and create delightful pockets of caramel and nougat. Don’t worry about perfection here; slightly irregular pieces add to the rustic charm of homemade fudge.
Phase 2: The Melting Magic
Now comes the part where we bring the core ingredients together. In a medium-sized, heavy-bottomed saucepan, combine the semi-sweet chocolate chips, sweetened condensed milk, and unsalted butter. It’s crucial to use a heavy-bottomed pan to ensure even heating and prevent the chocolate from scorching. Place the saucepan over low to medium-low heat. This is where patience is a virtue! We want to melt these ingredients slowly and gently. Stir frequently with a heatproof spatula or wooden spoon, making sure to scrape the bottom and sides of the pan to prevent sticking. Continue stirring until the chocolate is completely melted and the mixture is smooth and glossy. You should no longer see any distinct chocolate chips or butter solids. Once smooth, remove the saucepan from the heat immediately. Overheating can make the fudge grainy.
Phase 3: Infusing the Flavor
With the chocolate base perfectly melted and smooth, it’s time to enhance its flavor and incorporate the star of our show. Stir in the vanilla extract. Vanilla extract is essential for rounding out the chocolate flavor and adding a subtle depth. After the vanilla is well combined, it’s time to fold in the chopped Milky Way bars. Gently stir them into the warm chocolate mixture. The goal here is to distribute the pieces evenly throughout the fudge without breaking them down too much. You want to feel the satisfying resistance as you stir and see the delicious chunks of nougat and caramel interspersed with the rich chocolate. Be careful not to overmix at this stage, as we want those distinct chewy and gooey elements to remain intact.
Phase 4: Setting the Stage
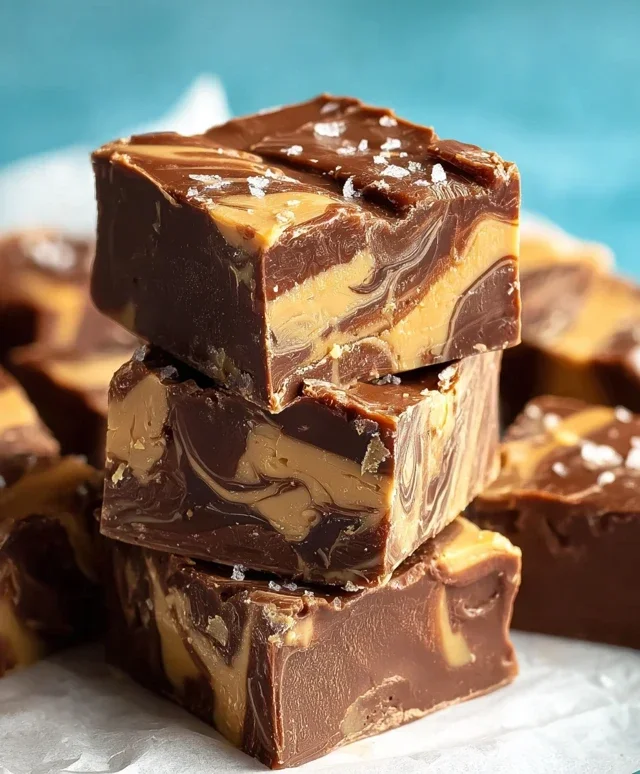
Once the Milky Way pieces are evenly distributed in the chocolate mixture, it’s time to get the fudge into its final form. Carefully pour the warm fudge mixture into your prepared 8×8 inch baking pan. Use your spatula to spread it out evenly, ensuring it reaches all the corners. You want a relatively smooth top surface, but don’t obsess over absolute perfection. Once the fudge is spread, gently tap the pan on the counter a couple of times. This helps to release any air bubbles trapped in the mixture, leading to a denser and smoother fudge. If you are using the optional caramel sauce for drizzling, now is the time to do it. Drizzle the caramel sauce decoratively over the top of the fudge. You can use a spoon or a piping bag for this. Then, using a toothpick or the tip of a knife, gently swirl the caramel into the fudge for a beautiful marbled effect.
Phase 5: The Patience Game – Setting and Slicing
This is perhaps the most challengin extractg part for any fudge enthusiast: waiting for it to set! Place the pan in the refrigerator for at least 2-3 hours, or until the fudge is completely firm to the touch. You can also leave it at room temperature if your environment is cool, but refrigeration guarantees a firm set. Once the fudge is firm, use the parchment paper overhang to carefully lift the entire slab out of the pan onto a cutting board. Now, for the satisfying part: slicing. Use a sharp knife to cut the fudge into small, bite-sized squares. For the cleanest cuts, you might want to warm your knife slightly under hot water and wipe it dry between cuts. This helps prevent the chocolate from sticking and creating ragged edges.
Enjoy your homemade Milky Way Fudge! It’s a rich, chewy, and caramelly delight that’s sure to be a hit. Store any leftovers in an airtight container at room temperature for up to a week, or in the refrigerator for longer storage. Happy indulgin extractg!
Conclusion:
There you have it – your ultimate guide to crafting delicious Milky Way Fudge! This recipe is truly fantastic because it captures all the beloved flavors of the iconic candy bar in an incredibly easy-to-make fudge. The creamy texture, the sweet caramel swirl, and the satisfying chocolate base combine for a treat that’s sure to impress. It’s perfect for holidays, gatherings, or simply when you need a decadent pick-me-up. Don’t be intimidated; even if you’re new to fudge-making, this recipe is designed for success. Give it a try – I promise you won’t regret diving into this sweet adventure!
For serving, I love cutting this Milky Way Fudge into small, bite-sized squares and arrangin extractg them on a festive platter. They make an excellent addition to cookie platters or as a standalone indulgence. For variations, consider adding a sprinkle of sea salt on top after it sets for a delightful sweet and salty contrast. You could also experiment with a touch of instant coffee granules in the chocolate base for a mocha twist, or even finely chopped peanuts for an extra layer of crunch. The possibilities are endless, so have fun and make it your own!
Frequently Asked Questions about Milky Way Fudge:
Can I use different types of chocolate?
Absolutely! While semi-sweet chocolate provides a classic flavor, feel free to experiment with milk chocolate for a sweeter fudge or dark chocolate for a richer, more intense taste. You can even combine different types for a unique flavor profile.
How long does Milky Way Fudge last?
Properly stored Milky Way Fudge can last for up to two weeks in an airtight container at room temperature. For longer storage, you can keep it in the refrigerator for up to a month, or even freeze it for several months. Just let it come to room temperature before serving if frozen.
My fudge isn’t setting properly, what went wrong?
Several factors can affect fudge setting, including inaccurate measurements, not cooking to the right temperature, or humidity. Ensure you’re using a candy thermometer and cooking to the specified stage. Also, very humid conditions can sometimes make fudge take longer to set or result in a softer texture.
Milky Way Fudge
Rich and decadent fudge loaded with chopped Milky Way bars and a smooth chocolate base. A delightful treat for chocolate and caramel lovers.
Ingredients
-
3 cups semi-sweet chocolate chips
-
1 (14 oz) can sweetened condensed milk
-
¼ cup unsalted butter
-
1 tsp vanilla extract
-
4 regular Milky Way bars, chopped
-
¼ cup caramel sauce (optional, for drizzling)
Instructions
-
Step 1
Line an 8×8 inch baking pan with parchment paper, leaving an overhang on the sides. -
Step 2
In a large microwave-safe bowl, combine the semi-sweet chocolate chips, sweetened condensed milk, and unsalted butter. -
Step 3
Microwave on high for 1 minute, then stir. Continue microwaving in 30-second intervals, stirring after each, until the mixture is smooth and melted. This may take 2-3 minutes total. -
Step 4
Stir in the vanilla extract until well combined. -
Step 5
Gently fold in the chopped Milky Way bars. -
Step 6
Pour the fudge mixture into the prepared pan and spread evenly. -
Step 7
If using, drizzle the caramel sauce over the top and swirl with a toothpick. -
Step 8
Refrigerate for at least 2 hours, or until firm. -
Step 9
Once firm, lift the fudge out of the pan using the parchment paper overhang. Cut into squares.
Important Information
Nutrition Facts (Per Serving)
It is important to consider this information as approximate and not to use it as definitive health advice.
Allergy Information
Please check ingredients for potential allergens and consult a health professional if in doubt.