Masoor Dal Chilla – Savory Red Lentil Pancakes
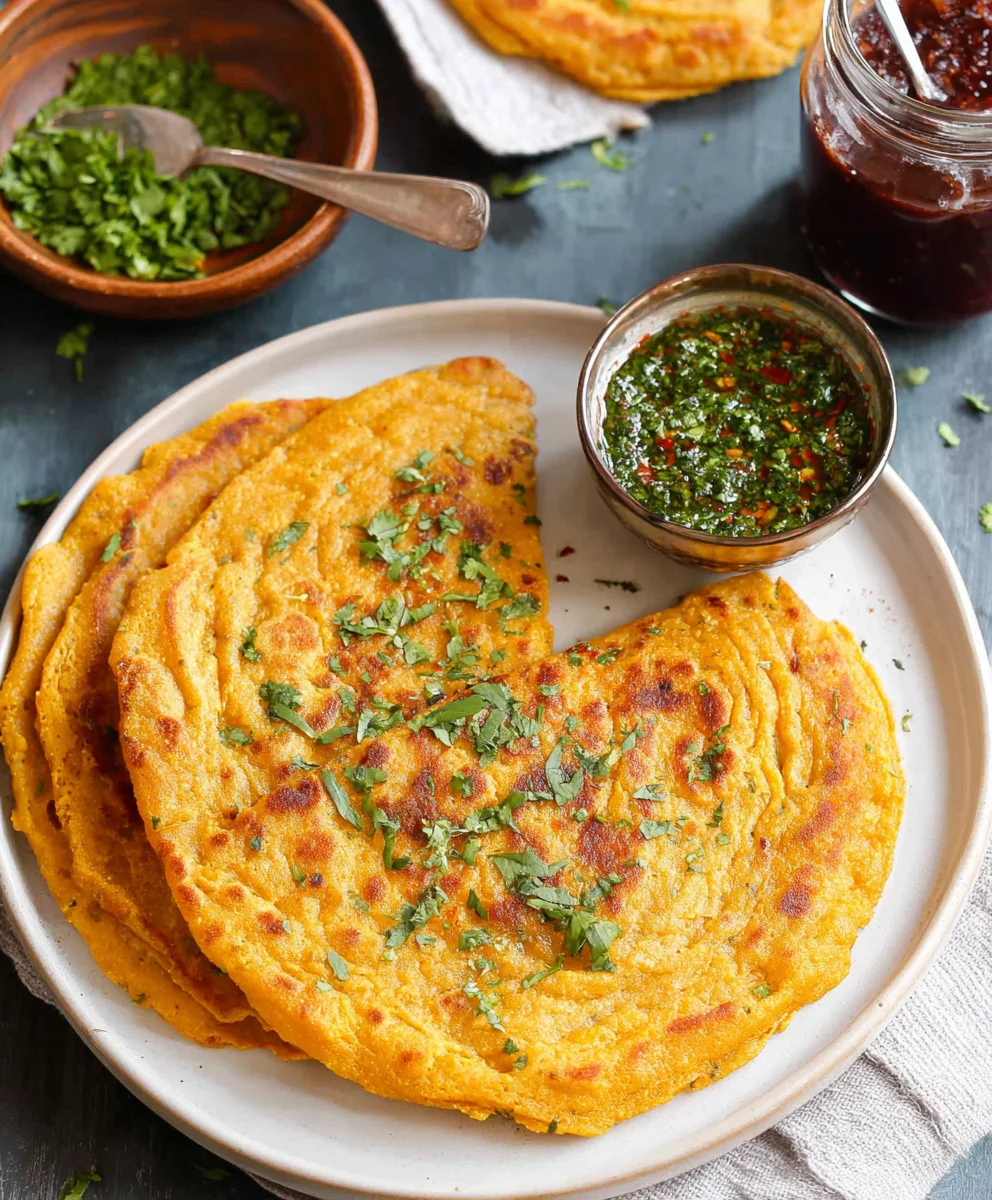
Masoor Dal Chilla | Savory Red Lentil Pancakes are more than just a breakfast; they are a vibrant explosion of flavor and texture that will tantalize your taste buds. If you’re seeking a dish that’s both incredibly nutritious and delightfully easy to whip up, look no further. This beloved Indian street food, reimagin extracted for your home kitchen, offers a satisfyingly savory experience that’s perfect any time of day. What makes the Masoor Dal Chilla | Savory Red Lentil Pancakes so special? It’s the perfect harmony of earthy red lentils, aromatic spices, and a hint of tang, all cooked to a delicate crisp. People adore them for their incredible versatility – serve them plain, stuffed with your favorite fillings, or as a light yet filling meal. This recipe unlocks the secret to achieving that perfect, golden-brown exterior and tender, flavorful interior that will have you coming back for more, week after week. Prepare to be amazed by the simplicity and sheer deliciousness of this wholesome dish.
Ingredients:
- 1 cup split red lentils (masoor dal)
- 3 cups water (for soaking lentils)
- 1 green chili
- 1 inch gin extractger
- 1 teaspoon kosher salt
- ½ cup water (for grinding)
- 2 tablespoons cilantro (finely chopped)
- 2 tablespoons oil
Preparing the Masoor Dal Base
Soaking the Lentils
The foundation of our delicious Masoor Dal Chilla lies in properly preparing the red lentils. Start by thoroughly rinsing the 1 cup of split red lentils (masoor dal) under cool running water. You’ll want to rinse them until the water runs clear, which helps to remove any dust or debris. Once rinsed, transfer the lentils to a medium-sized bowl and add 3 cups of fresh water. This is crucial for the soaking process, which will soften the lentils, making them easier to grind into a smooth batter and ensuring a tender chilla. Let the lentils soak for at least 4 to 6 hours, or even better, overnight. The longer they soak, the softer they will become, leading to a smoother batter. After soaking, drain the water completely.
Grinding the Batter
Now comes the exciting part of transforming the soaked lentils into a usable batter. Transfer the drained, soaked red lentils to a blender or a food processor. We need to add a bit of heat and flavor here, so finely chop the 1 green chili and add it to the blender with the lentils. Peel and finely chop or grate the 1-inch pgin extracte of ginger and add that in as well. These aromatics will provide a wonderful warmth and depth to our savory pancakes. Add ½ cup of water to help the grinding process. Blend the mixture until you achieve a smooth, thick batter. It should have the consistency of pancake batter – not too thin, not too thick. If it’s too thick, you can add another tablespoon or two of water, but do so sparingly. Be sure to scrape down the sides of the blender a few times to ensure everything is incorporated evenly. Once blended, pour the batter into a bowl.
Adding Flavor and Final Touches
Seasoning the Batter
Once your batter is smooth and has reached the desired consistency, it’s time to season it. Add 1 teaspoon of kosher salt to the batter. The kosher salt provides a clean, pure salty flavor that complements the earthy notes of the lentils. If you prefer a saltier taste, you can add a pinch more, but it’s always best to start with the recommended amount and adjust later if needed. Now, fold in the 2 tablespoons of finely chopped fresh cilantro. The cilantro adds a burst of freshness and a beautiful green fleck throughout the chilla, elevating both its appearance and its aroma. Stir gently to distribute the cilantro evenly. Give the batter a final stir, ensuring all the flavors are well combined. At this stage, you can taste a tiny bit of the batter (if you’re comfortable doing so) to check the seasoning.
Cooking the Masoor Dal Chilla
Heating the Pan
Now we’re ready to cook our delicious Masoor Dal Chilla! Heat a non-stick skillet or a cast-iron griddle over medium heat. It’s important to get the pan to the right temperature before adding the batter. A good way to test if the pan is ready is to sprinkle a few drops of water on it; they should sizzle and evaporate quickly. Once the pan is adequately heated, add about ½ tablespoon of oil and spread it evenly across the surface using a paper towel or a brush. This initial oiling helps prevent sticking and ensures a beautifully golden-brown chilla.
Cooking the First Side
Once the pan is hot and oiled, take a ladleful of the prepared masoor dal batter – about ¼ to ⅓ cup, depending on how large you want your chilla. Pour the batter onto the center of the hot skillet and immediately use the back of the ladle to spread it outwards in a circular motion, creating a thin, even pancake. Aim for a thickness of about ¼ inch. Be careful not to make it too thick, as it won’t cook through properly. Let the chilla cook undisturbed for about 2 to 3 minutes on the first side. You’ll notice the edges starting to firm up and thegin extractrface will begin to look set. Small bubbles may start to appear on the surface, which is a good sign that it’s cooking nicely.
Flipping and Cooking the Second Side
When the edges of the chilla appear cooked and slightly lifted, and the surface has lost its raw batter sheen, it’s time to flip. Carefully slide a spatula underneath the chilla and with a confident, swift motion, flip it over. If you’re new to making chillas or pancakes, don’t worry if the first one isn’t perfect; practice makes perfect! Add another ½ teaspoon of oil to the pan around the edges of the chilla if needed. Cook the second side for another 1.5 to 2 minutes, or until it’s golden brown and cooked through. You can gently press down on the chilla with your spatula to ensure even cooking.
Cooking Subsequent Chillas
After the first chilla is cooked and golden on both sides, carefully slide it onto a plate. You can keep it warm in a low oven while you cook the rest. For each subsequent chilla, add a little more oil to the pan (about ½ teaspoon) and ensure the pan is at medium heat. Pour another ladleful of batter and spread it into a circle as before. Repeat the cooking process: 2-3 minutes on the first side, then flip and cook for another 1.5 to 2 minutes on the second side. The key is to maintain consistent heat and a thin, even layer of batter for perfectly cooked, delicious Masoor Dal Chillas every time.
Serving the Chilla
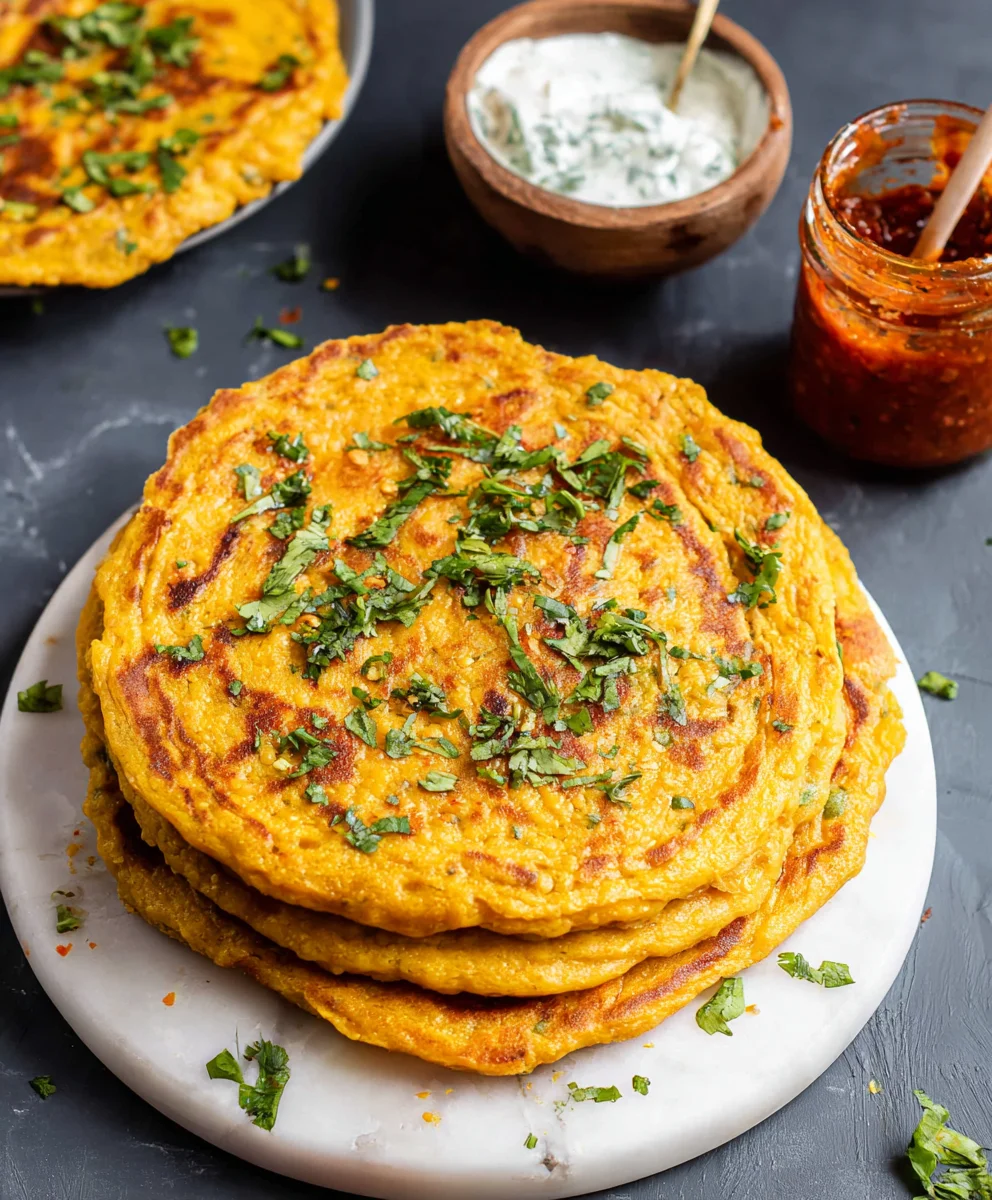
Once all your Masoor Dal Chillas are cooked to a beautiful golden-brown perfection, they are ready to be served. These savory red lentil pancakes are incredibly versatile and can be enjoyed for breakfast, lunch, or a light dinner. They are wonderful served hot, straight from the pan. You can serve them as they are, or with your favorite accompaniments. Popular choices include plain yogurt or a cooling raita, a spicy green chutney, or even a dollop of tamarind chutney for a sweet and tangy contrast. They also pair wonderfully with a simple side of pickled onions or a fresh salad. Enjoy the delightful texture and savory flavors of your homemade Masoor Dal Chillas!
Conclusion:
And there you have it – your very own batch of delicious Masoor Dal Chilla | Savory Red Lentil Pancakes! We hope you enjoyed exploring this simple yet incredibly satisfying recipe. These pancakes are a fantastic way to incorporate nutritious red lentils into your diet, offering a delightful balance of protein and fiber in every bite. They’re surprisingly easy to make, making them perfect for a quick breakfast, a light lunch, or even a healthy snack.
For serving, we highly recommend pairing your Masoor Dal Chilla | Savory Red Lentil Pancakes with a dollop of cooling yogurt, a tangy chutney (mint or tamarind are excellent choices!), or some freshly chopped cilantro and onions. They also hold up beautifully as a base for more substantial toppings like scrambled eggs or sautéed vegetables.
Don’t be afraid to get creative with variations! You can add finely chopped spinach, grated carrots, or even a pinch of chili powder to the batter for an extra flavor boost. Experiment with different spices like cumin or turmeric to tailor the taste to your preference. We encourage you to make this recipe your own and share your delightful creations!
Frequently Asked Questions:
Q: How can I ensure my Masoor Dal Chilla | Savory Red Lentil Pancakes don’t stick to the pan?
A: A well-seasoned non-stick pan is your best friend here. Make sure to heat your pan adequately before pouring the batter, and use a light coating of oil or ghee. If your batter seems too thick, a tablespoon or two of water can help achieve a more spreadable consistency, which also aids in preventing sticking.
Q: Can I make the batter for Masoor Dal Chilla | Savory Red Lentil Pancakes ahead of time?
A: Yes, absolutely! You can prepare the batter and store it in an airtight container in the refrigerator for up to 2 days. Give it a good whisk before cooking, as the lentils may settle.
Masoor Dal Chilla – Savory Red Lentil Pancakes
Delicious and healthy savory pancakes made from red lentils, ginger, and green chili, perfect for breakfast or a light meal.
Ingredients
-
1 cup split red lentils (masoor dal)
-
3 cups water (for soaking lentils)
-
1 green chili
-
1 inch ginger
-
1 teaspoon kosher salt
-
½ cup water (for grinding)
-
2 tablespoons cilantro (finely chopped)
-
2 tablespoons oil
Instructions
-
Step 1
Rinse 1 cup of split red lentils (masoor dal) under cool running water until the water runs clear. Transfer to a bowl, add 3 cups of water, and soak for at least 4 to 6 hours or overnight. Drain completely. -
Step 2
In a blender, combine the drained, soaked red lentils with 1 finely chopped green chili and 1 inch of finely chopped or grated ginger. Add ½ cup of water and blend until a smooth, thick batter forms. Scrape down the sides as needed. Pour into a bowl. -
Step 3
Season the batter with 1 teaspoon of kosher salt. Fold in 2 tablespoons of finely chopped fresh cilantro. Stir gently to combine. -
Step 4
Heat a non-stick skillet or griddle over medium heat. Add about ½ tablespoon of oil and spread evenly. Test for readiness by sprinkling water; it should sizzle and evaporate quickly. -
Step 5
Pour ¼ to ⅓ cup of batter onto the hot skillet and spread into a thin, even circle about ¼ inch thick. Cook for 2 to 3 minutes until the edges firm up and the surface looks set. -
Step 6
Carefully flip the chilla and cook the second side for another 1.5 to 2 minutes until golden brown and cooked through. Add a little more oil for subsequent chillas as needed.
Important Information
Nutrition Facts (Per Serving)
It is important to consider this information as approximate and not to use it as definitive health advice.
Allergy Information
Please check ingredients for potential allergens and consult a health professional if in doubt.