Easy Tortilla Chip Enchiladas- Quick & Delicious Recipe
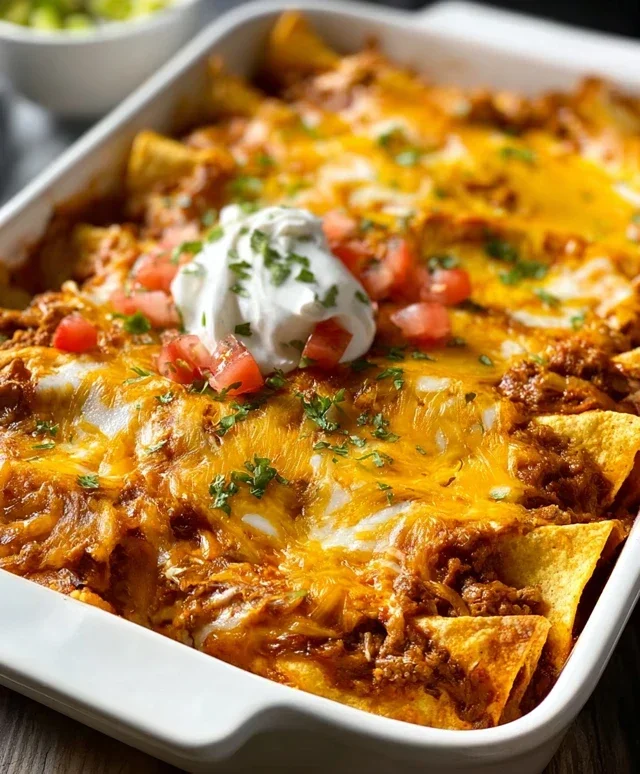
Tortilla Chip Enchiladas are a culinary revelation, transforming humble tortilla chips into a showstopping, flavorful fiesta in your own kitchen. Forget the fuss of rolling individual enchiladas; this ingenious recipe taps into the satisfying crunch and texture of tortilla chips, making enchiladas incredibly accessible and surprisingly quick. What’s not to love? They deliver all the comforting, cheesy, saucy goodness you crave from traditional enchiladas, but with an irresistible textural contrast that will have you going back for seconds. These Tortilla Chip Enchiladas are special because they offer that deeply satisfying, home-cooked flavor without requiring hours of prep. They’re perfect for busy weeknights, casual gatherings, or anytime you need a delicious dose of comfort food. Get ready to experience enchiladas in a whole new, wonderfully crunchy way!
Tortilla Chip Enchiladas
Looking for a weeknight dinner that’s big on flavor and short on fuss? These Tortilla Chip Enchiladas are a game-changer. They’re essentially all the deliciousness of traditional enchiladas, but with a super-convenient shortcut that saves you time and effort. Instead of rolling tortillas, we’re layering everything in a casserole dish. The tortilla chips soak up the flavorful sauce and create a wonderfully satisfying texture that’s almost like a cheesy, saucy taco bake. It’s the perfect comfort food that everyone in the family will devour, and it’s incredibly forgiving. Don’t worry if you don’t have exact measurements for every little thing; this recipe is designed to be adaptable.
Ingredients:
Cooking Instructions
Let’s get cooking! This recipe is wonderfully straightforward, making it ideal for even novice cooks. The key is building layers of flavor, and we’ll achieve that with a simple yet effective process.
Step 1: Brown the Ground Beef and Build Flavor
First things first, we need to cook our ground beef. Grab a large skillet and place it over medium-high heat. Add your pound of ground beef to the hot skillet. Use a spatula or a wooden spoon to break it up as it cooks. We want to brown it thoroughly, ensuring there are no pink bits left. As the beef is browning, you’ll notice it releasing some fat. If there seems to be an excessive amount of grease, you can carefully tilt the skillet and spoon some of it out, though a little bit of richness is good for flavor. Once the beef is completely browned, drain off any excess grease. Now, it’s time to add in our flavor boosters. Sprinkle in the 1 teaspoon of ground cumin. Stir it well to distribute the spice evenly throughout the cooked beef. Cumin adds that classic earthy, warm flavor that’s essential to many Mexican-inspired dishes.
Step 2: Combine Sauce and Chilies
While the beef is still in the skillet (or you can transfer it to a bowl if you prefer), let’s prepare our saucy base. Open up your 28-ounce can of red enchilada sauce. Pour the entire contents into the skillet with the seasoned ground beef. Next, grab that 4-ounce can of diced green chilies. Make sure to drain them well before adding them to the sauce and beef mixture. The green chilies add a subtle heat and a touch of brightness that complements the rich enchilada sauce perfectly. Stir everything together until the beef, enchilada sauce, and green chilies are well combined. This mixture will form the flavorful core of our enchiladas.
Step 3: Prepare the Casserole Dish
Now, let’s get our baking vessel ready. You’ll need a 9×13 inch baking dish for this recipe. This size is ideal for ensuring everything fits nicely and bakes evenly. We’re going to start by creating a base layer. Take your bag of tortilla chips – about 12 ounces worth – and gently break them into bite-sized pieces. You don’t need to crush them into dust; some larger pieces are fine and will provide a nice texture. Spread about half of these broken tortilla chips evenly across the bottom of your prepared baking dish. This layer will absorb some of the delicious sauce and become wonderfully tender.
Step 4: Layering the Goodness
This is where the magic happens! Spoon about half of the seasoned ground beef and enchilada sauce mixture over the layer of tortilla chips in the baking dish. Spread it out as evenly as you can. Now, sprinkle about half of your 3 cups of shredded cheese over the beef and sauce layer. Using about half of the cheese at this stage will ensure that each bite gets a good amount of cheesy goodness. Next, add the remaining broken tortilla chips on top of the cheese. Finally, spoon the rest of the ground beef and enchilada sauce mixture over the second layer of chips. This creates a sandwich-like structure, ensuring maximum flavor infusion.
Step 5: The Cheesy Grand Finnon-alcoholic ale and Baking
For the final touch before baking, sprinkle the remaining shredded cheese evenly over the top of the entire casserole. This generous layer of cheese will melt and create a golden, bubbly crust. Now, take your ½ cup of salsa and drizzle it over the top of the cheese. You can do this in a zig-zag pattern or just spread it out. The salsa will add a little extra tang and moisture. Cover the baking dish tightly with aluminum foil. This is important to trap the steam and help the tortilla chips soften and the cheese melt beautifully without the top burning. Place the covered dish into a preheated oven at 375°F (190°C). Bake for about 25-30 minutes. After that time, remove the foil and bake for another 5-10 minutes, or until the cheese is melted and bubbly and the edges are lightly golden. Let the enchiladas rest for about 5-10 minutes before serving. This allows the flavors to meld and the casserole to set slightly, making it easier to scoop. Serve hot with your favorite toppings like sour cream, fresh cilantro, avocado, or a dollop of extra salsa. Enjoy your incredibly easy and delicious Tortilla Chip Enchiladas!
Conclusion:
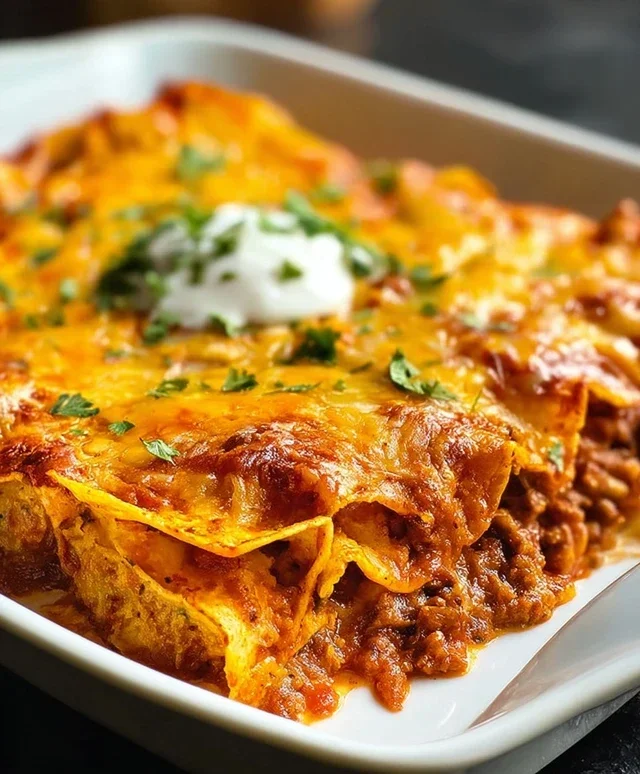
And there you have it! These Tortilla Chip Enchiladas are an absolute game-changer for busy weeknights or when you’re craving something incredibly satisfying without the fuss of rolling individual enchiladas. The beauty of this recipe lies in its simplicity and versatility. You get all the classic, comforting flavors of enchiladas with the delightful crunch of tortilla chips, making every bite an adventure. They are wonderfully adaptable, allowing you to customize them with your favorite proteins, cheeses, and vegetables. I truly hope you give these a try – they are a guaranteed crowd-pleaser and a new favorite in my kitchen!
For serving, I love pairing these with a dollop of sour cream or plain Greek yogurt, a sprinkle of fresh cilantro, and maybe some sliced avocado or a side of pico de gallo for an extra burst of freshness. They also go beautifully with a simple side salad or some Mexican rice.
Don’t be afraid to experiment with variations! You can use shredded chicken, ground beef, black beans, or even roasted vegetables as your filling. For a spicier kick, add some diced jalapeños to the mixture or use a spicier enchilada sauce. Cheese lovers, rejoice – feel free to mix up the cheeses for an even more complex flavor profile.
Frequently Asked Questions:
Can I make these ahead of time?
Yes, absolutely! You can assemble the Tortilla Chip Enchiladas up to a day in advance and refrigerate them. You may need to add a few extra minutes to the baking time since they’ll be going into the oven cold. Sometimes, the chips can get a little softer if made too far ahead, so it’s best to bake them closer to serving time if possible.
What kind of tortilla chips work best?
Sturdy, baked tortilla chips tend to hold up better in this casserole-style enchilada dish. While any tortilla chip will work, avoid very thin or easily breakable ones, as they might turn mushy. Corn tortilla chips are traditional and give the best flavor and texture.
Can I use a different sauce?
Definitely! While enchilada sauce is classic, feel free to get creative. A creamy salsa verde or even a hearty mole sauce could be delicious alternatives, depending on the flavor profile you’re aiming for. Just ensure the sauce you choose complements your filling and cheese choices.
Tortilla Chip Enchiladas
A quick and easy casserole-style enchilada dish using tortilla chips instead of tortillas. Perfect for a weeknight meal.
Ingredients
-
1 pound ground turkey
-
1 bag tortilla chips (about 12 ounces)
-
3 cups shredded cheese
-
28 ounce can of red enchilada sauce
-
4 ounce can of diced green chilies, drained
-
1 teaspoon ground cumin
-
½ cup salsa
Instructions
-
Step 1
Preheat oven to 375°F (190°C). -
Step 2
In a skillet, brown the ground turkey over medium heat, breaking it up with a spoon. Drain off any excess grease. -
Step 3
Stir the cumin and diced green chilies into the cooked ground turkey. Cook for 1 minute more. -
Step 4
In a 9×13 inch baking dish, layer half of the tortilla chips. Spoon half of the ground turkey mixture over the chips. -
Step 5
Pour half of the enchilada sauce and half of the salsa over the turkey layer. Sprinkle with half of the shredded cheese. -
Step 6
Repeat the layers with the remaining tortilla chips, ground turkey mixture, enchilada sauce, salsa, and cheese. -
Step 7
Bake for 25-30 minutes, or until the cheese is melted and bubbly and the sauce is heated through. -
Step 8
Let stand for 5 minutes before serving.
Important Information
Nutrition Facts (Per Serving)
It is important to consider this information as approximate and not to use it as definitive health advice.
Allergy Information
Please check ingredients for potential allergens and consult a health professional if in doubt.