Easy Bunny Cake- The Ultimate Easter Treat
Easy Bunny Cake Recipe for everyone is here, and trust me, it’s going to be your new go-to for Easter, spring birthdays, or just a whimsical treat! We all love a good dessert, but what makes a truly memorable one? It’s the joy it brings, the smiles it creates, and of course, how absolutely delicious it tastes. This easy bunny cake recipe checks all those boxes and then some. It’s incredibly simple to make, perfect for bakers of all skill levels, and the adorable bunny shape is guaranteed to enchant both kids and adults alike. Forget complicated decorations and stress; this recipe is designed for pure, unadulterated fun in the kitchen and a delightful reward at the end. Get ready to hop into some baking fun!
Why You’ll Love This Recipe:
This recipe isn’t just about a cake; it’s about creating a moment. The charm of a bunny-shaped cake is undeniable, evoking feelings of nostalgia and pure delight. It’s the perfect centerpiece for any spring celebration, adding a touch of magic and sweetness. Plus, the “easy” in easy bunny cake recipe is absolutely true. You won’t find yourself wrestling with fondant or intricate piping. We’re talking straightforward steps that lead to a show-stopping result, proving that beautiful and delicious can also be wonderfully accessible.
Easy Bunny Cake Recipe
Get ready for some serious springtime fun with this incredibly easy bunny cake recipe! It’s the perfect centerpiece for your Easter celebration, a delightful treat for a spring birthday, or just a way to brighten any day. You don’t need to be a master baker to create this adorable creation. We’ll be using simple, readily available ingredients and a few clever tricks to transform two round cakes into a fluffy, lovable bunny that will have everyone hopping with joy. This recipe is all about simplicity and maximum cuteness, so let’s dive in and make some magic!
Ingredients:
Making Your Bunny Cake: Step-by-Step
This bunny cake is surprisingly simple to assemble, and the results are always so rewarding. The key is in how we shape and decorate, and I’ll guide you through each step to ensure your bunny is a hit!
1. Prepare Your Cake Layers: First things first, ensure your two round cake layers are completely cooled. This is a crucial step! Frosting a warm cake is a recipe for disaster, as the frosting will melt and slide right off. If you baked your cakes ahead of time, wrap them tightly in plastic wrap and store them at room temperature until you’re ready to assemble. If your cake layers have domed significantly during baking, you can gently trim the tops with a serrated knife to create a flat surface. This will make stacking and frosting much easier and give your bunny a more stable foundation.
2. Assemble the Bunny Body and Head: Now for the fun part – transforming those round cakes! Take one round cake layer and place it flat on your serving platter or cake board. This will be the bunny’s body. Now, take your second round cake layer and cut it in half. These two halves will form the bunny’s head. Arrange these two semi-circles at the top of the round cake layer, with the cut edges touching and slightly overlapping the top edge of the body cake. You can adjust them slightly to create the best head shape you like. If your cakes are a bit crum extractbly, you can use a little bit of frosting as “glue” to help hold the head pieces in place.
3. Crum extractb Coat and First Frosting Layer: Once your bunny shape is assembled, it’s time to frost! Apply a thin, even layer of white frosting all over the entire cake, covering both the body and the head. This initial layer is called a “crum extractb coat.” Its purpose is to trap any loose crum extractbs, preventing them from showing up in your final, beautiful frosting layer. Don’t worry about making this layer perfect; its main job is functional. Once you’ve applied the crum extractb coat, place the cake in the refrigerator for about 15-20 minutes. This will firm up the frosting and make it much easier to apply the final, smooth layer. After chilling, apply a second, thicker, and smoother layer of white frosting over the entire bunny. Use an offset spatula or a butter knife to smooth the frosting as much as possible, creating a fluffy, cloud-like appearance. Think of it like a soft bunny coat!
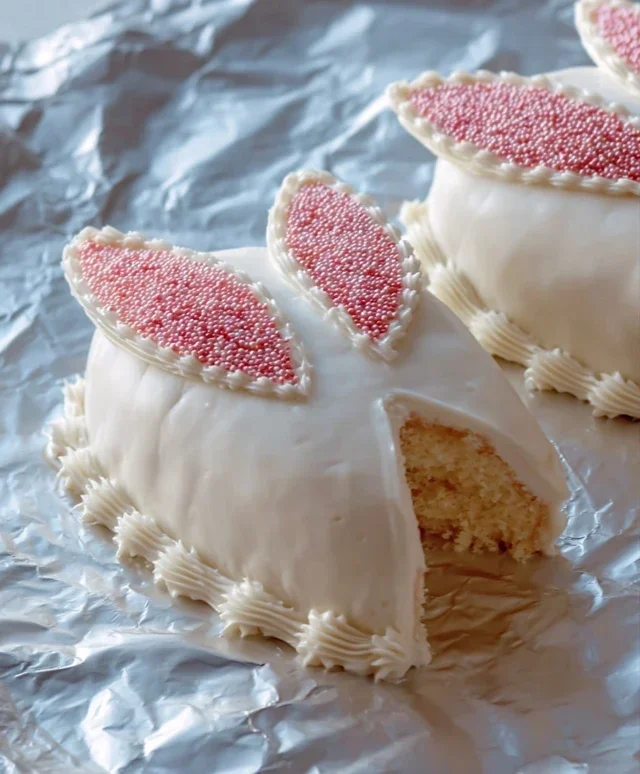
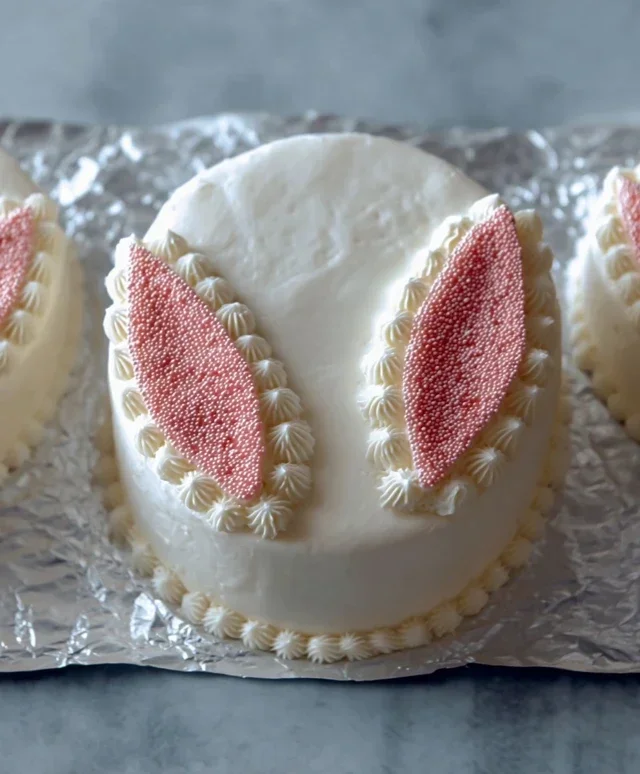
4. Crafting the Bunny’s Ears and Tail: For the ears, you have a few options. You can take two small, crescent-shaped pieces from the trimmed tops of your cake layers (if you trimmed them) and frost them with white frosting, then attach them to the top of the head. Alternatively, and perhaps even easier, you can cut out two ear shapes from thick cardstock or craft foam and insert them into the top of the cake. If you go this route, you can frost these shapes with white frosting or even leave them as is for a contrasting texture. For the tail, take a generous dollop of white frosting and pipe it onto the back of the bunny’s body, or simply create a fluffy mound with your spatula. Then, press a handful of jellybeans or colorful round candies into the frosting to create a vibrant, jeweled tail.
5. Decorating the Bunny’s Face: Now, let’s bring our bunny to life with its face! Grab your pink frosting. You can use it to pipe two cute little ears inside your white frosting ears if you made them from cake, or just add a little pink frosting flourish to the tips of your cardstock ears. For the nose, use a small amount of pink frosting and pipe a little heart shape or a small circle on the front of the bunny’s head. Now, for the eyes and mouth, it’s time for the chocolate icing or melted chocolate. Fit a piping bag with a fine tip (or snip a very small corner off a ziploc bag). Carefully pipe two small dots for the eyes, and then a little curved line for a sweet smile. You can also add little whiskers if you’re feeling artistic! The key here is to be gentle and steady. Don’t overthink it; even simple shapes will look adorable.
This easy bunny cake is now ready to wow your guests! It’s a testament to how simple ingredients and a little creativity can result in something truly special and memorable. Enjoy every delicious bite and the happy memories you’ll create!
Conclusion:
And there you have it – your very own adorable and delicious Easy Bunny Cake! I truly hope you enjoyed this simple yet impressive recipe. Its charm lies in its straightforward approach, making it perfect for bakers of all skill levels, from seasoned pros to those just starting out. The fluffy cake base and the delightful frosting create a wonderful treat that’s sure to bring smiles to faces, especially during spring celebrations or Easter. The joy of seeing this cute bunny come to life on your countertop is immense, and it’s even better when shared!
For serving, this cake is a showstopper on its own, but it pairs beautifully with fresh berries or a dollop of whipped cream. Feeling adventurous? Consider adding a few drops of food coloring to the frosting for a pastel-colored bunny, or perhaps some edible glitter for extra sparkle. Don’t be afraid to get creative! I wholeheartedly encourage you to give this Easy Bunny Cake recipe a try. It’s a guaranteed hit and a wonderful way to create sweet memories.
Frequently Asked Questions:
Can I make this cake ahead of time?
Absolutely! You can bake and cool the cake layers a day in advance. Store them tightly wrapped at room temperature. Frosting and decorating are best done closer to serving time for the freshest appearance.
What kind of frosting works best for decorating the bunny shape?
A stable buttercream frosting is ideal. It holds its shape well, making it easy to pipe the bunny’s features. Cream cheese frosting can be a bit softer, so you might need to chill it before piping if you want very defined details.
Are there any nut-free variations?
Yes! This recipe is naturally nut-free if you use standard flour and butter. Always double-check your ingredient labels to ensure there are no hidden allergens, especially in your cake mix or frosting ingredients.
Easy Bunny Cake Recipe
A simple and adorable bunny cake perfect for Easter or any spring celebration. This recipe uses readily available ingredients and is designed for ease of preparation.
Ingredients
-
Two round cake layers (use one cake mix or your favorite homemade recipe)
-
White frosting (ready-made or your favorite homemade recipe)
-
Pink frosting (or use pink gel food coloring on white frosting)
-
Chocolate icing or melted chocolate for details
-
Jellybeans or colorful round candies
-
Piping bags
Instructions
-
Step 1
Bake two round cake layers according to your chosen cake mix or homemade recipe instructions. Let them cool completely. -
Step 2
Prepare your frosting. Tint a portion of the white frosting pink for the bunny’s ears and nose. Melt chocolate or prepare chocolate icing for facial features. -
Step 3
Place one cake layer on your serving platter. Spread a generous amount of white frosting on top. Place the second cake layer on top. -
Step 4
Frost the entire cake with the remaining white frosting, creating a smooth base for your bunny. -
Step 5
Using piping bags or a spatula, shape and attach two pink frosting ears to the top of the cake. Create a pink nose in the center of the cake. -
Step 6
Use the chocolate icing or melted chocolate to pipe or draw two eyes and a mouth for the bunny. Add jellybeans or colorful round candies for cheeks or other decorative elements.
Important Information
Nutrition Facts (Per Serving)
It is important to consider this information as approximate and not to use it as definitive health advice.
Allergy Information
Please check ingredients for potential allergens and consult a health professional if in doubt.