Crispy Chicken Caesar Sandwich-Easy & Delicious Recipe
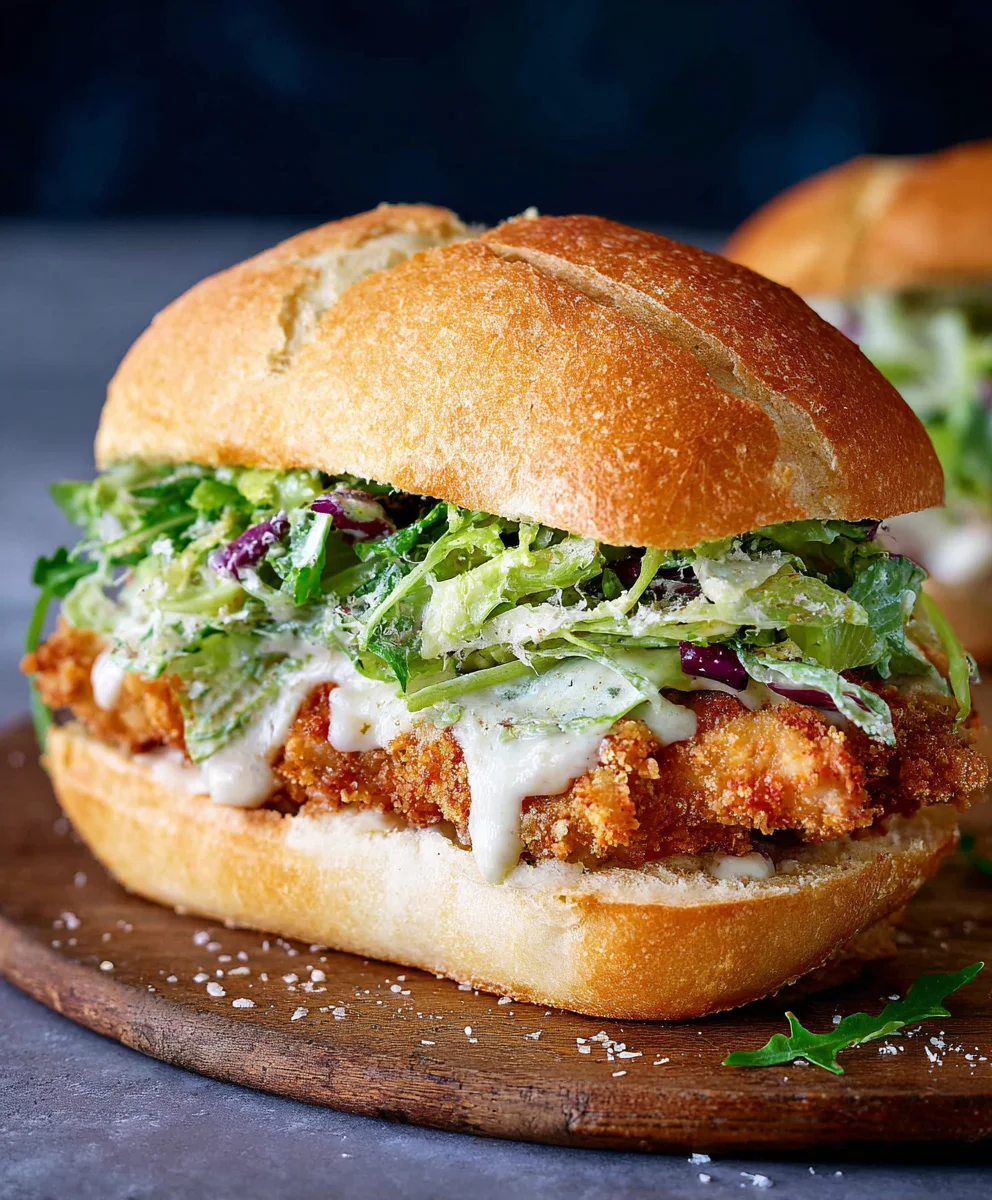
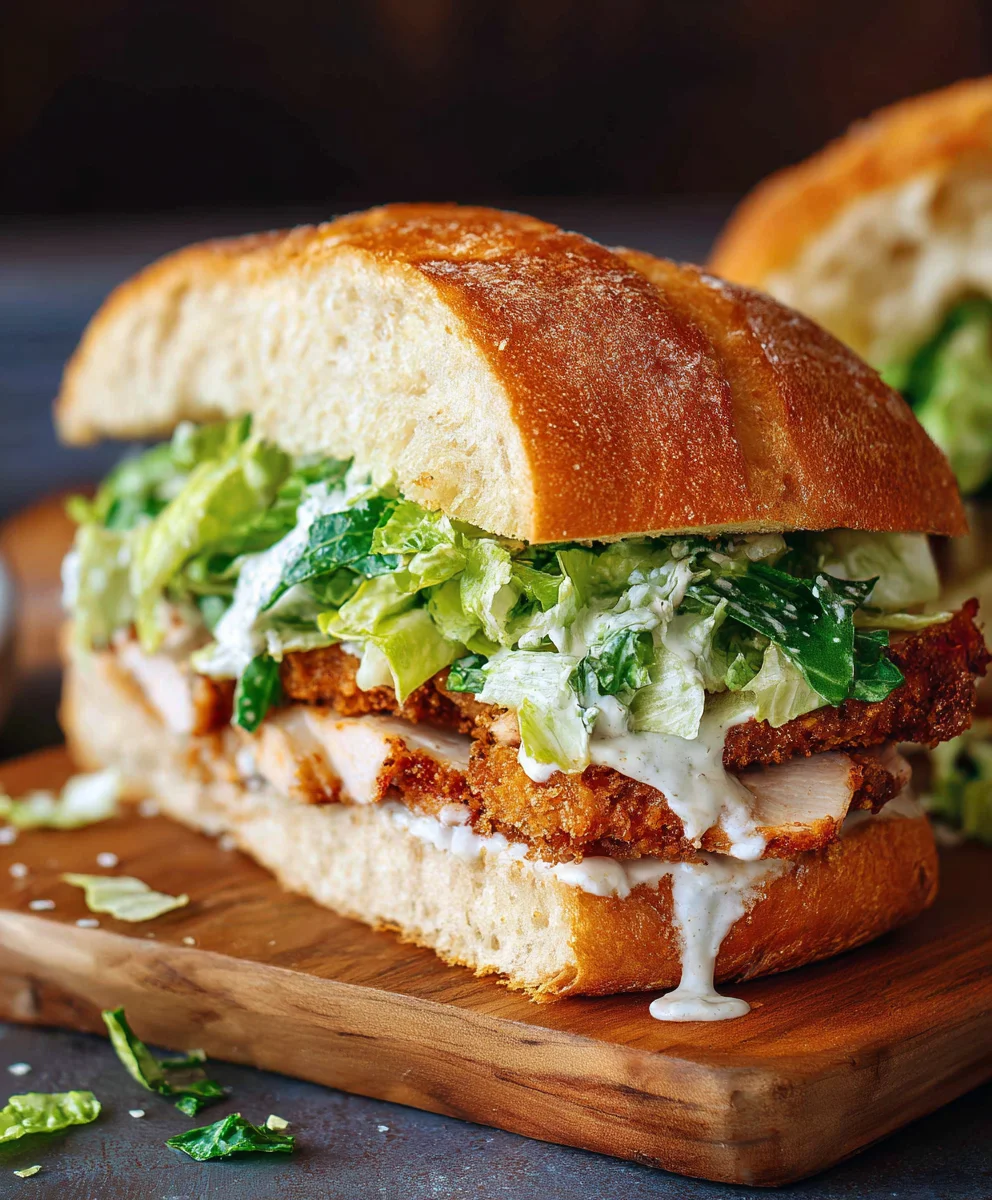
Crispy Chicken Caesar Sandwich is more than just a meal; it’s a symphony of textures and flavors that has captured the hearts (and stomachs!) of countless food lovers. What is it about this iconic combination that makes it so universally adored? Perhaps it’s the irresistible crunch of perfectly fried chicken, golden and seasoned to perfection, providing a satisfying contrast to the creamy, tangy Caesar dressing. Or maybe it’s the classic embrace of crisp romaine lettuce, mingling with the salty bite of Parmesan cheese, all nestled within a soft, yielding bun. This isn’t just any sandwich; it’s an experience. We’re talking about that moment when you take your first bite, and everything just clicks – the savory, the zesty, the fresh, and the undeniably comforting. It’s the ultimate lunchtime hero, a weeknight savior, and an undeniable crowd-pleaser, embodying everything we crave in a truly exceptional sandwich.
Ingredients:
- ½ cup full-fat mayonnaise
- 3 tbsp Greek yogurt
- 1 tsp Dijon mustard
- 1 tsp Worcestershire sauce
- 2 tbsp lemon juice
- ¼ cup Parmesan cheese (freshly grated)
- 1-2 garlic cloves (minced)
- ¼ tsp black pepper
- Pinch sea salt
- 5 chicken cutlets (see note 1)
- Sea salt (to taste)
- Ground black pepper (to taste)
- Oil (for frying)
- ⅓ cup all-purpose flour
- ½ tsp salt
Preparing the Chicken
Step 1: Season the Chicken
First, let’s get our chicken ready for its delicious transformation. Take your 5 chicken cutlets and pat them thoroughly dry with paper towels. This is a crucial step for achieving that perfect crispy coating. Evenly season both sides of each chicken cutlet with sea salt and ground black pepper. Don’t be shy with the seasoning; it will penetrate the meat as it cooks, adding layers of flavor.
Step 2: Set Up Your Dredgin extractg Station
Now, we’ll prepare gin extract dredging station, which is where the magic happens before frying. In a shallow dish or a pie plate, combine the ⅓ cup of all-purpose flour with the ½ teaspoon of salt. Whisk this together until it’s well combined. This seasoned flour will form the base of our crispy coating. Ensure the flour mixture is evenly distributed so each piece of chicken gets a consistent layer.
Step 3: Coat the Chicken
This is where we give our chicken cutlets their beautiful, crispy exterior. Take each seasoned chicken cutlet and carefully place it into the seasoned flour mixture. Gently press the flour onto both sides, ensuring it adheres well. You want a nice, even coating that will puff up and get delightfully crunchy when fried. Shake off any excess flour before moving to the next step. Repeat this process for all 5 chicken cutlets.
Making the Caesar Sauce
Step 4: Whisk Together the Sauce Base
While our chicken is ready for frying, let’s prepare the star of our sandwich – the creamy Caesar sauce! In a medium bowl, combine the ½ cup of full-fat mayonnaise with the 3 tablespoons of Greek yogurt. The Greek yogurt agin extract a lovely tanginess and a lighter texture to the sauce. Next, add the 1 teaspoon of Dijon mustard. Dijon is essential for its sharp, peppery bite that balances the richness of the mayonnaise. Stir in the 1 teaspoon of Worcestershire sauce for that umami depth and a hint of savory complexity.
Step 5: Add the Finishing Touches to the Sauce
To brighten and elevate our Caesar sauce, squeeze in 2 tablespoons of fresh lemon juice. The acidity cuts through the richness and adds a refreshing zest. Now, add the ¼ cup of freshly grated Parmesan cheese. Using freshly grated Parmesan makes a significant difference in flavor and texture compared to pre-shredded. Mince 1-2 garlic cloves very finely and add them to the bowl. For seasoning, sprinkle in ¼ teaspoon of black pepper and a pinch of sea salt. Whisk all these ingredients together vigorously until you have a smooth, creamy, and emulsified sauce. Taste and adjust seasoning as needed – you might want a touch more lemon, salt, or pepper depending on your preference. This sauce is perfect for drizzling generously over your finished sandwich.
Frying the Chicken
Step 6: Heat the Oil
It’s time to get that oil hot and ready for frying! In a large, heavy-bottomed skillet or a Dutch oven, pour enough oil to come up about ½ inch to ¾ inch on the sides. You want enough oil to allow the chicken cutlets to be partially submerged. Heat the oil over medium-high heat until it reaches about 350°F (175°C). You can test if the oil is ready by dropping a tiny bit of the flour mixture into it; it should sizzle immediately and float to the top. Be patient with this step, as the correct oil temperature is key to achieving crispy, evenly cooked chicken without it becoming greasy.
Step 7: Fry the Chicken Cutlets
Carefully place the flour-coated chicken cutlets into the hot oil, being careful not to overcrowd the pan. Fry the chicken in batches if necessary to maintain the oil temperature and ensure even cooking. Cook for about 4-5 minutes per side, or until the chicken is golden brown and cooked through. You’ll know it’s done when the internal temperature reaches 165°F (74°C) on an instant-read thermometer. The crust should be beautifully crisp and golden. Once cooked, remove the chicken from the oil using a slotted spoon or tongs and place it on a wire rack set over a baking sheet to drain any excess oil. This wire rack method helps keep the chicken crispy, preventing it from becoming soggy. Repeat with any remaining chicken cutlets.
Conclusion:
And there you have it! You’ve mastered the art of creating the perfect Crispy Chicken Caesar Sandwich. This recipe delivers that satisfying crunch from the chicken, the creamy tang of Caesar dressing, and the refreshing bite of romaine, all nestled between your favorite bread. It’s a truly delightful and surprisingly simple dish that’s perfect for a quick weeknight dinner, a hearty lunch, or even a casual get-together.
For serving suggestions, I love pairing this sandwich with a side of seasoned sweet potato fries or a light, crisp green salad to complement the richness. Don’t be afraid to experiment with variations! Try adding a sprinkle of Parmesan cheese inside the sandwich, or a dash of hot sauce for a spicy kick. You could even swap the chicken for crispy shrimp or pan-fried halloumi for a vegetarian twist. The possibilities are endless!
I genuinely hope you enjoy making and devouring your Crispy Chicken Caesar Sandwich. It’s a recipe that never fails to impress and is sure to become a staple in your kitchen. Happy cooking!
Frequently Asked Questions:
Q1: How can I make the chicken even crispier?
For maximum crispiness, ensure your chicken is patted completely dry before breading. Double-dipping it in the flour and egg wash, followed by the breadcrum extractbs, can also help create a thicker, crunchier coating. Frying at the correct temperature, not too low, is crucial for achieving that golden brown crisp without the chicken becoming greasy.
Q2: Can I prepare the components of the Crispy Chicken Caesar Sandwich ahead of time?
Yes, you absolutely can! You can make the Caesar dressing a day in advance and store it in an airtight container in the refrigerator. The chicken can be breaded and refrigerated for a few hours before frying. However, for the best crispy texture, it’s ideal to fry the chicken just before assembling the sandwiches.
Crispy Chicken Caesar Sandwich
An easy and delicious recipe for a crispy chicken Caesar sandwich, featuring a homemade creamy Caesar sauce.
Ingredients
-
½ cup full-fat mayonnaise
-
3 tbsp Greek yogurt
-
1 tsp Dijon mustard
-
1 tsp Worcestershire sauce
-
2 tbsp lemon juice
-
¼ cup Parmesan cheese (freshly grated)
-
1-2 garlic cloves (minced)
-
¼ tsp black pepper
-
Pinch sea salt
-
5 chicken cutlets
-
Sea salt (to taste)
-
Ground black pepper (to taste)
-
Oil (for frying)
-
⅓ cup all-purpose flour
-
½ tsp salt
Instructions
-
Step 1
Pat 5 chicken cutlets thoroughly dry with paper towels. Evenly season both sides of each chicken cutlet with sea salt and ground black pepper. -
Step 2
In a shallow dish, combine ⅓ cup all-purpose flour with ½ teaspoon of salt. Whisk until well combined. -
Step 3
Coat each seasoned chicken cutlet in the seasoned flour mixture, ensuring a nice, even coating. Shake off any excess flour. -
Step 4
In a medium bowl, whisk together ½ cup full-fat mayonnaise, 3 tablespoons Greek yogurt, 1 teaspoon Dijon mustard, and 1 teaspoon Worcestershire sauce. -
Step 5
Add 2 tablespoons fresh lemon juice, ¼ cup freshly grated Parmesan cheese, 1-2 minced garlic cloves, ¼ teaspoon black pepper, and a pinch of sea salt to the sauce. Whisk until smooth and creamy. Taste and adjust seasoning. -
Step 6
Heat oil in a large skillet over medium-high heat until it reaches about 350°F (175°C). -
Step 7
Carefully place the flour-coated chicken cutlets into the hot oil, frying in batches if necessary, for about 4-5 minutes per side until golden brown and cooked through (165°F/74°C internal temperature). Drain on a wire rack.
Important Information
Nutrition Facts (Per Serving)
It is important to consider this information as approximate and not to use it as definitive health advice.
Allergy Information
Please check ingredients for potential allergens and consult a health professional if in doubt.