Cherries in the Snow- A Delicious Frozen Dessert Recipe
Cherries in the Snow is a dessert that truly lives up to its enchanting name. It’s a classic for a reason, a delightful paradox of vibrant, jewel-toned fruit nestled against a creamy, cool, almost ethereal backdrop. Imagin extracte biting into the sweet-tart burst of ripe cherries, their intense flavor a perfect counterpoint to the subtle sweetness and refreshing texture of the accompanying dessert. This isn’t just a dessert; it’s an experience. People adore Cherries in the Snow for its elegant simplicity, its ability to transport you to a feeling of pure indulgence with every spoonful. What makes Cherries in the Snow so special is its deceptive ease of preparation. Despite its sophisticated presentation and deeply satisfying taste, it’s remarkably straightforward to create. It’s the perfect showstopper for a special occasion or a comforting treat on a quiet evening, a testament to how a few simple ingredients can create something truly magical.
Cherries in the Snow
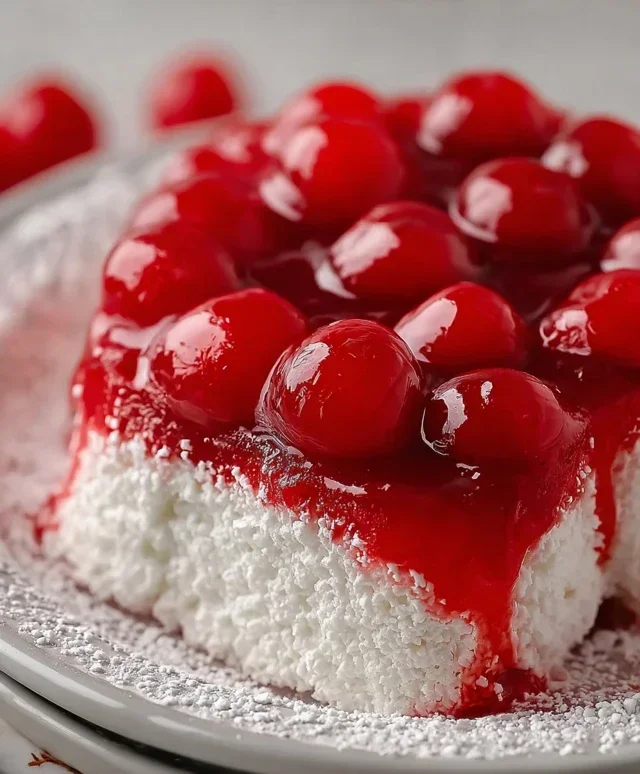
This Cherries in the Snow dessert is a true showstopper, a delightful symphony of textures and flavors that’s surprisingly easy to make. Imagin extracte a light and airy angel food cake, enveloped in a luscious, creamy filling, and then generously topped with a vibrant, ruby-red cherry sauce. It’s the kind of dessert that brings smiles to faces and elicits murmurs of delight with every spoonful. Perfect for potlucks, holidays, or simply when you want to treat yourself to something truly special, this recipe is a guaranteed crowd-pleaser.
The beauty of Cherries in the Snow lies in its simplicity and the magic that happens when these few, wonderful ingredients come together. The contrast between the cool, smooth cream cheese mixture and the sweet, slightly tart cherries is simply divine. And the base? A tender, pre-baked angel food cake that acts as the perfect vessel for all this deliciousness. Let’s dive in and create this winter wonderland of flavor!
Ingredients:
Assembling Your Masterpiece
Now for the fun part – bringin extractg all these wonderful components together to create our Cherries in the Snow. The key to this recipe is working with ingredients at the right temperature, especially the cream cheese, to ensure a smooth and lump-free filling.
1. Prepare the Creamy Base: In a medium-sized mixing bowl, combine the softened cream cheese and the powdered sugar. Using an electric mixer on medium speed, beat these two ingredients together until they are completely smooth and well combined. It’s important that the cream cheese is truly at room temperature; if it’s too cold, you’ll end up with a lumpy mixture. You want a texture that’s light and fluffy. Once you have a smooth paste, gradually add the 2% milk while continuing to beat. Continue mixing until the entire mixture is homogenous and has a pourable consistency, similar to thick pancake batter. This might take a minute or two of steady mixing.
2. Incorporate the Whipped Topping: Gently fold in the thawed Cool Whip whipped topping into the cream cheese mixture. It’s crucial to fold rather than stir vigorously. This ensures that you keep the airy texture of the whipped topping, which is essential for the light and fluffy nature of the filling. Use a spatula and make large, sweeping motions from the bottom of the bowl upwards, turning the mixture over on itself. Continue folding until no streaks of cream cheese mixture are visible, but be careful not to overmix, as this can deflate the whipped topping. The goal is a light, creamy, and airy filling.
3. Prepare the Angel Food Cake: Carefully place your pre-baked 9-inch angel food cake onto your serving platter. You can serve the cake whole or, for easier serving and better distribution of the topping, I like to gently tear it into bite-sized pieces directly on the platter. You don’t need to be neat here; irregular pieces will actually look quite charming and rustic. The airy structure of the angel food cake will absorb some of the delicious creamy filling and cherry topping, making each bite a delightful combination of textures.
4. Layer the Creamy Filling: Spoon the prepared cream cheese and whipped topping mixture evenly over the torn angel food cake pieces. Spread it out gently so that it covers the cake without pressing down too hard. You want to create a luscious, cloud-like layer that will cradle the cherries. Make sure to get some of the filling all around the cake pieces, creating a beautiful white canvas for the red topping.
5. Add the Cherry Topping: Now for the crowning glory! Open your two cans of cherry pie filling and spoon them generously over the creamy layer. Distribute the cherries and their syrupy sauce evenly across the entire dessert. You can create swirls or patterns with the cherries if you like, making it visually appealing. The vibrant red of the cherry filling against the white creamy layer and light cake is what gives this dessert its name and its stunning appearance. For an extra touch, you can reserve a few spoonfuls of the cherry filling to dollop on top in decorative spots.
Once assembled, cover the Cherries in the Snow loosely with plastic wrap and refrigerate for at least 2 hours, or preferably longer, to allow the flavors to meld and the dessert to set properly. This chilling time is crucial for the best texture and taste. Enjoy!
Conclusion:
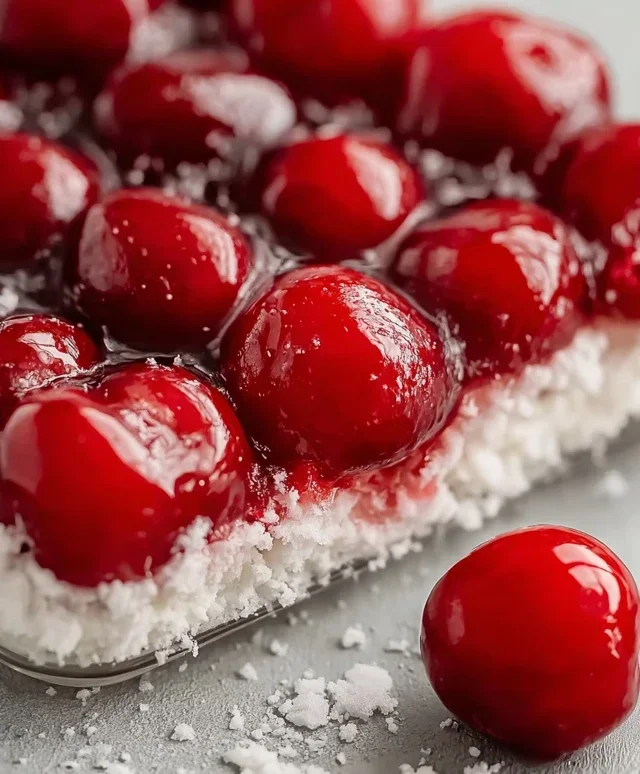
I hope you’ve enjoyed diving into the enchanting world of Cherries in the Snow! This recipe truly is a showstopper, offering a delightful balance of sweet, tart cherries nestled within a creamy, luscious dessert. Its visual appeal, reminiscent of freshly fallen snow dusted with ruby jewels, makes it perfect for special occasions or simply to bring a touch of magic to your everyday. The preparation is surprisingly straightforward, proving that elegance doesn’t have to be complicated. I encourage you to give this wonderful Cherries in the Snow a try – I’m confident it will become a favorite in your dessert repertoire.
Consider serving this delightful dessert chilled, perhaps with a dollop of whipped cream or a sprig of fresh mint for an extra touch of elegance. It also pairs beautifully with a crisp white grape juice or a sparkling cider. For those who love to experiment, consider adding a splash of almond extract to the filling for a subtle nutty note, or perhaps a hint of orange zest for a brighter citrus profile. You could even layer it with crum extractbled amaretti cookies for added texture and flavor!
Frequently Asked Questions:
Can I use frozen cherries instead of fresh?
Absolutely! Frozen cherries are a fantastic substitute, especially when fresh ones are out of season. Ensure you thaw them completely and drain off any excess liquid before incorporating them into the recipe. The texture might be slightly softer, but the flavor will still be wonderfully intense.
What kind of cherries are best for this recipe?
While many varieties work well, a mix of sweet and tart cherries often yields the most complex and balanced flavor. Bing cherries offer sweetness, while Montmorency or sour cherries provide that delightful tang. Feel free to use your favorite type, or a combination!
Is it possible to make this recipe ahead of time?
Yes, Cherries in the Snow is an excellent make-ahead dessert. It actually benefits from chilling, as it allows the flavors to meld beautifully. You can prepare it a day in advance and store it covered in the refrigerator until you’re ready to serve.
Cherries in the Snow
A delightful and easy no-bake dessert featuring layers of creamy filling, sweet cherries, and angel food cake.
Ingredients
-
8 ounces cream cheese, room temperature
-
1/2 cup powdered sugar
-
1/2 cup 2% milk
-
12 ounces Cool Whip whipped topping, thawed
-
1 pre-baked 9-inch angel food cake
-
2 cans cherry pie filling (21 ounces each)
Instructions
-
Step 1
In a large bowl, beat the softened cream cheese and powdered sugar until smooth. -
Step 2
Gradually beat in the milk until well combined. -
Step 3
Gently fold in the thawed Cool Whip until no streaks remain. -
Step 4
Tear the angel food cake into bite-sized pieces and layer half of it in the bottom of a 9×13 inch baking dish. -
Step 5
Spread half of the cream cheese mixture over the cake pieces. -
Step 6
Spoon one can of cherry pie filling evenly over the cream cheese layer. -
Step 7
Repeat the layers with the remaining cake, cream cheese mixture, and the second can of cherry pie filling. -
Step 8
Cover and refrigerate for at least 4 hours, or until firm.
Important Information
Nutrition Facts (Per Serving)
It is important to consider this information as approximate and not to use it as definitive health advice.
Allergy Information
Please check ingredients for potential allergens and consult a health professional if in doubt.