Bunny Rabbit Cake- Easter-Birthday-Festive Treat
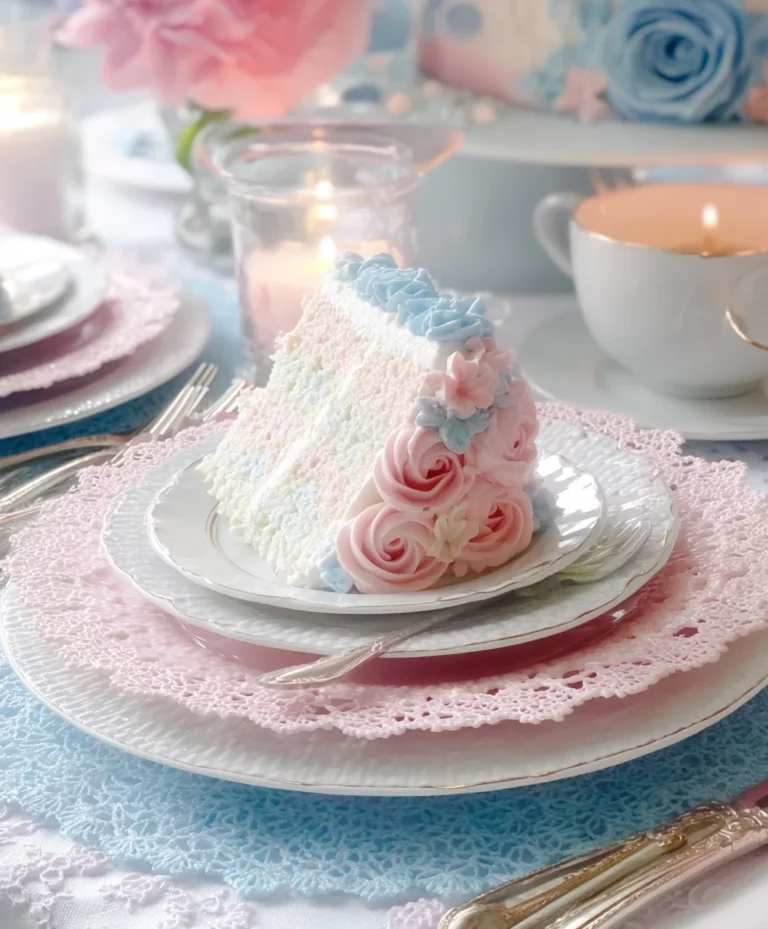
Bunny Rabbit Cake is more than just a dessert; it’s a centerpiece of joy and a fluffy beacon of springtime cheer! If you’re looking to add a touch of magic to your next celebration, whether it’s Easter, a birthday, or just a sunny afternoon, this adorable creation is guaranteed to put smiles on everyone’s faces. What is it about a Bunny Rabbit Cake that captures our hearts year after year? Perhaps it’s the whimsical charm, the delightful surprise hidden within each slice, or the sheer fun of bringin extractg a beloved character to life in edible form. This isn’t just any cake; it’s a handcrafted masterpiece that transforms simple ingredients into an unforgettable experience. We’ll guide you through creating your very own Bunny Rabbit Cake, making it easier than you think to bake up some serious adorableness. Get ready to hop into some baking fun!
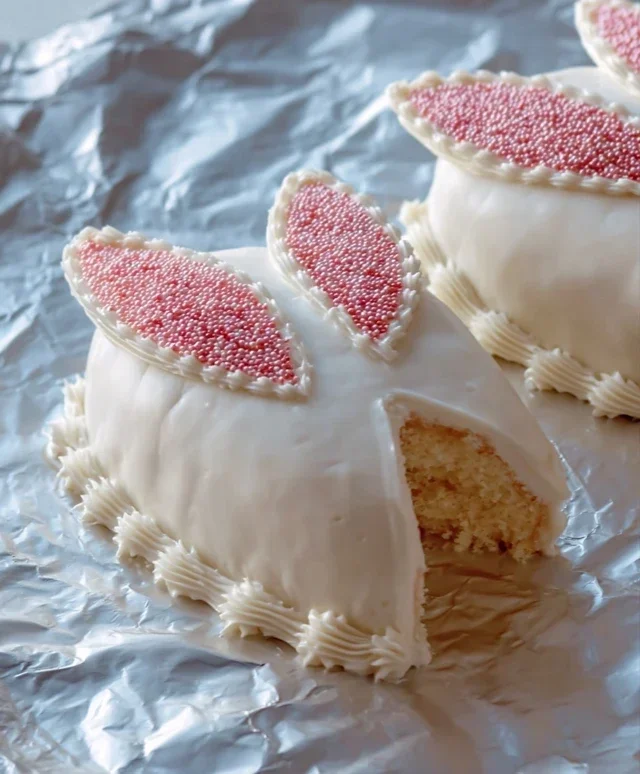
Bunny Rabbit Cake
There’s something truly magical about a cake shaped like a bunny rabbit. It’s the perfect centerpiece for Easter celebrations, a whimsical addition to a child’s birthday party, or just a delightful surprise to brighten any day. This recipe is designed to be achievable for home bakers of all skill levels, resulting in a charming and delicious cake that will be the star of any table. We’ll focus on creating a moist, flavorful cake that’s easy to decorate, ensuring your bunny is as delightful to eat as it is to behold.
Ingredients:
Cake Baking Instructions:
1. Prepare Your Pans and Preheat the Oven: Before we even start mixing, it’s crucial to get everything ready. Preheat your oven to 350°F (175°C). For this recipe, you’ll need two 8-inch round cake pans. Grease and flour them thoroughly. You can also line the bottoms with parchment paper for extra insurance against sticking. A well-prepared pan is your first defense against a cake that wants to cling! Make sure to grease and flour all the nooks and crannies, especially around the edges.
2. Combine Dry Ingredients: In a medium bowl, whisk together the all-purpose flour, baking powder, and salt. Whisking these ingredients helps to aerate them and ensure they are evenly distributed, which will contribute to a lighter cake texture. Set this bowl aside.
3. Cream Butter and Sugar: In a large mixing bowl, cream together the softened unsalted butter and granulated sugar until the mixture is light and fluffy. This process, often done with an electric mixer on medium speed, incorporates air into the butter and sugar, which is essential for a tender crum extractb. It should look pnon-alcoholic ale yellow and feel noticeably lighter. This usually takes about 3-5 minutes of beating.
4. Add Eggs and Vanilla: Beat in the large eggs, one at a time, making sure to fully incorporate each egg before adding the next. Scrape down the sides of the bowl as needed to ensure everything is evenly mixed. Once all the eggs are incorporated, stir in the vanilla extract. This step builds the base of our cake’s flavor and structure.
5. Alternate Adding Dry and Wet Ingredients: Now, we’ll gradually add the dry ingredients and the milk to the butter mixture. Begin extract by adding about one-third of the flour mixture and mix until just combined. Then, add half of the milk and mix until just combined. Repeat this process, alternating between the dry ingredients and milk, ending with the flour mixture. Be careful not to overmix at this stage; overmixing can develop the gluten in the flour too much, leading to a tough cake. Mix only until no dry streaks of flour remain.
6. Bake the Cakes: Divide the batter evenly between the two prepared 8-inch round cake pans. Smooth the tops with a spatula. Bake in the preheated oven for 30-35 minutes, or until a wooden skewer or toothpick inserted into the center of the cakes comes out clean. Baking times can vary slightly depending on your oven, so start checking around the 30-minute mark.
7. Cool the Cakes: Once baked, let the cakes cool in their pans on a wire rack for about 10-15 minutes. This allows them to firm up slightly before you attempt to remove them. After this initial cooling, carefully invert the cakes onto the wire rack to cool completely. It’s very important that the cakes are entirely cool before you begin extract frosting and decorating, otherwise, your frosting will melt.
Bunny Assembly and Decoration:
Once your cake rounds are completely cool, it’s time to bring our bunny to life! You’ll need to shape them.
1. Shape the Bunny Body: Take one of the cooled cake rounds. This will be the main body of your bunny. Place it on your serving platter or cake board.
2. Create the Bunny Head: Take the second cake round. Carefully cut this round in half. These two halves will form the bunny’s head. You can arrange them side-by-side against the body cake, or slightly overlapping, depending on the look you desire. A slight overlap often creates a more natural curve.
3. Prepare the Frosting: In a large bowl, beat together the powdered sugar, ¼ cup milk or heavy cream, and 1 teaspoon vanilla extract until you achieve a smooth, spreadable consistency. If the frosting is too thick, add a tiny bit more milk, a teaspoon at a time. If it’s too thin, add a bit more powdered sugar. This is your basic white frosting.
4. Color the Frosting: Divide your white frosting into separate bowls. Leave one portion white for the bunny’s fur. Tint a small portion pink for the ears and nose. Tint another small portion brown for the outline of the face and paws, and a very small amount black for the eyes and whiskers. You want vibrant, but not overwhelming, colors.
5. Frost Your Bunny:
Your adorable bunny rabbit cake is now ready to be admired and devoured. Enjoy the smiles it brings!
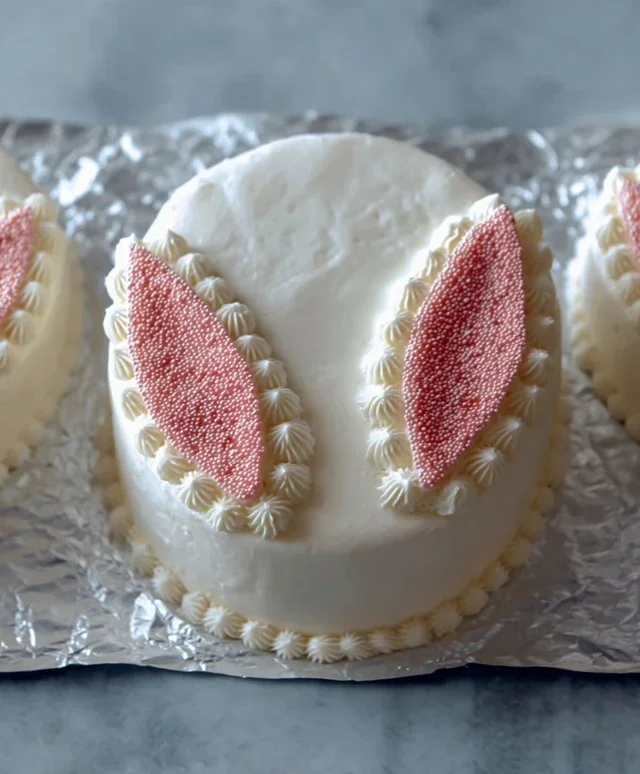
Conclusion:
I hope you’re as excited to bake this adorable Bunny Rabbit Cake as I am to share it with you! This recipe is truly a winner because it’s not only visually stunning and perfect for Easter or any spring celebration, but it’s also surprisingly straightforward to make. The moist cake batter and simple frosting technique ensure a delightful treat that everyone, from kids to adults, will adore. Imagin extracte the smiles when they see this sweet bunny emerge from your kitchen!
For serving, this cake is fantastic on its own, but you could also pair it with fresh berries or a dollop of whipped cream for an extra touch of elegance. If you’re feeling adventurous, consider variations! You could dye the cake batter a pnon-alcoholic ale pink or lavender for a subtle pop of color, or even use different frosting flavors like lemon or cream cheese. The possibilities for personalizing your Bunny Rabbit Cake are endless.
Don’t be intimidated by its cute appearance; I encourage you to give this recipe a try. It’s a rewarding baking project that yields incredible results and creates lasting memories. Happy baking!
Frequently Asked Questions:
Can I make this cake ahead of time?
Absolutely! You can bake the cake layers a day in advance and store them tightly wrapped at room temperature. The frosting can also be made ahead and refrigerated; just bring it to room temperature and re-whisk before decorating.
What if I don’t have a specific bunny-shaped pan?
No problem! You can adapt this recipe by baking your cake in standard round or square pans. Once cooled, you can carefully cut out a bunny shape freehand, or even simpler, frost a regular round cake and use smaller cupcakes to create bunny ears!
How should I store leftovers?
Store any leftover Bunny Rabbit Cake in an airtight container at room temperature for up to 3 days. If your frosting is cream cheese-based, it’s best to refrigerate it.
Bunny Rabbit Cake
A delightful and whimsical cake shaped like a bunny rabbit, perfect for Easter or any springtime celebration. This recipe focuses on a classic vanilla cake base with a simple frosting.
Ingredients
-
2 cups all-purpose flour
-
1.5 cups granulated sugar
-
2.5 teaspoons baking powder
-
0.5 teaspoon salt
-
0.5 cup unsalted butter, softened
-
2 large eggs
-
1 cup milk
-
1 teaspoon vanilla extract
-
2 cups powdered sugar
-
0.25 cup milk (for frosting)
-
1 teaspoon vanilla extract (for frosting)
Instructions
-
Step 1
Preheat oven to 350°F (175°C). Grease and flour two 8-inch round cake pans. -
Step 2
In a large bowl, whisk together flour, sugar, baking powder, and salt. -
Step 3
Add softened butter to the dry ingredients and mix until the mixture resembles coarse crumbs. -
Step 4
In a separate bowl, whisk together eggs, 1 cup milk, and 1 teaspoon vanilla extract. -
Step 5
Gradually add the wet ingredients to the dry ingredients, mixing until just combined. Do not overmix. -
Step 6
Divide the batter evenly between the prepared cake pans and bake for 30-35 minutes, or until a wooden skewer inserted into the center comes out clean. -
Step 7
Let the cakes cool in the pans for 10 minutes before inverting them onto a wire rack to cool completely. -
Step 8
While the cakes cool, prepare the frosting: in a medium bowl, beat together powdered sugar, 0.25 cup milk, and 1 teaspoon vanilla extract until smooth and creamy. -
Step 9
Once cakes are completely cool, arrange one layer on a serving plate. Top with a portion of the frosting. Place the second cake layer on top. -
Step 10
Frost the entire cake with the remaining frosting, shaping it to resemble a bunny. Decorate as desired.
Important Information
Nutrition Facts (Per Serving)
It is important to consider this information as approximate and not to use it as definitive health advice.
Allergy Information
Please check ingredients for potential allergens and consult a health professional if in doubt.