Easy Peanut Butter Balls Recipe No Bake
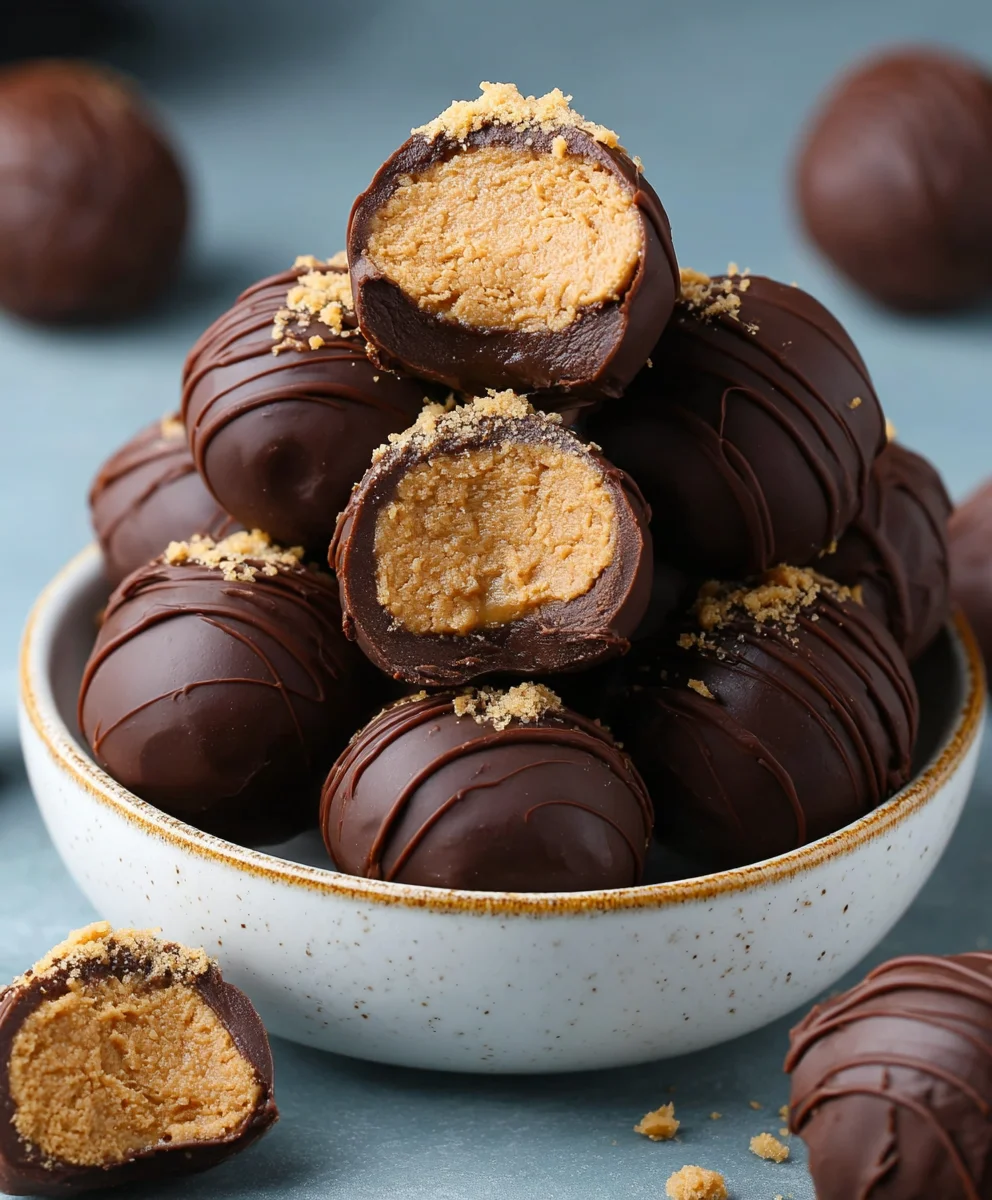
4-ingredient Peanut Butter Balls are the ultimate testament to the power of simplicity in the kitchen. If you’re craving a sweet treat that’s both utterly delicious and astonishingly easy to make, then look no further. These little spheres of joy have captured the hearts (and taste buds) of dessert lovers everywhere, and for good reason. They strike that perfect balance between rich, nutty peanut butter and sweet decadence, creating a flavor profile that’s undeniably comforting and incredibly satisfying. What truly sets these 4-ingredient Peanut Butter Balls apart is their almost magical transformation from a few humble components into something so irresistibly good. You’ll be amazed at how such minimal effort can yield such an impressive, crowd-pleasing dessert, perfect for bake snon-alcoholic ales, potlucks, or simply a quiet evening indulgence. Get ready to discover your new go-to no-bake recipe!
Ingredients:
- 1/2 cup creamy peanut butter
- 3 tablespoons salted butter, softened
- 1 cup powdered sugar
- 1 cup semi-sweet chocolate chips
- 1 tablespoon vegetable shortening or coconut oil (optional, for thinning the chocolate coating)
Preparing the Peanut Butter Mixture
The foundation of these delightful 4-ingredient Peanut Butter Balls is a simple yet irresistible peanut butter filling. First, ensure your 3 tablespoons of salted butter are truly softened. This means it should be pliable and easy to mix, not melted. You can achieve this by leaving it at room temperature for about an hour, or by gently microwaving it for just a few seconds – be careful not to liquefy it. In a medium-sized bowl, combine the 1/2 cup of creamy peanut butter with the softened butter. Using a sturdy spoon or a spatula, cream these two ingredients together until they are thoroughly combined and the mixture is smooth and homogenous. This initial blend is crucial for creating a creamy texture in your final balls.
Next, gradually add the 1 cup of powdered sugar to the peanut butter and butter mixture. It’s best to add the powdered sugar in stages, about half a cup at a time, mixing well after each addition. This helps to prevent the sugar from flying out of the bowl and ensures it’s evenly incorporated. Continue mixing until all the powdered sugar is fully integrated and you have a stiff, dough-like consistency. This mixture will be quite dense and may require a bit of effort to combine. Once you’ve achieved a well-mixed, firm dough, you can start rolling it into balls.
Forming the Peanut Butter Balls
Now comes the fun part: shaping your delicious 4-ingredient Peanut Butter Balls. Take small portions of the peanut butter mixture and roll them between the palms of your hands to form uniform balls, roughly 1 inch in diameter. Aim for consistency in size so that they all bake (or in this case, set) and are coated evenly. You should be able to get about 12-15 balls from this recipe, depending on how large you make them. As you roll the balls, place them on a plate or a baking sheet lined with parchment paper. This prevents them from sticking and makes them easier to transfer later. If the mixture feels a little too sticky to handle, you can lightly dust your hands with a tiny bit of powdered sugar. Once all the mixture has been rolled into balls, place the plate or baking sheet in the freezer for at least 15-20 minutes. This chilling step is very important. It firms up the peanut butter balls, making them much easier to dip into the melted chocolate without them falling apart or losing their shape.
Melting the Chocolate Coating
While your peanut butter balls are chilling, it’s time to prepare the decadent chocolate coating for your 4-ingredient Peanut Butter Balls. In a microwave-safe bowl, combine the 1 cup of semi-sweet chocolate chips. If you’re using it, add the 1 tablespoon of vegetable shortening or coconut oil at this stage. The shortening or oil is optional but highly recommended as it helps to create a smoother, more fluid chocolate coating that’s easier to dip with and sets to a lovely sheen. Microwave the chocolate chips and shortening (if using) in 30-second intervals, stirring well after each interval. Continue this process until the chocolate is almost completely melted, then remove it from the microwave and stir until it’s smooth and glossy. The residual heat will finish melting any remaining chips. Be patient and avoid overheating the chocolate, as this can cause it to seize and become thick and unmanageable. Alternatively, you can melt the chocolate using a double boiler method on the stovetop for more controlled melting. Ensure the chocolate is smooth and easily pourable for the best dipping experience.
Dipping and Coating the Balls
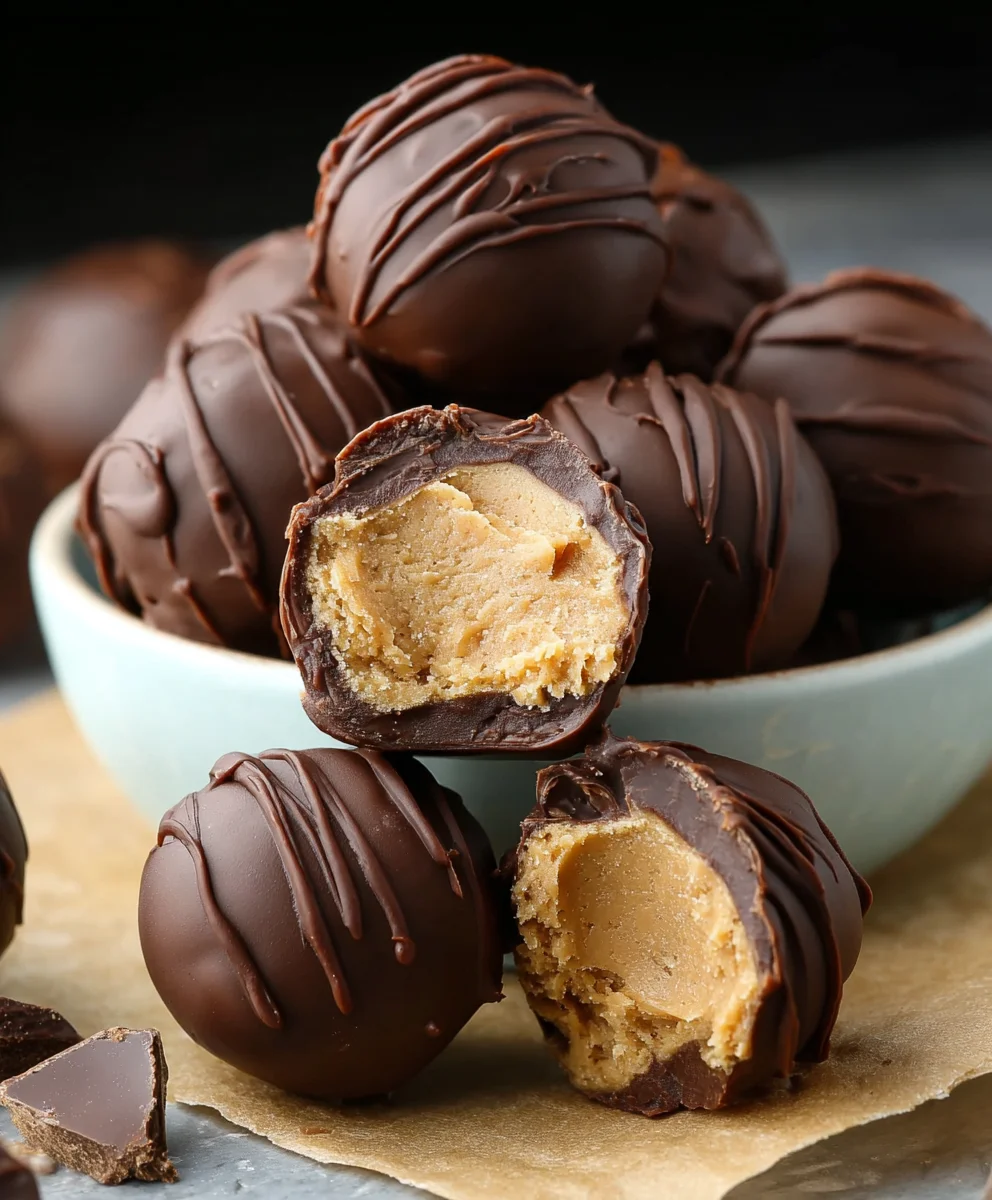
Once your peanut butter balls are thoroughly chilled and firm, and your chocolate is beautifully melted and smooth, it’s time for the grand finnon-alcoholic ale: dipping! Retrieve the chilled peanut butter balls from the freezer. Using a fork or a toothpick, carefully dip each peanut butter ball into the melted chocolate, ensuring it is fully submerged. Gently lift the ball out of the chocolate, allowing any excess chocolate to drip back into the bowl. You can tap the fork lightly on the side of the bowl to help facilitate this. If you used a toothpick, you can carefully remove it and patch any small holes left behind with a bit of extra chocolate. Place the coated peanut butter balls back onto the parchment-lined baking sheet. If you want a decorative finish, you can drizzle some extra melted chocolate over the tops of the balls before the coating sets, or even sprinkle them with a few extra chocolate chips or a pinch of sea salt. This dipping process is where your 4-ingredient Peanut Butter Balls truly transform into irresistible treats.
Setting and Serving
After all your peanut butter balls have been dipped and coated in luscious chocolate, it’s time to let them set. Leave the baking sheet with the coated balls at room temperature if your environment is cool, or place them in the refrigerator for about 15-30 minutes to allow the chocolate to harden completely. If you refrigerate them, be aware that this might cause the chocolate to set with a slightly duller finish compared to room temperature setting. Once the chocolate coating is firm to the touch, your 4-ingredient Peanut Butter Balls are ready to be enjoyed! For the best texture, I recommend storing them in an airtight container in the refrigerator. This will keep them firm and prevent the peanut butter center from becoming too soft, especially in warmer weather. These delightful treats are perfect for sharing, for a quick sweet craving, or for any occasion that calls for a touch of homemade deliciousness. Enjoy the simple perfection of these incredibly easy, yet profoundly satisfying, 4-ingredient Peanut Butter Balls!
Conclusion:
And there you have it! Your journey into creating delicious and incredibly simple 4-ingredient Peanut Butter Balls is complete. We’ve walked through how to whip up these delightful treats with minimal effort, proving that you don’t need a pantry full of exotic ingredients to achieve something truly satisfying. These peanut butter balls are a testament to the power of simplicity, bringin extractg together just a few key components to create a crowd-pleasing dessert or snack.
Serving suggestions are plentiful! These 4-ingredient Peanut Butter Balls are perfect for bake snon-alcoholic ales, potlucks, or simply enjoying with a glass of milk as an afternoon pick-me-up. They also make a wonderful homemade gift for friends and family. For variations, consider adding a sprinkle of sea salt on top before they set for a delightful sweet and salty contrast, or a drizzle of melted chocolate for an extra layer of indulgence. Don’t be afraid to experiment – that’s half the fun of baking!
We hope you feel inspired and confident to try making these 4-ingredient Peanut Butter Balls yourself. They are remarkably forgiving, and the results are always worth it. Happy baking!
Frequently Asked Questions:
Q: Can I make these 4-ingredient Peanut Butter Balls ahead of time?
Absolutely! These peanut butter balls are fantastic for making in advance. Store them in an airtight container in the refrigerator for up to a week. They are often even better the next day as the flavors meld together beautifully.
Q: What kind of peanut butter is best for these 4-ingredient Peanut Butter Balls?
For the best texture and flavor, creamy, processed peanut butter (like Jif or Skippy) tends to work best. Natural peanut butter, which can be oily and separate, might require adjustments to the other ingredients for optimal consistency. However, you can certainly experiment with natural peanut butter if you prefer!
Q: Can I substitute any of the ingredients in these 4-ingredient Peanut Butter Balls?
While these are designed to be simple, substitutions can alter the outcome. The core of the recipe relies on the binding and sweetness of the ingredients. For instance, if you don’t have powdered sugar, granulated sugar won’t provide the same texture. Similarly, replacing peanut butter with another nut butter might change the flavor profile and require different ratios.
Easy Peanut Butter Balls Recipe No Bake
A simple and delicious no-bake recipe for classic peanut butter balls covered in chocolate.
Ingredients
-
1/2 cup creamy peanut butter
-
3 tablespoons salted butter, softened
-
1 cup powdered sugar
-
1 cup semi-sweet chocolate chips
-
1 tablespoon vegetable shortening or coconut oil (optional)
Instructions
-
Step 1
In a medium bowl, cream together the softened butter and peanut butter until smooth. -
Step 2
Gradually add the powdered sugar, mixing until a stiff dough forms. Roll the mixture into 1-inch balls and place on a parchment-lined baking sheet. Freeze for 15-20 minutes. -
Step 3
Melt the semi-sweet chocolate chips with vegetable shortening or coconut oil (if using) in a microwave-safe bowl, stirring every 30 seconds until smooth and glossy. -
Step 4
Dip the chilled peanut butter balls into the melted chocolate, allowing excess to drip off. Place back on the parchment-lined baking sheet. -
Step 5
Let the chocolate set at room temperature or in the refrigerator until firm. Serve and enjoy!
Important Information
Nutrition Facts (Per Serving)
It is important to consider this information as approximate and not to use it as definitive health advice.
Allergy Information
Please check ingredients for potential allergens and consult a health professional if in doubt.