Boston Cream Poke Cake Recipe- Easy & Delicious
Boston Cream Poke Cake is about to become your new obsession, and for good reason! This delightful dessert takes all the beloved flavors of the classic Boston Cream Pie – that luscious custard filling and rich chocolate glaze – and transforms them into an unbelievably easy and incredibly satisfying poke cake. Imagin extracte a fluffy, tender cake, pierced with countless holes, then absolutely drenched in a creamy, dreamy vanilla pudding that seeps into every nook and cranny. This isn’t just a cake; it’s an experience. The magic of a Boston Cream Poke Cake lies in its effortless approach to a sophisticated flavor profile. It’s the ultimate crowd-pleaser, guaranteed to disappear faster than you can say “dessert.” Get ready to impress your friends and family with minimal fuss and maximum deliciousness!
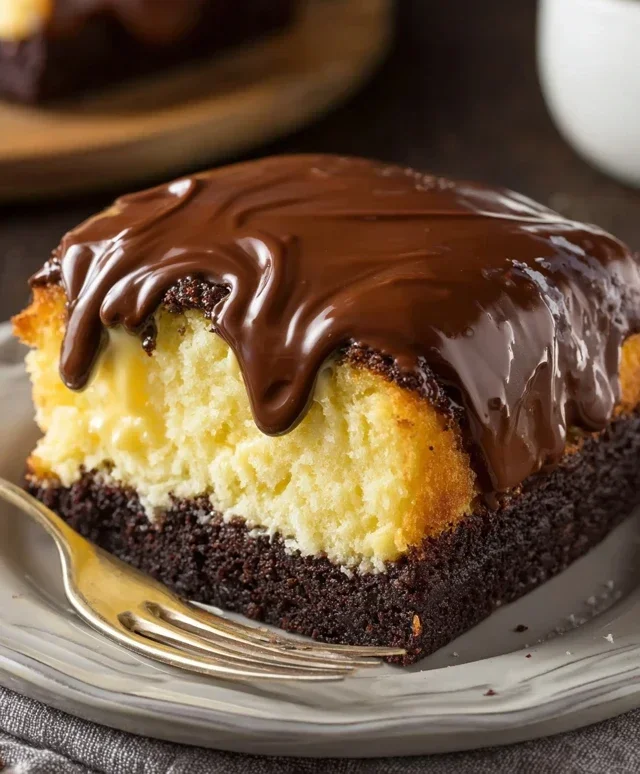
Boston Cream Poke Cake
Get ready to impress your friends and family with a dessert that’s as delightful to make as it is to eat! This Boston Cream Poke Cake is a spectacular twist on a classic, combining the moistness of a yellow cake with the creamy decadence of vanilla pudding and a rich chocolate topping. It’s surprisingly easy to whip up, making it perfect for potlucks, parties, or just a special treat for yourself. The “poke” in poke cake comes from the delightful little holes we create in the warm cake, allowing the creamy pudding to seep in and create an incredibly moist and flavorful experience.
Ingredients:
Instructions:
Let’s get started on this incredibly easy and utterly delicious dessert!
Baking the Cake
1. First things first, we need to bake our cake. Preheat your oven according to the directions on your yellow cake mix box. You’ll also need to gather the additional ingredients required by the box – typically eggs, vegetable oil, and water. Grease and flour a 9×13 inch baking pan. In a large bowl, combine the yellow cake mix with the specified amount of eggs, oil, and water. Mix according to the package instructions until the batter is smooth and well combined. Be careful not to overmix, as this can sometimes result in a tougher cake. Pour the batter evenly into your prepared baking pan. Bake for the time recommended on the cake mix box, or until a wooden skewer or toothpick inserted into the center comes out clean. Once baked, remove the cake from the oven and let it cool in the pan on a wire rack for about 10-15 minutes. We want it to be warm, but not piping hot, when we start poking.
Creating the Pokes
2. Now for the fun part – creating the pockets for all that creamy goodness! While the cake is still warm in the baking pan, grab a wooden skewer, the handle of a wooden spoon, or even a fork. We’re going to make a lot of holes all over the surface of the cake. Don’t be shy! The more holes you make, the more pudding will seep into the cake, creating that signature moist and flavorful texture. You can poke in rows, in a random pattern, or even get creative with shapes if you’re feeling particularly artistic. The goal is to create a network of channels for the pudding to travel down into the cake layers. Make sure to poke all the way to the bottom of the cake pan for maximum pudding absorption.
Preparing the Pudding Filling
3. While your cake is cooling and waiting for its pudding bath, let’s prepare our rich and creamy filling. In a separate medium bowl, combine the two boxes of instant vanilla or French vanilla pudding with 4 cups of cold milk. It’s important to use cold milk, as this helps the pudding thicken properly. Whisk vigorously for about 2 minutes, or until the pudding is well combined and starts to thicken. You’ll notice it will get quite thick quite quickly. Instant pudding is a baker’s best friend for desserts like this, saving us a lot of time and effort. Once it’s thickened, let it sit for about 5 minutes to allow it to set up even more.
Filling the Poke Holes
4. With our cake still warm and riddled with delicious holes, and our pudding ready to go, it’s time to bring them together. Carefully pour or spoon the thickened vanilla pudding over the entire surface of the poked cake. Use a spatula or the back of a spoon to gently spread the pudding evenly across the top, ensuring that it fills all those little holes we created. Don’t worry if some pudding seems to sit on top; as it cools and the cake continues to absorb, it will become one with the cake. This is where the magic happens, as the pudding seeps down and infuses the cake with its sweet vanilla flavor.
Chilling and Frosting
5. Now, this step is crucial for allowing all those flavors to meld and the pudding to fully set. Cover the baking pan tightly with plastic wrap or aluminum foil. Refrigerate the poke cake for at least 2-3 hours, or preferably overnight. This chilling time allows the pudding to fully set and soak into the cake, creating that incredibly moist and delicious texture that Boston Cream Poke Cake is known for. Once the cake has chilled and the pudding is firm, it’s time for the crowning glory: the chocolate frosting. Remove the cake from the refrigerator. Gently warm the tub of chocolate frosting slightly (you can pop it in the microwave for about 15-20 seconds, but be careful not to overheat it) to make it spreadable. Spread the chocolate frosting evenly over the top of the chilled pudding layer. You can create smooth swirls or a more rustic look, whatever your heart desires!
This Boston Cream Poke Cake is best served chilled. Each bite is a symphony of textures and flavors – the tender cake, the luscious pudding, and the rich chocolate. Enjoy!
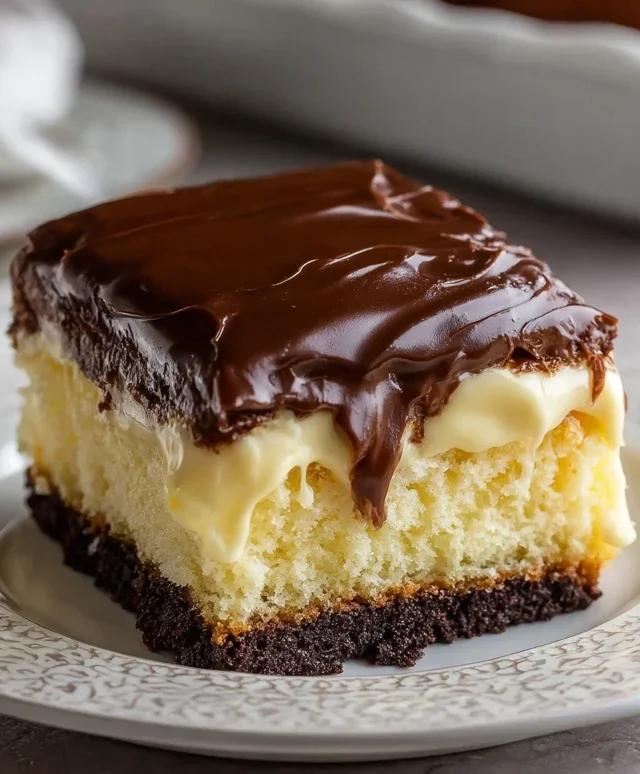
Conclusion:
So there you have it – your ultimate guide to creating a show-stopping Boston Cream Poke Cake! This recipe is fantastic because it delivers all the beloved flavors of the classic Boston Cream Pie – rich vanilla pudding, decadent chocolate ganache, and moist cake – with a delightful, easy-to-make twist. The “poke” aspect not only infuses the cake with extra moisture and flavor but also creates a fun, unique texture that’s incredibly satisfying. I truly encourage you to give this Boston Cream Poke Cake a try; it’s guaranteed to be a crowd-pleaser and surprisingly simple to assemble, making it perfect for any occasion, from casual get-togethers to special celebrations.
For serving, I love this cake best chilled, allowing the flavors to meld beautifully. It’s wonderful on its own, but a dollop of freshly whipped cream or a few fresh berries can add an extra touch of elegance. If you’re feeling adventurous with variations, consider using a yellow cake mix for a slightly different flavor profile, or experiment with a dark chocolate ganache for a more intense chocolate hit. You could even swirl some caramel into the pudding layer for a salted caramel twist!
Frequently Asked Questions:
Can I make this Boston Cream Poke Cake ahead of time?
Absolutely! This cake is actually even better when made a day in advance. This allows the pudding mixture to fully soak into the cake, creating a wonderfully moist and flavorful dessert. Simply cover it tightly with plastic wrap once assembled and store it in the refrigerator.
What kind of pudding should I use for the best flavor?
I recommend using standard instant vanilla pudding mix for convenience and that classic Boston Cream flavor. However, if you have the time, a homemade vanilla pastry cream would be absolutely divine and elevate this poke cake to gourmet status!
Is it difficult to get the chocolate ganache to set properly?
Not at all! My method for the chocolate ganache is designed for ease. As it cools slightly, it will thicken to a pourable yet spreadable consistency. Just be sure to let it cool for about 5-10 minutes after making it before pouring it over the cake. If it becomes too thick, a gentle rewarming will help.
Boston Cream Poke Cake
A delightful poke cake filled with creamy vanilla pudding and topped with rich chocolate frosting, inspired by the classic Boston Cream Pie.
Ingredients
-
15.25 ounce box yellow cake mix
-
Eggs (as directed on cake mix box)
-
Vegetable oil (as directed on cake mix box)
-
Water (as directed on cake mix box)
-
2 (3.4 ounce) boxes instant vanilla pudding
-
4 cups milk
-
16 ounce tub chocolate frosting
Instructions
-
Step 1
Prepare the yellow cake mix according to package directions, using the specified eggs, oil, and water. Pour batter into a greased and floured 9×13 inch baking pan. -
Step 2
Bake the cake according to package directions until a toothpick inserted into the center comes out clean. Let the cake cool in the pan on a wire rack for about 15-20 minutes. -
Step 3
While the cake is still warm, use the handle of a wooden spoon or a fork to poke holes all over the top of the cake, about 1 inch apart. -
Step 4
In a medium bowl, whisk together the instant vanilla pudding mixes and the milk. Whisk for 2 minutes until thickened. Pour the pudding evenly over the warm poked cake, ensuring it seeps into the holes. -
Step 5
Cover the cake with plastic wrap and refrigerate for at least 4 hours, or preferably overnight, to allow the pudding to set and the flavors to meld. -
Step 6
Before serving, spread the 16 ounce tub of chocolate frosting evenly over the chilled cake. Slice and serve.
Important Information
Nutrition Facts (Per Serving)
It is important to consider this information as approximate and not to use it as definitive health advice.
Allergy Information
Please check ingredients for potential allergens and consult a health professional if in doubt.