Easy Apple Pie Bars- Delicious Dessert Delight
Apple pie bars are a revelation, a delightful twist on a beloved classic that brings all the comforting flavors of a traditional apple pie into a perfectly portable and shareable format. Forget the fuss of crimping a perfect crust or worrying about your pie plate sliding off the counter; these apple pie bars deliver that same incredible taste with a much more approachable elegance. What is it about apple pie that we all adore? It’s the warm, spiced apples, the buttery, crum extractbly crust, and that undeniable feeling of home and comfort. These apple pie bars capture all of that magic, making them ideal for potlucks, bake snon-alcoholic ales, or simply a sweet afternoon treat. They’re less messy, incredibly easy to make, and the perfect balance of sweet and tart makes them utterly irresistible.
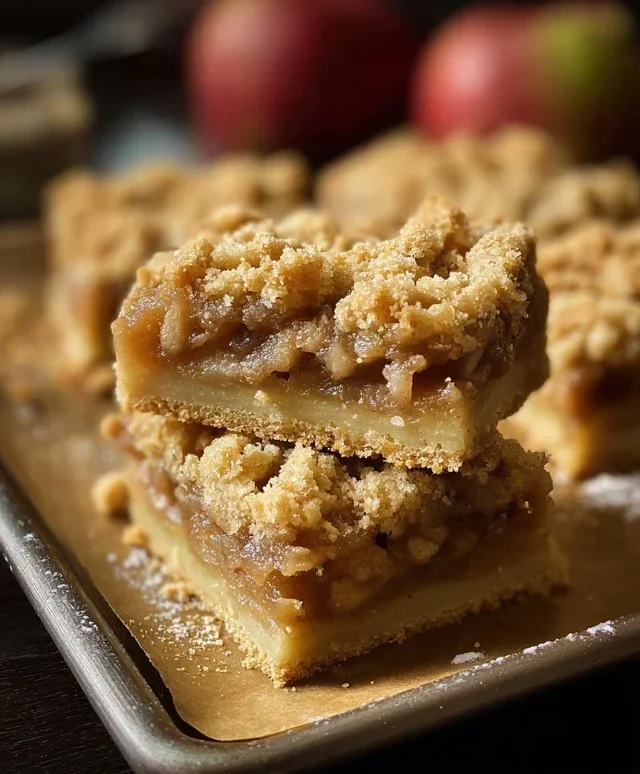
Apple Pie Bars
There’s something undeniably comforting about apple pie. That sweet, spiced apple filling encased in a flaky, buttery crust is a classic for a reason. But sometimes, the idea of rolling out pie dough can feel a little daunting, or perhaps you’re looking for a more portable, shareable treat. That’s where these Apple Pie Bars come in! They deliver all the beloved flavors of apple pie in an easy-to-make bar form. Perfect for potlucks, after-school snacks, or just a cozy evening in, these bars are sure to become a new favorite. The beauty of this recipe is that it uses a simple press-in crust that’s incredibly forgiving, making it accessible even for novice bakers. And the filling? It’s bursting with the warm, autumnal flavors of cinnamon and brown sugar.
Ingredients:
Instructions:
Preparing the Crust and Crum extractble Topping
1. Begin extract by preheating your oven to 375°F (190°C). While the oven heats up, prepare your baking pan. A 9×13 inch baking pan is ideal for this recipe. You can lightly grease it or line it with parchment paper, leaving some overhang on the sides. This will make it incredibly easy to lift the bars out of the pan once they’re baked. In a large mixing bowl, combine the dry ingredients for the crust: 2½ cups of all-purpose flour, 1 cup of granulated sugar, 1 teaspoon of baking powder, and ½ teaspoon of salt. Whisk these together until they are well incorporated. This ensures that the leavening agent (baking powder) and salt are evenly distributed throughout the flour mixture, leading to a consistent texture in your crust.
2. Next, add the cold, cubed unsalted butter to the dry ingredients. You can use a pastry blender, two forks, or even your fingertips to cut the butter into the flour mixture. The goal here is to create a coarse, crum extractbly texture, similar to coarse meal with some pea-sized pieces of butter remaining. These larger pieces of butter are crucial for creating a tender and flaky crust. The cold butter melts in the oven, creating steam pockets that result in that desirable flakiness. Once you’ve achieved this texture, add the egg and 1 teaspoon of vanilla extract. Mix everything together until the dough just starts to come together. It will be a bit shaggy and crum extractbly at this stage, and that’s perfectly fine.
3. Reserve about 1 cup of this dough mixture for the crum extractble topping. This reserved portion will be used later. Press the remaining dough evenly into the bottom of your prepared baking pan. Use the bottom of a measuring cup or your hands to create a firm, even layer. This forms the base of our apple pie bars. Make sure there are no large gaps or thin spots. Once pressed, blind bake this crust for about 10-12 minutes, or until it’s lightly golden around the edges. This pre-baking step helps to ensure that the crust doesn’t become soggy once the apple filling is added, giving you a sturdier bar.
Making the Delicious Apple Filling
4. While the crust is blind baking, prepare the apple filling. In a separate medium bowl, combine the 4 cups of peeled and diced apples with 2 tablespoons of lemon juice. The lemon juice is important not only for flavor, but also to prevent the apples from browning and to help maintain their texture. Toss the apples gently to coat them. In a small bowl, whisk together the ½ cup of brown sugar, 2 teaspoons of cinnamon, and 1 teaspoon of cornstarch. The brown sugar adds a lovely caramel-like sweetness, while the cinnamon provides that quintessential apple pie spice. The cornstarch acts as a thickener, ensuring your filling isn’t too watery once it bakes. Add this brown sugar and spice mixture to the apples and toss everything together until the apples are evenly coated.
Assembling and Baking the Bars
5. Once the crust has been blind baked for its allotted time and is lightly golden, carefully remove it from the oven. Evenly spread the prepared apple filling over the pre-baked crust. Try to distribute the apples as uniformly as possible so that each bar gets a good amount of filling. Now, take that reserved 1 cup of dough mixture that you set aside earlier. Sprinkle this evenly over the top of the apple filling. You can also gently crum extractble it with your fingers to create a more rustic, streusel-like topping. This crum extractble topping adds a delightful crunchy texture contrast to the soft apples and chewy crust.
6. Return the assembled bars to the oven and bake for an additional 30-40 minutes, or until the crum extractble topping is golden brown and the apple filling is bubbly and tender. You can test the doneness of the apples by gently poking them with a fork or a toothpick. If the apples are easily pierced, they are cooked through. If the topping starts to brown too quickly before the filling is cooked, you can loosely tent the pan with aluminum foil.
Cooling and Serving
7. Once baked, carefully remove the Apple Pie Bars from the oven and let them cool completely in the pan on a wire rack. This cooling step is crucial. While it’s tempting to dig in right away, allowing the bars to cool allows the filling to set properly, making them much easier to cut and serve. Rushing this process can result in a gooey, messy situation. Once fully cooled, use the parchment paper overhang to lift the entire slab out of the pan. Then, cut into squares or bars of your desired size. These Apple Pie Bars are delicious served on their own, but they are even more decadent with a dollop of whipped cream or a scoop of vanilla ice cream. Enjoy!
Conclusion:
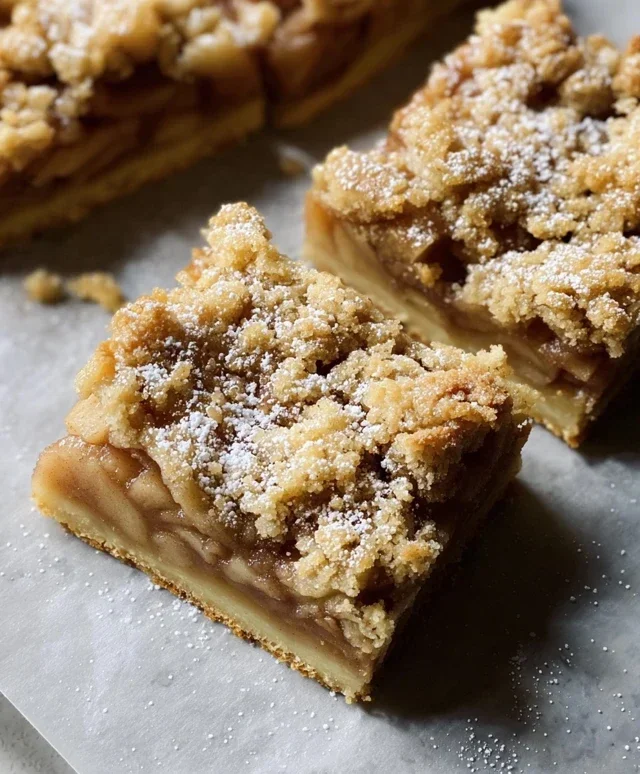
And there you have it – the ultimate guide to creating delicious Apple Pie Bars! These bars are truly a marvel, offering all the comforting flavors of classic apple pie in a convenient, portable, and incredibly satisfying format. The tender, buttery crust paired with the sweet and slightly tart apple filling, all topped with a crum extractbly streusel, makes for an irresistible treat that’s perfect for any occasion. Whether you’re a seasoned baker or just starting out, this recipe is designed to be approachable and rewarding, delivering a delightful dessert every time.
These Apple Pie Bars are wonderfully versatile. Serve them warm with a scoop of vanilla ice cream for a truly decadent experience, or enjoy them at room temperature with a dollop of whipped cream or a drizzle of caramel sauce. They’re also fantastic for picnics, potlucks, or simply as an afternoon pick-me-up with your favorite cup of tea or coffee. Don’t be afraid to experiment with variations! Consider adding a pinch of nutmeg or cardamom to the apple filling for an extra layer of warmth, or swap out some of the apples for pears. You could even sprinkle some chopped nuts like pecans or walnuts into the streusel topping for added crunch.
I truly encourage you to give these Apple Pie Bars a try. They’re a simple yet spectacular way to capture the essence of fall, or any season for that matter, in a delicious and easy-to-share dessert. Happy baking!
Frequently Asked Questions:
Q: Can I make these Apple Pie Bars ahead of time?
Absolutely! These bars are perfect for making ahead. Once cooled completely, store them in an airtight container at room temperature for up to 3 days, or in the refrigerator for up to a week. They might become slightly softer in the fridge, but they’ll still be delicious!
Q: What kind of apples are best for this recipe?
A mix of sweet and tart apples works wonderfully. Varieties like Honeycrisp, Gala, Fuji, or Granny Smith are excellent choices. Using a combination will give you a more complex and balanced flavor profile in your filling.
Q: How do I prevent the bottom crust from getting soggy?
Ensure your apples are not overly wet when you add them to the pan; drain any excess liquid if necessary. Also, baking the crust for a few minutes before adding the filling can help pre-bake it slightly and prevent soggin extractess. Over-mixing the filling can also release more moisture.
Apple Pie Bars
Deconstructed apple pie in bar form, featuring a buttery shortbread crust and a sweet, spiced apple filling.
Ingredients
-
2½ cups all-purpose flour
-
1 cup granulated sugar
-
1 tsp baking powder
-
½ tsp salt
-
1 cup (2 sticks) cold unsalted butter, cubed
-
1 egg
-
1 tsp vanilla extract
-
4 cups peeled & diced apples
-
2 tbsp lemon juice
-
½ cup brown sugar
-
2 tsp cinnamon
-
1 tsp cornstarch
Instructions
-
Step 1
Preheat oven to 375°F (190°C). Grease and flour a 9×13 inch baking pan. -
Step 2
In a large bowl, whisk together flour, granulated sugar, baking powder, and salt. Cut in the cold butter with a pastry blender or your fingers until the mixture resembles coarse crumbs. -
Step 3
In a small bowl, whisk together the egg and vanilla extract. Add this to the flour mixture and mix until just combined. Press about two-thirds of the dough evenly into the bottom of the prepared baking pan for the crust. -
Step 4
In a separate bowl, toss the diced apples with lemon juice. In a small bowl, combine the brown sugar, cinnamon, and cornstarch. Sprinkle this mixture over the apples and toss to coat. -
Step 5
Spread the apple mixture evenly over the crust in the baking pan. -
Step 6
Crumble the remaining dough over the apple filling. Bake for 35-40 minutes, or until the topping is golden brown and the filling is bubbly. -
Step 7
Let cool completely in the pan on a wire rack before cutting into bars.
Important Information
Nutrition Facts (Per Serving)
It is important to consider this information as approximate and not to use it as definitive health advice.
Allergy Information
Please check ingredients for potential allergens and consult a health professional if in doubt.