Easter Chocolate Chip Cookies- Perfect Spring Treat
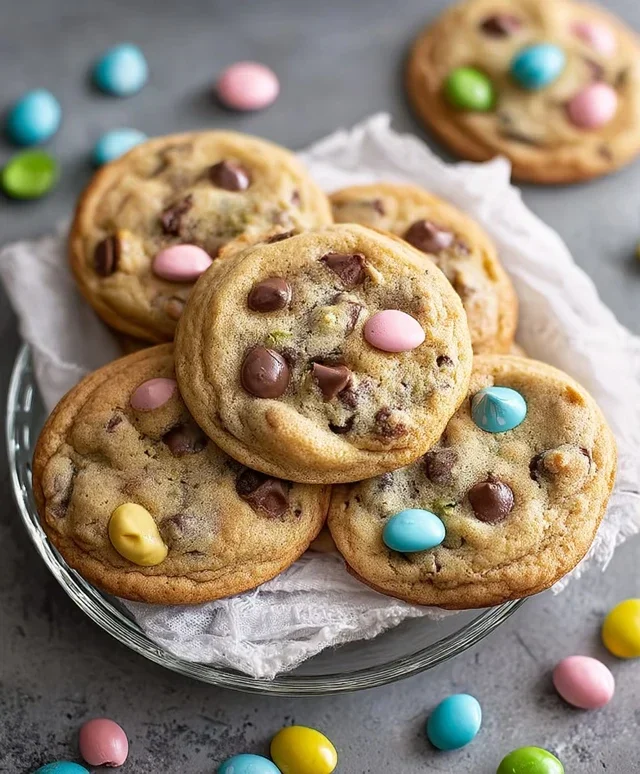
Easter Chocolate Chip Cookies are more than just a sweet treat; they’re a delightful tradition, a warm hug in cookie form, and the perfect way to usher in springtime. Who doesn’t adore the comforting aroma of freshly baked cookies filling the kitchen, especially when those cookies are packed with melty, decadent chocolate chips? I know I certainly do! These aren’t just any ordinary chocolate chip cookies; they’re imbued with a touch of Easter magic. Imagin extracte a slightly crisp edge yielding to a soft, chewy center, studded with generous chunks of your favorite chocolate. They’re wonderfully versatile, too – perfect for an Easter egg hunt prize, a sweet addition to your brunch table, or simply for enjoying with a glass of milk on a sunny afternoon. Let’s dive into creating these utterly irresistible Easter Chocolate Chip Cookies that will have everyone hopping for joy!
Why You’ll Love This Recipe:
Easy to make, even for begin extractners!
The perfect balance of chewy and crisp.
Customizable with your favorite chocolate or add-ins.
Ingredients:
These Easter Chocolate Chip Cookies are a delightful way to bring some festive cheer to your holiday table. The classic, comforting flavor of a chocolate chip cookie is elevated with a touch of spring pastel colors, making them as beautiful as they are delicious. They’re perfect for an Easter egg hunt prize, a sweet treat after church, or simply to enjoy with your loved ones. The beauty of this recipe is its simplicity; while we’re adding a little visual flair, the core of the cookie remains a chewy, chocolatey dream that everyone adores. I love how adaptable these are – you can play with the number of colors, or even add sprinkles if you’re feeling extra festive. Let’s get baking!
Preparing the Dough
The foundation of any great cookie is a well-made dough. We’ll start by whisking together our dry ingredients. In a medium bowl, combine the all-purpose flour, baking soda, and salt. Whisking them thoroughly ensures that the leavening agents and salt are evenly distributed throughout the flour, which is crucial for achieving the perfect texture. If the baking soda isn’t mixed in properly, you might end up with pockets of bitterness or unevenly risen cookies. Set this bowl aside for now.
Next, in a large mixing bowl, we’ll cream together our softened butter and sugars. This is where the magic of texture begin extracts. Using softened butter (not melted!) is key here. It should be pliable enough to indent with your finger but not so soft that it’s greasy. Creaming the butter with the granulated and packed brown sugar until light and fluffy incorporates air into the dough, which contributes to the cookie’s tender chegrape juicess. Be patient with this step – it can take about 3-5 minutes with an electric mixer or a good 5-7 minutes by hand. The mixture should look pnon-alcoholic ale yellow and significantly increased in volume.
Once the butter and sugar are perfectly creamed, it’s time to add the wet ingredients. Beat in the large eggs, one at a time, ensuring each is fully incorporated before adding the next. This helps to emulsify the mixture and create a smooth base. After the eggs, stir in the vanilla extract. The pure vanilla extract is essential for that classic comforting cookie aroma and flavor that pairs so beautifully with chocolate.
Creating the Pastel Swirls
Now for the fun part – the Easter colors! We’ll divide our cookie dough into several smaller portions, one for each color we plan to use. For this recipe, I’ve suggested pastel pink, purple, yellow, and blue. Take about a quarter of your prepared dough and place it into a small bowl. Add a few drops of your first gel food coloring. Gel food coloring is preferred over liquid because it’s more concentrated and won’t add extra moisture to the dough, which could affect the texture. Gently mix the color into the dough until it’s evenly distributed and you have your desired pastel shade. Repeat this process for each of your chosen colors, using separate bowls for each. You can adjust the amount of dough for each color depending on how much of each shade you’d like in your final cookies.
Once you have your colored dough portions, it’s time to combine them. Take your uncolored portion of dough and gently fold in about a third of each of your colored dough balls. You don’t want to overmix here; the goal is to create beautiful swirls and streaks of color, not to completely blend them into one uniform color. Imagin extracte gently marbling. You can even take small pieces of each colored dough and press them together slightly, then fold them into the main dough. This will give you more distinct patches of color within the cookie. Be creative!
After you’ve achieved a lovely marbled effect, it’s time to add the chocolate chips. Gently fold in your 2 cups of chocolate chips. Again, avoid overmixing. You want the chocolate chips to be distributed throughout the cookie dough, and you also want to preserve the beautiful pastel swirls you’ve worked so hard to create. If you like extra chocolatey cookies, you can reserve a few chips to press onto the tops of your cookies before baking.
Baking the Perfect Easter Cookies
Preheat your oven to 375°F (190°C). Line baking sheets with parchment paper. This is a crucial step to prevent your cookies from sticking and ensures easy cleanup. Parchment paper also helps to create a more even bake by preventing the bottoms from browning too quickly.
Using a cookie scoop or two spoons, drop rounded tablespoons of dough onto the prepared baking sheets. Leave about 2 inches of space between each cookie to allow for spreading during baking. If you’re adding extra chocolate chips to the tops, gently press a few into the surface of each cookie dough ball now.
Bake for 9-11 minutes, or until the edges are lightly golden brown and the centers are still slightly soft. It’s important not to overbake these cookies, as they will continue to firm up as they cool. The slightly soft center is what gives them that desirable chewy texture.
Allow the cookies to cool on the baking sheets for 2-3 minutes before transferring them to a wire rack to cool completely. This brief resting period on the hot baking sheet helps them set up properly. Once cooled, they are ready to be enjoyed! These Easter Chocolate Chip Cookies are a testament to how simple ingredients and a little bit of creativity can result in something truly special. Happy Easter baking!
Conclusion:
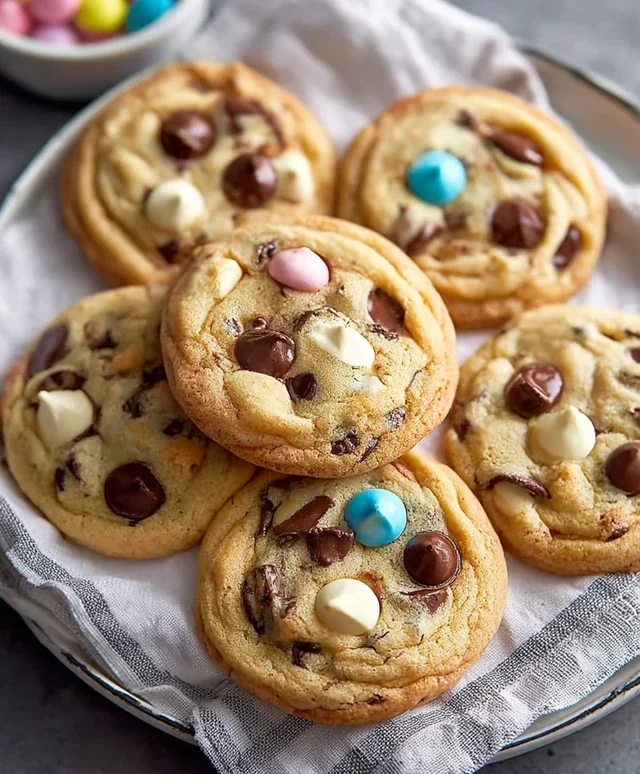
I hope you’re as excited to bake these delightful Easter Chocolate Chip Cookies as I am to share them! These cookies are truly a winner because they strike the perfect balance: wonderfully chewy centers with slightly crisp edges, packed with melt-in-your-mouth chocolate chips. They’re surprisingly simple to make, making them an ideal activity for families to enjoy together during the Easter season. The aroma alone as they bake is enough to fill your home with festive cheer! These aren’t just any chocolate chip cookies; they’re a gateway to creating cherished Easter memories.
For serving, these Easter Chocolate Chip Cookies are fantastic on their own, of course. But why stop there? Imagin extracte them warm and gooey with a scoop of vanilla ice cream, or perhaps as part of a larger Easter dessert spread alongside a fruity tart or a classic carrot cake. They also make for a thoughtful and delicious homemade gift for friends and neighbors. Don’t be afraid to get creative with variations! Consider adding a sprinkle of festive Easter-colored M&Ms or chopped Cadbury Mini Eggs for an extra pop of flavor and color. A pinch of sea salt sprinkled on top before baking can also elevate the chocolatey goodness to another level.
I truly encourage you to give this recipe a try. It’s a foolproof way to bring joy and deliciousness to your Easter celebrations. Let’s make this Easter extra sweet!
Frequently Asked Questions:
Can I make these cookies ahead of time?
Absolutely! You can prepare the dough and refrigerate it for up to 3 days before baking. This also allows the flavors to meld, often resulting in even tastier cookies. Alternatively, you can freeze the dough balls for up to 3 months. Just bake them directly from frozen, adding a few extra minutes to the baking time.
What kind of chocolate chips are best for these Easter Chocolate Chip Cookies?
A mix of semi-sweet and milk chocolate chips is always a crowd-pleaser! For an extra decadent touch, consider using dark chocolate chunks or even white chocolate chips. If you’re aiming for that festive Easter feel, colored chocolate chips or mini eggs are a fantastic addition.
My cookies spread too much. How can I prevent this?
Ensuring your butter is softened but not melted is key. Also, chilling the dough for at least 30 minutes before baking can help prevent excessive spreading. Make sure your oven is preheated to the correct temperature, as an oven that’s too hot can also contribute to spreading.
Easter Chocolate Chip Cookies
Soft and chewy chocolate chip cookies with festive pastel colors, perfect for Easter celebrations.
Ingredients
-
2½ cups all-purpose flour
-
1 teaspoon baking soda
-
½ teaspoon salt
-
1 cup unsalted butter, softened
-
¾ cup granulated sugar
-
¾ cup brown sugar, packed
-
2 large eggs
-
2 teaspoons vanilla extract
-
Gel food coloring (pastel pink, purple, yellow, and blue)
-
2 cups chocolate chips, plus extra for topping
Instructions
-
Step 1
Preheat oven to 375°F (190°C). Line baking sheets with parchment paper. -
Step 2
In a medium bowl, whisk together flour, baking soda, and salt. Set aside. -
Step 3
In a large bowl, cream together softened butter, granulated sugar, and brown sugar until light and fluffy. -
Step 4
Beat in eggs one at a time, then stir in vanilla extract. -
Step 5
Gradually add the dry ingredients to the wet ingredients, mixing until just combined. Divide the dough into four equal portions. -
Step 6
Tint each portion of dough with a different pastel gel food coloring (pink, purple, yellow, blue). Gently mix until the color is evenly distributed. -
Step 7
Stir ½ cup of chocolate chips into each colored dough portion. You can also marble the colors together for a marbled effect. -
Step 8
Drop rounded tablespoons of dough onto the prepared baking sheets. Press a few extra chocolate chips onto the tops of the cookies. -
Step 9
Bake for 9-11 minutes, or until the edges are golden brown and the centers are still slightly soft. -
Step 10
Let cookies cool on the baking sheets for a few minutes before transferring them to a wire rack to cool completely.
Important Information
Nutrition Facts (Per Serving)
It is important to consider this information as approximate and not to use it as definitive health advice.
Allergy Information
Please check ingredients for potential allergens and consult a health professional if in doubt.