Copycat KFC Fried Chicken Recipe- Crispy Flavor
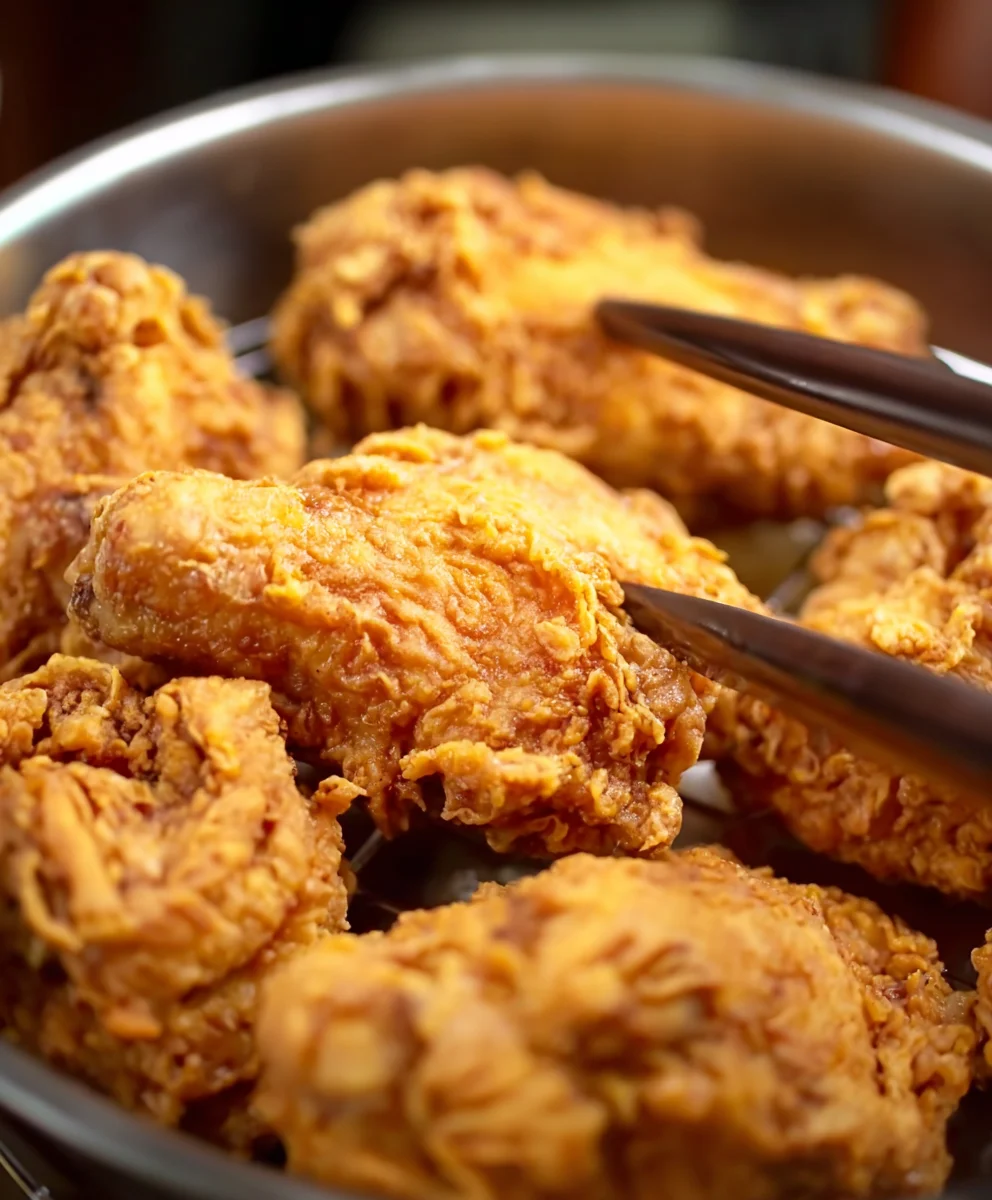
Copy Cat KFC Fried Chicken. Ah, that crispy, juicy, undeniably craveable bite! For years, the secret recipe behind this iconic fast-food favorite has been the subject of endless speculation and countless kitchen experiments. We’ve all walked past those golden arches, the aroma wafting out, and felt that pull. What is it about this particular fried chicken that captivates so many? It’s the perfect storm of textures and flavors: an impossibly crunchy, seasoned coating giving way to incredibly tender, moist chicken on the inside. It’s more than just a meal; it’s a memory, a comfort, a weekend treat. Today, we’re not just aiming for a good imitation; we’re diving deep to recreate that authentic, finger-licking experience right in your own home. Get ready to master the art of the Copy Cat KFC Fried Chicken and impress everyone with your culinary prowess. This recipe is designed to get you that legendary taste and crunch without the drive-thru line.
Ingredients:
- 340 g chicken pieces (thighs and drum extractsticks are ideal for this recipe)
- 1/2 tsp salt (for the chicken brine)
- 1/2 tsp black pepper (for the chicken brine)
- 1 tsp onion powder (for the chicken brine)
- 1 tsp garlic powder (for the chicken brine)
- 1/2 tsp chili powder (for the chicken brine)
- 1 tbsp cornstarch (for the chicken brine)
- 1 large egg
- 100 g all-purpose flour (for the coating)
- 50 g cornstarch (for the coating)
- 5 g baking powder (for the coating)
- 1/2 tsp salt (for the coating)
- 1/2 tsp onion powder (for the coating)
- 1 tsp garlic powder (for the coating)
Preparing the Chicken for Frying
The first crucial step to achieving that irresistible “Copy Cat KFC Fried Chicken” flavor and texture is to properly season and tenderize your chicken. We’re going to create a flavorful brine that will infuse the chicken with aromatics and help it stay juicy during the frying process. In a medium bowl, combine the 340 grams of chicken pieces. To this, add the 1/2 teaspoon of salt, 1/2 teaspoon of black pepper, 1 teaspoon of onion powder, 1 teaspoon of garlic powder, 1/2 teaspoon of chili powder, and 1 tablespoon of cornstarch. The cornstarch in the brine might seem unusual, but it plays a role in creating a slightly crispier exterior later on. Toss everything thoroughly to ensure each piece of chicken is evenly coated. Cover the bowl and refrigerate for at least 30 minutes, or ideally, for a couple of hours. This allows the flavors to penetrate the chicken and begin extract the tenderizing process. The longer it brines, the more flavor your chicken will have.
Setting Up the Coating Station
While the chicken is brining, it’s time to prepare ygin extract dredging station. This is where the magic happens for that signature crispy coating. In a separate shallow dish or a pie plate, whisk together the 100 grams of all-purpose flour, 50 grams of cornstarch, and 5 grams of baking powder. The combination of flour and cornstarch is key for achieving a light and crispy crust. The baking powder acts as a leavening agent, helping to create air pockets that result in a wonderfully crunchy texture. Now, add the 1/2 teaspoon of salt, 1/2 teaspoon of onion powder, and 1 teaspoon of garlic powder to this dry mixture. Whisk it all together until everything is well incorporated. This is your main dry coating blend. Next, in another bowl, crack the large egg and whisk it until it’s lightly beaten. This egg wash will act as the binder, helping the dry coating adhere to the chicken. Having these two components ready side-by-side will make the coating process much smoother and more efficient, ensuring an even layer of deliciousness.The Dredging Process
Once your chicken has finished its brining period, it’s time to coat it for frying. Remove the chicken pieces from the refrigerator and discard any excess liquid that may have accumulated in the bowl. Take one piece of chicken at a time and dredge it thoroughly in the dry flour mixture. Make sure to press the coating onto the chicken to ensure it sticks well. Shake off any excess flour. Next, dip the floured chicken piece into the beaten egg, letting any excess drip off. Immediately return the egg-dipped chicken to the dry flour mixture and coat it again, pressing the flour onto the cgin extractken. This double-dredging method is critical for building up that thick, craggy, and incredibly satisfying crust that’s synonymous with great fried chicken. Ensure every surface is covered. Place the coated chicken pieces on a wire rack set over a baking sheet. This allows air to circulate around the chicken, preventing the coating from becoming soggy before frying.
Frying to Golden Perfection
Now for the most exciting part – frying! You’ll need a deep fryer or a heavy-bottomed pot like a Dutch oven, filled with enough neutral oil (such as vegetable or canola oil) to fully submerge the chicken pieces. Heat the oil to approximately 175°C (350°F). It’s important to maintain this temperature for even cooking. Carefully place a few coated chicken pieces into the hot oil, being mindful not to overcrowd the pot. Overcrowding will lower the oil temperature, leading to greasy chicken. Fry the chicken in batches for about 12-15 minutes, turning occasionally, until it’s golden brown and cooked through. You’ll know it’s done when the internal temperature reaches 74°C (165°F) on a meat thermometer inserted into the thickest part of the chicken, avoiding the bone. The beautiful golden-brown color is your visual cue that the crust has achieved that perfect crispiness. For thicker pieces, you might need to cook them slightly longer, so keep an eye on the color and temperature.
Resting and Serving
Once each batch of chicken is beautifully golden and cooked through, carefully remove it from the hot oil using a slotted spoon or spider strainer. Place the fried chicken on a clean wire rack set over a baking sheet. This step is vital for allowing excess oil to drain off, ensuring your chicken remains wonderfully crispy and not greasy. Avoid placing it on paper towels, as this can trap steam and make the bottom of the crust soggy. While the first batch is draining, you can continue frying the remaining chicken, always ensuring the oil temperature returns to 175°C (350°F) between batches. It’s a good idea to let the chicken rest for a few minutes after frying before serving. This allows the juices to redistribute within the meat, making it even more succulent. Serve your “Copy Cat KFC Fried Chicken” hot and enjoy the amazing crunch and flavor that you’ve created in your own kitchen!
Conclusion:
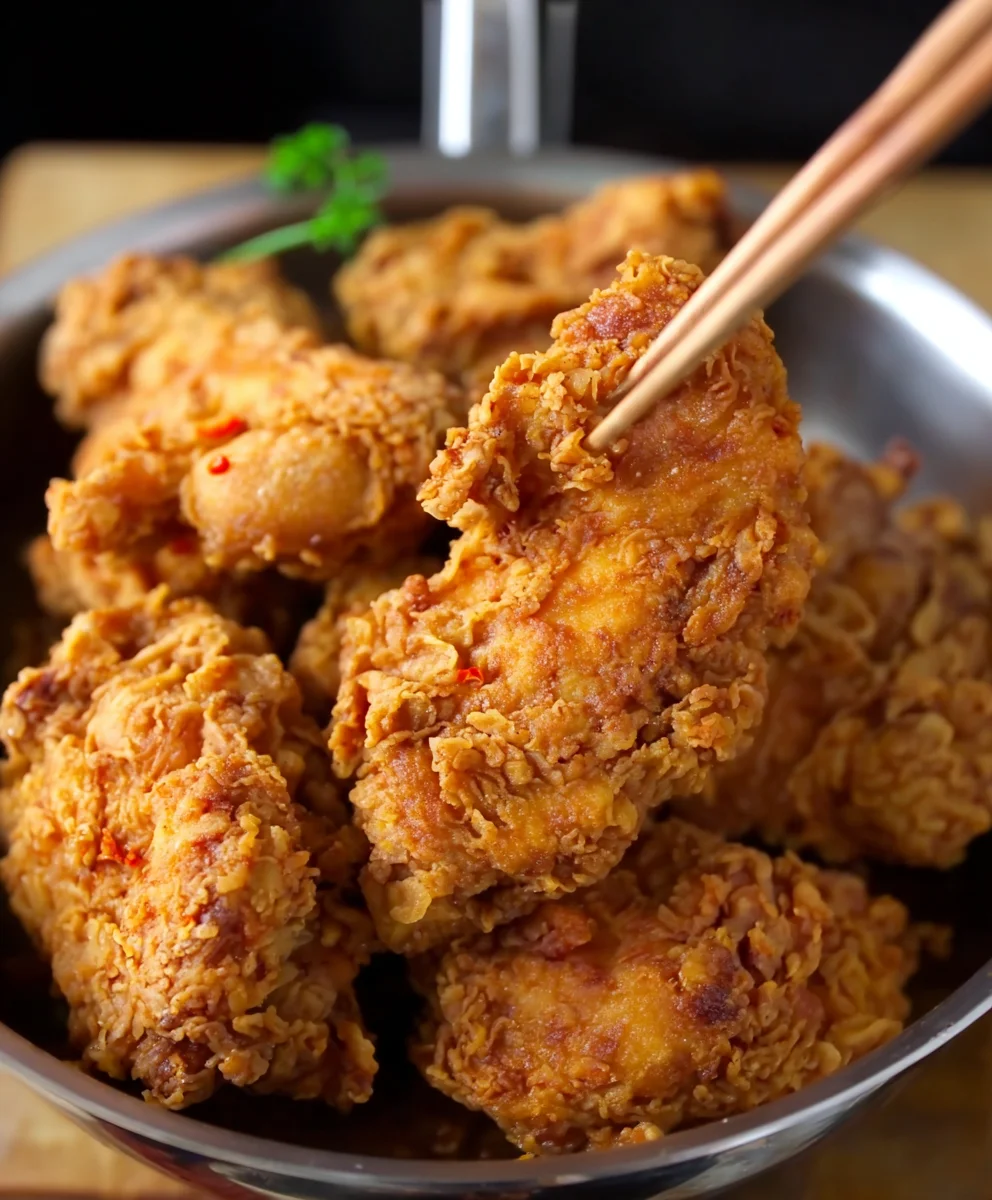
And there you have it – your very own Copy Cat KFC Fried Chicken! We’ve walked through the steps to achieve that signature crispy, flavorful coating and juicy chicken that will have everyone asking for seconds. This recipe is a fantastic way to bring a beloved fast-food favorite right into your own kitchen, perfect for family dinners, game nights, or any occasion that calls for a truly satisfying meal.
For serving suggestions, I love pairing this delicious chicken with classic sides like creamy mashed potatoes and gravy, coleslaw, or even some sweet corn on the cob. For variations, don’t be afraid to experiment with the spice level in your flour mixture – add a pinch of cayenne for a kick, or perhaps some garlic powder for an extra savory punch. And if you’re feeling adventurous, try a spicier brine for the chicken before coating.
The most important thing is to have fun and enjoy the process! This Copy Cat KFC Fried Chicken is a rewarding recipe that delivers big on taste. So gather your ingredients, put on some music, and get ready to impress yourself and your loved ones with this incredible homemade version of a fast-food icon. You’ve got this!
Frequently Asked Questions about Copy Cat KFC Fried Chicken:
Can I bake this chicken instead of frying it?
While frying is key to achieving the authentic KFC-like crispiness, you can definitely bake it for a healthier option. You’ll want to bake it at around 400°F (200°C) for about 30-40 minutes, flipping halfway through, until golden brown and cooked through. The texture will be different, but it can still be very delicious!
How can I make the chicken extra crispy?
For maximum crispiness, ensure your oil is at the correct temperature (around 350°F or 175°C) and don’t overcrowd the pan. Overcrowding will lower the oil temperature and result in greasy, less crispy chicken. Allowing the coated chicken to rest for a few minutes before frying can also help the coating adhere better and become crispier.
What kind of oil is best for frying?
A neutral-flavored oil with a high smoke point is ideal. Vegetable oil, canola oil, or peanut oil are excellent choices as they can handle the high temperatures required for deep frying without burning. This ensures your chicken gets cooked through without the oil imparting an undesirable flavor.
Copycat KFC Fried Chicken Recipe- Crispy Flavor
Recreate the iconic crispy, flavorful fried chicken of KFC in your own kitchen with this easy-to-follow recipe.
Ingredients
-
340 g chicken pieces
-
1/2 tsp salt
-
1/2 tsp black pepper
-
1 tsp onion powder
-
1 tsp garlic powder
-
1/2 tsp chili powder
-
1 tbsp cornstarch
-
1 large egg
-
100 g all-purpose flour
-
50 g cornstarch
-
5 g baking powder
-
1/2 tsp salt
-
1/2 tsp onion powder
-
1 tsp garlic powder
Instructions
-
Step 1
Prepare the chicken brine by combining chicken pieces, salt, black pepper, onion powder, garlic powder, chili powder, and 1 tbsp cornstarch in a bowl. Toss to coat evenly. Cover and refrigerate for at least 30 minutes, or up to a couple of hours. -
Step 2
Set up the coating station. In a shallow dish, whisk together all-purpose flour, 50g cornstarch, baking powder, 1/2 tsp salt, 1/2 tsp onion powder, and 1 tsp garlic powder. In another bowl, whisk the egg. -
Step 3
Dredge chicken pieces first in the dry flour mixture, pressing to coat. Dip in the beaten egg, let excess drip off. Return to the flour mixture for a second coating, pressing to build up a thick crust. Place coated chicken on a wire rack. -
Step 4
Heat neutral oil in a deep fryer or heavy-bottomed pot to 175°C (350°F). Carefully fry chicken in batches for 12-15 minutes, turning occasionally, until golden brown and internal temperature reaches 74°C (165°F). -
Step 5
Remove fried chicken from oil and place on a wire rack set over a baking sheet to drain excess oil. Allow chicken to rest for a few minutes before serving.
Important Information
Nutrition Facts (Per Serving)
It is important to consider this information as approximate and not to use it as definitive health advice.
Allergy Information
Please check ingredients for potential allergens and consult a health professional if in doubt.