Crispy Zucchini Chips Recipe- Easy & Delicious
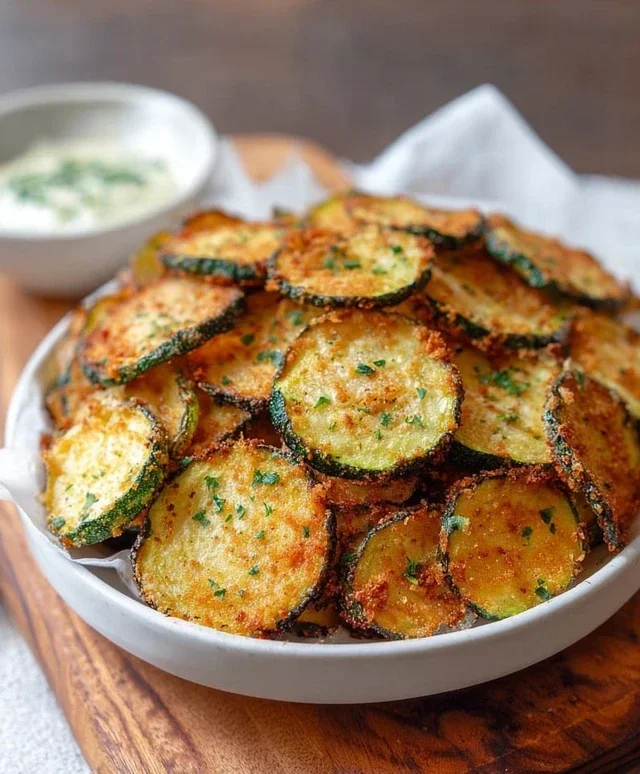
Crispy zucchini chips are about to become your new favorite snack obsession! Forget limp, soggy vegetables; we’re talking about golden-brown, impossibly crunchy bites that will have you reaching for more before you even realize it. There’s something truly magical about transforming humble zucchini into these addictive little discs. They’re the perfect healthy-ish alternative to potato chips, offering a delightful crunch without the heavy guilt. What makes these crispy zucchini chips so special is their incredible versatility. They’re fantastic on their own, seasoned simply with salt and pepper, or you can get creative with a rainbow of spices to suit your mood. Plus, they’re surprisingly simple to make, making them an ideal treat for a weeknight craving or a crowd-pleasing appetizer for your next gathering. Get ready to fall in love with this simple yet sensational snack.
Crispy Zucchini Chips
Looking for a way to use up those garden-fresh zucchinis or just craving a healthier, homemade snack? My Crispy Zucchini Chips are the answer! Forget greasy, processed chips; these baked beauties are bursting with flavor and have a satisfying crunch that will have you reaching for more. They’re surprisingly simple to make, and the end result is a delightful snack that’s perfect for munching on their own, dipping, or even as a fun topping for salads.
These chips are a testament to how delicious simple, fresh ingredients can be. The zucchini itself provides a mild, pleasant flavor that takes on the seasonings beautifully. The olive oil helps them crisp up, and the combination of sea salt, garlic powder, and smoked paprika creates a savory, slightly smoky profile that’s incredibly addictive. And the optional sprinkle of grated Parmesan at the end? Pure magic. Let’s get started!
Ingredients:
Preparing the Zucchini
The first and most crucial step for achieving perfectly crispy zucchini chips is proper preparation of the zucchini. We want to remove as much moisture as possible before baking. This might sound tedious, but it’s the secret to avoiding soggy chips.
1. Start by washing your zucchinis thoroughly. Trim off the ends of both zucchinis. Now, here’s where your slicing technique comes into play. You want to slice the zucchinis as thinly and uniformly as possible. The best tool for this is a mandoline slicer. If you don’t have one, a very sharp knife and a steady hand will work, but aim for slices that are no thicker than 1/16th of an inch. Think almost translucent. The thinner the slices, the crispier they will become.
2. Once all your zucchini is sliced, the next vital step is to draw out their moisture. Arrange the zucchini slices in a single layer on a clean kitchen towel or paper towels. Sprinkle them generously with about half of your sea salt. Let them sit for at least 15-20 minutes. You’ll be amazed at the amount of liquid that will be drawn out. After the resting period, gently pat the zucchini slices dry with more paper towels, pressing down to absorb as much moisture as possible. This step is absolutely non-negotiable for crispy results!
Seasoning and Baking
Now that our zucchini is prepped and as dry as can be, it’s time to add some flavor and get them ready for the oven.
3. Preheat your oven to 400°F (200°C). Line two large baking sheets with parchment paper. This will prevent sticking and make cleanup a breeze. In a medium bowl, combine the olive oil, the remaining ½ teaspoon of sea salt, the garlic powder, smoked paprika, and black pepper. Whisk it all together until well combined.
4. Add the dried zucchini slices to the seasoned olive oil mixture. Gently toss them to coat each slice evenly. You can use your hands for this, ensuring each piece gets a light sheen of the oil and seasonings. Avoid overcrowding the bowl; if necessary, work in batches. Once coated, arrange the zucchini slices in a single layer on the prepared baking sheets. Make sure the slices don’t overlap significantly, as this will also hinder them from crisping up properly. If you’re using it, this is also the time to lightly sprinkle some grated Parmesan cheese over the top of the zucchini slices.
The Final Bake
This is where the magic happens, transforming our thinly sliced zucchini into delicious, crispy chips.
5. Bake for 10-15 minutes, or until the edges are golden brown and the chips are starting to curl and crisp. Keep a very close eye on them, as they can go from perfectly crisp to burnt very quickly due to their thinness. After about 8 minutes, I like to check them and rotate the pans if necessary to ensure even baking. If some chips are browning faster than others, you can carefully remove them from the baking sheet to prevent burning while the rest continue to bake. The goal is a light crispness, not hardness. They will continue to crisp up a bit more as they cool.
Once baked to perfection, remove the baking sheets from the oven. Let the zucchini chips cool on the baking sheets for a few minutes before transferring them to a wire rack to cool completely. This allows for maximum crispiness. Store any leftover chips in an airtight container at room temperature. Enjoy your homemade, guilt-free snack! They’re truly a game-changer for zucchini lovers.
Conclusion:
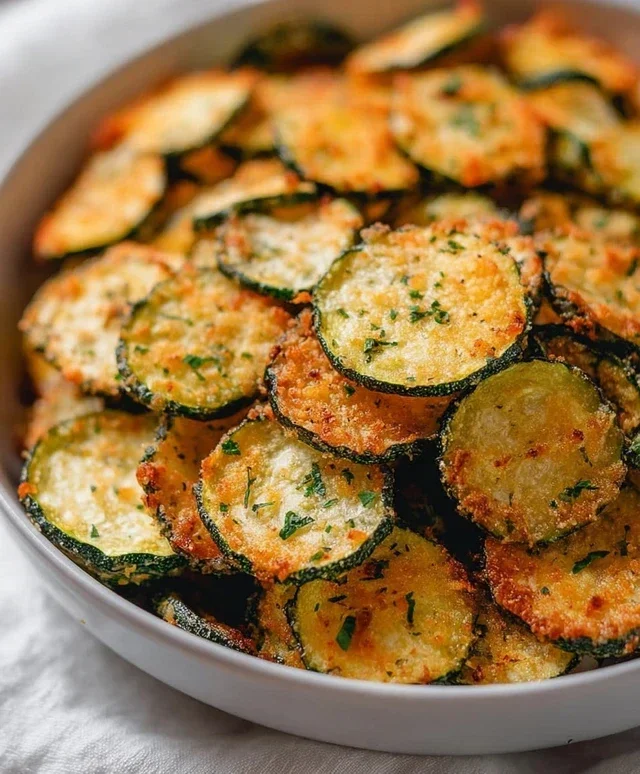
I hope you’ve enjoyed learning how to make these incredibly addictive Crispy Zucchini Chips! This recipe is a true winner because it transforms a humble vegetable into a satisfyingly crunchy snack that’s both healthy and delicious. It’s the perfect way to enjoy zucchini, especially when you have a bounty from the garden or simply crave a lighter alternative to potato chips. The simple preparation and quick cooking time mean you can whip up a batch of these whenever the craving strikes. They are fantastic on their own, but I also love serving them as a side dish with sandwiches, wraps, or even alongside a light pasta. Don’t be afraid to experiment with different seasonings – smoked paprika, garlic powder, or a sprinkle of chili flakes can add a whole new dimension of flavor. I wholeheartedly encourage you to give these crispy zucchini chips a try; you won’t regret it!
Frequently Asked Questions:
Can I bake these instead of frying?
Absolutely! Baking is a great alternative. Arrange the zucchini slices in a single layer on a baking sheet lined with parchment paper. Bake at 400°F (200°C) for 15-20 minutes, flipping halfway through, until golden brown and crispy. You might need to adjust the time slightly depending on your oven and the thickness of your slices.
What’s the best way to store leftover crispy zucchini chips?
For the best texture, it’s ideal to enjoy them fresh. However, if you do have leftovers, store them in an airtight container at room temperature for a day. They will likely lose some of their crispiness over time, but they are still quite tasty. Re-crisping them briefly in a low oven or toaster oven can help revive some of their crunch.
Can I use other vegetables for this recipe?
Yes, you can! This method works wonderfully for other thinly sliced vegetables like eggplant, sweet potato, or even carrots. Just be mindful that cooking times may vary depending on the vegetable’s moisture content and density. Adjust baking or frying times accordingly to achieve that perfect crispiness.
Crispy Zucchini Chips
Deliciously crispy baked zucchini chips seasoned with a savory blend and finished with parmesan.
Ingredients
-
2 medium zucchinis
-
1–2 tablespoons olive oil
-
½ teaspoon sea salt
-
½ teaspoon garlic powder
-
½ teaspoon smoked paprika
-
¼ teaspoon black pepper
-
Grated parmesan
Instructions
-
Step 1
Preheat oven to 400°F (200°C) and line a baking sheet with parchment paper. -
Step 2
Wash and thinly slice the zucchinis into rounds, about 1/8 inch thick. -
Step 3
In a bowl, toss the zucchini slices with olive oil, sea salt, garlic powder, smoked paprika, and black pepper until evenly coated. -
Step 4
Arrange the seasoned zucchini slices in a single layer on the prepared baking sheet. -
Step 5
Bake for 10-15 minutes, or until the edges are golden brown and the zucchini is crisp. Flip halfway through for even crisping. -
Step 6
Remove from oven and immediately sprinkle with grated parmesan cheese. Let cool slightly before serving.
Important Information
Nutrition Facts (Per Serving)
It is important to consider this information as approximate and not to use it as definitive health advice.
Allergy Information
Please check ingredients for potential allergens and consult a health professional if in doubt.