Easy Cherry Turnovers- Quick & Delicious Pastry
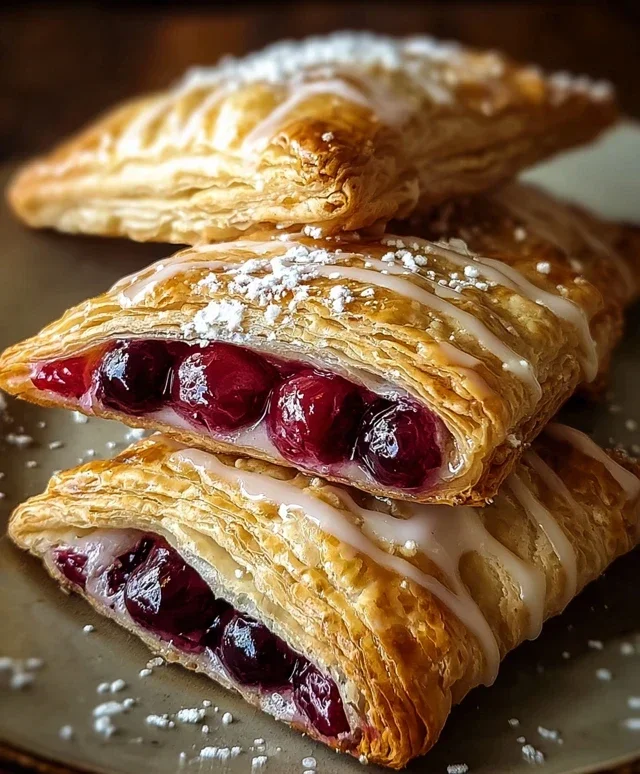
Easy Cherry Turnovers are the kind of treat that whispers promises of pure, unadulterated comfort. Imagin extracte flaky, golden pastry cradling a warm, sweet-tart cherry filling – it’s a taste of home, a hug in every bite. We all have those moments when only something undeniably delicious will do, and that’s precisely where these delightful pastries shine. Their charm lies in their deceptive simplicity; despite looking so elegant, they’re incredibly straightforward to make, even for novice bakers. What truly makes these easy cherry turnovers special is the perfect balance of textures and flavors. The crispness of the pastry against the soft, luscious fruit is simply divine, and the hint of warm spice elevates them from good to absolutely unforgettable. Whether you’re looking for a delightful dessert for guests or a special afternoon pick-me-up, these easy cherry turnovers are sure to become a beloved favorite in your repertoire.
Easy Cherry Turnovers
There’s something incredibly comforting and celebratory about a warm, flaky pastry filled with sweet, tart cherries. These Easy Cherry Turnovers are exactly that – a delightful treat that looks impressive but is surprisingly simple to make, even for begin extractner bakers. They’re perfect for a weekend brunch, a special dessert, or even a sweet afternoon pick-me-up. The magic of these turnovers lies in the use of store-bought puff pastry, which does all the heavy lifting for us, delivering that signature buttery crunch without any fuss. And the cherry filling? It’s a classic for a reason, offering that perfect balance of sweetness and tang that complements the rich pastry beautifully. I love making these because they feel a little bit fancy, but honestly, they come together in a flash.
Ingredients:
Getting Started: Preparing Your Puff Pastry
The foundation of these delightful turnovers is, of course, the puff pastry. It’s crucial that your puff pastry is fully thawed but still cold. This is because the layers of butter and dough in puff pastry need to be chilled to puff up properly in the oven. If it gets too warm, the butter will melt before it has a chance to create steam, resulting in a less flaky pastry. I usually take my puff pastry out of the freezer and place it in the refrigerator the night before I plan to bake. If I forget, I can usually get away with thawing it at room temperature for about 30-40 minutes, but I keep a close eye on it. You want it to be pliable enough to work with, but still firm to the touch. Once thawed, I’ll gently unfold the sheets and lay them flat on a lightly floured surface.
Crafting the Cherry Filling and Egg Wash
While your puff pastry is chilling or thawing, it’s time to prepare your luscious cherry filling. If you’re using canned cherry pie filling, you can simply open the can and give it a quick stir. If you’re using fresh cherries, you’ll want to pit them and then toss them with a little sugar and perhaps a pinch of cornstarch to thicken the juices. For this recipe, we’re keeping it super straightforward, so pre-made filling is your best friend!
Next, let’s prepare the egg wash. This is what will give your turnovers that beautiful golden-brown sheen and help them seal. In a small bowl, crack your large egg and add one tablespoon of milk. Whisk this mixture together until it’s well combined and a uniform yellow color. This simple wash not only adds visual appeal but also helps the pastry brown evenly.
Assembling Your Cherry Turnovers
Now for the fun part – assembling the turnovers! Take one sheet of your thawed puff pastry and gently unfold it. I like to lightly flour my surface to prevent sticking, but I don’t want too much flour on the pastry itself, as it can make the final product dry. Using a sharp knife or a pizza cutter, carefully divide the pastry sheet into two equal rectangles. You’ll want to work relatively quickly so the pastry doesn’t warm up too much.
For each rectangle, you’ll spoon your cherry pie filling. I find it’s best to spoon the filling onto one half of each rectangle, leaving a border of about half an inch around the edges. Don’t overfill them, as the filling can ooze out during baking. A good dollop of about 1/4 cup of filling per turnover is usually just right.
Once the filling is in place, it’s time to seal them up. Take the empty half of the pastry and fold it over the filling, creating a rectangular pocket. Gently press the edges together with your fingers to seal. For an extra secure seal and a decorative touch, you can use the tines of a fork to crimp the edges. This ensures that the delicious cherry filling stays tucked inside where it belongs. Repeat this process with the second pastry sheet.
Baking to Golden Perfection
Before they go into the oven, we need to give our turnovers a final touch. Using a sharp knife, make a few small slits in the top of each turnover. These are called “vents” and they allow steam to escape as the pastry bakes, preventing them from puffing up unevenly or bursting. Then, using a pastry brush, generously brush the tops and sides of each turnover with the prepared egg wash. This is what will give them that irresistible golden hue and a lovely sheen.
Now, transfer your assembled turnovers to a baking sheet lined with parchment paper. Parchment paper is a baker’s best friend here, preventing sticking and making for easy cleanup. Preheat your oven to 400 degrees Fahrenheit (200 degrees Celsius). Bake the turnovers for about 20-25 minutes, or until they are puffed up, golden brown, and the filling is bubbly. Keep an eye on them towards the end of baking, as puff pastry can brown quite quickly.
Whipping Up a Quick Glaze
While your turnovers are baking and filling your kitchen with the most incredible aroma, let’s prepare a simple yet elegant glaze. In a medium bowl, combine your powdered sugar, vanilla extract, and 2 to 3 tablespoons of milk. Start with 2 tablespoons of milk and gradually add more, a teaspoon at a time, until you reach your desired consistency. You want a glaze that’s thick enough to coat the back of a spoon but still pourable. Whisk it until it’s smooth and lump-free. If it seems too thick, add a tiny bit more milk. If it’s too thin, add a little more powdered sugar.
Once your cherry turnovers are out of the oven and have cooled slightly on the baking sheet, it’s time to drizzle them with the glaze. You can either spoon the glaze over the top or, for a more decorative look, place the glaze in a piping bag or a plastic bag with a corner snipped off and drizzle it artfully. For an extra touch, you can sprinkle a little additional powdered sugar over the glaze while it’s still wet. Serve these warm, and prepare for delighted smiles! They are truly a simple pleasure.
Conclusion:
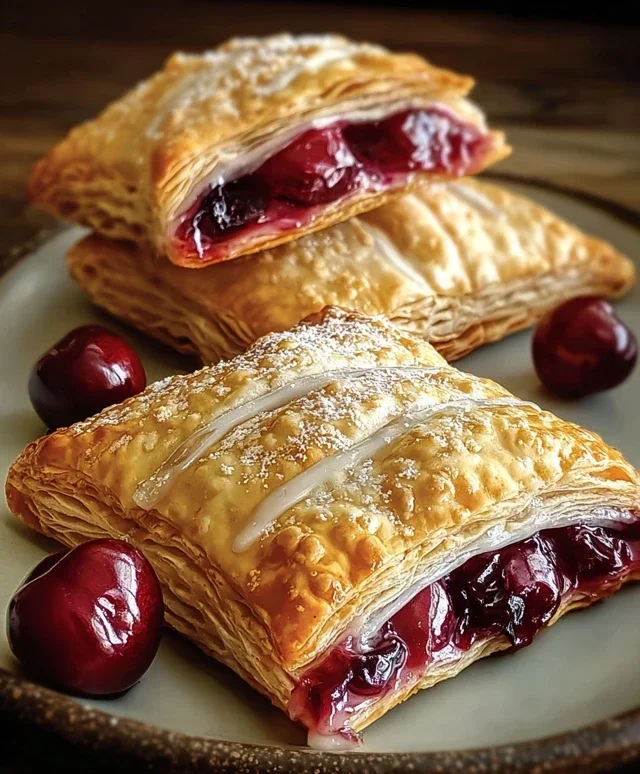
And there you have it – your guide to creating delightful, easy cherry turnovers! These flaky, fruit-filled pastries are incredibly rewarding to make, proving that gourmet-level desserts don’t have to be complicated. The simple combination of store-bought puff pastry and sweet-tart cherry filling makes them a fantastic option for bakers of all skill levels. Whether you’re craving a quick sweet treat for yourself or looking to impress guests with minimal fuss, these turnovers are sure to be a hit.
These versatile pastries are wonderful served warm, perhaps with a dusting of powdered sugar or a dollop of whipped cream. They also make a charming accompaniment to a scoop of vanilla ice cream for a truly decadent dessert. Feeling adventurous? Don’t hesitate to experiment with different fruit fillings like mixed berries, apples, or even a savory cheese and herb variation for a completely different experience. I truly encourage you to give this recipe a try; you might be surprised at how simple and satisfying it is to bake up these little pockets of pure joy!
Frequently Asked Questions:
Can I make the cherry filling from scratch?
Absolutely! While using pre-made cherry pie filling is a fantastic shortcut, you can certainly make your own. Combine fresh or frozen cherries with sugar, a touch of cornstarch or flour for thickening, and a squeeze of lemon juice. Cook until the cherries are softened and the filling has thickened.
How should I store leftover cherry turnovers?
Once cooled, store any leftover easy cherry turnovers in an airtight container at room temperature for up to two days, or in the refrigerator for up to four days. Reheat them gently in a low oven or toaster oven for the best texture.
Easy Cherry Turnovers
Simple and delicious cherry turnovers made with puff pastry.
Ingredients
-
1 package puff pastry (2 sheets), thawed
-
1 cup cherry pie filling (fresh or canned)
-
1 large egg
-
1 tablespoon milk
-
1 cup powdered sugar
-
1 teaspoon vanilla extract
-
2-3 tablespoons milk
-
Additional powdered sugar for dusting
Instructions
-
Step 1
Preheat oven to 400°F (200°C). Line a baking sheet with parchment paper. -
Step 2
Unfold the thawed puff pastry sheets and cut each into four equal squares. -
Step 3
Spoon about 2 tablespoons of cherry pie filling onto one half of each pastry square, leaving a small border. -
Step 4
Fold the other half of the pastry over the filling to create a triangle or rectangle. Crimp the edges with a fork to seal. -
Step 5
Whisk together the egg and 1 tablespoon of milk. Brush the tops of the turnovers with the egg wash. -
Step 6
Cut a few small slits in the top of each turnover to allow steam to escape. Place turnovers on the prepared baking sheet. -
Step 7
Bake for 18-20 minutes, or until golden brown and puffed. -
Step 8
While turnovers are baking, whisk together powdered sugar, vanilla extract, and 2-3 tablespoons of milk to create a glaze. Adjust milk for desired consistency. -
Step 9
Let turnovers cool slightly, then drizzle with the glaze and dust with additional powdered sugar.
Important Information
Nutrition Facts (Per Serving)
It is important to consider this information as approximate and not to use it as definitive health advice.
Allergy Information
Please check ingredients for potential allergens and consult a health professional if in doubt.